Wafer Cookies Recipe Better Than Store-Bought Every Time

Most people think making a Wafer Cookies Recipe at home is complicated. I believed that too until I baked my first batch. Once I learned why the dough needs to stay cold and why a simple sugar coating matters, I never went back to buying boxed wafer cookies.
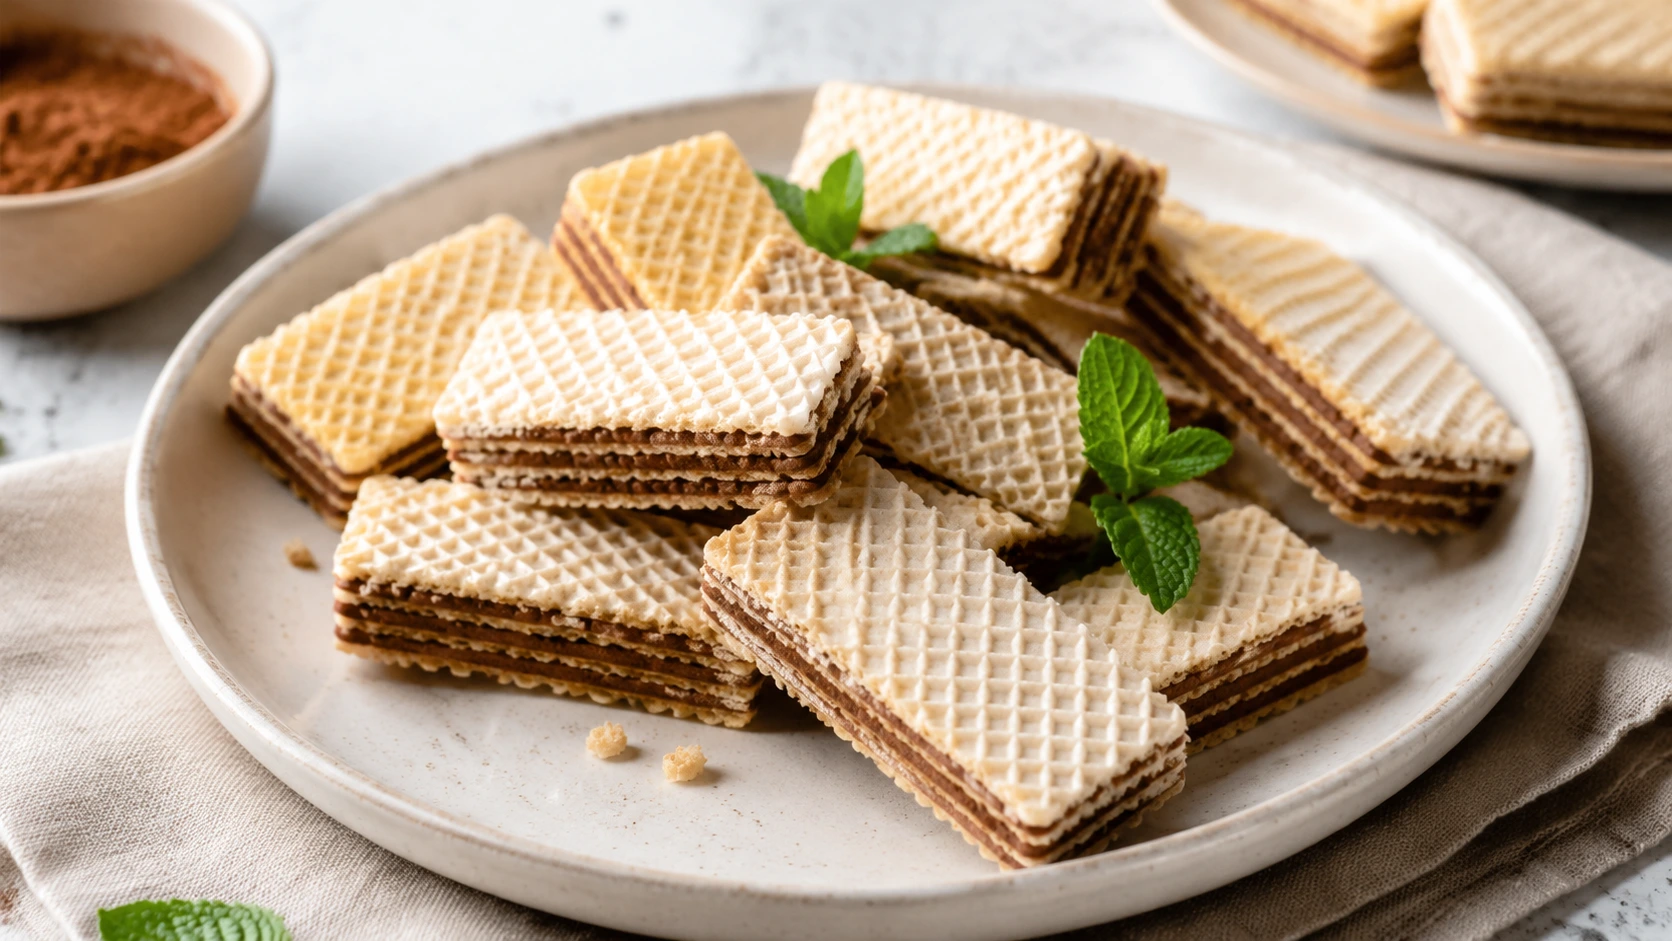
These cookies are light, flaky, and gently crisp with a rich buttery flavor. You can leave them plain or sandwich them with buttercream for classic Cream Wafer Cookies. They also work as homemade Vanilla Wafer Cookies, Chocolate Wafer Cookies, or colorful holiday treats. The ingredients are simple, the steps are easy to follow, and the results taste far better than most store-bought versions.
The best part is that I’ll explain not only what to do, but why each step matters. That makes this recipe easier to master, even if it’s your first time making wafer cookies from scratch.
What Is a Wafer Cookies Recipe?
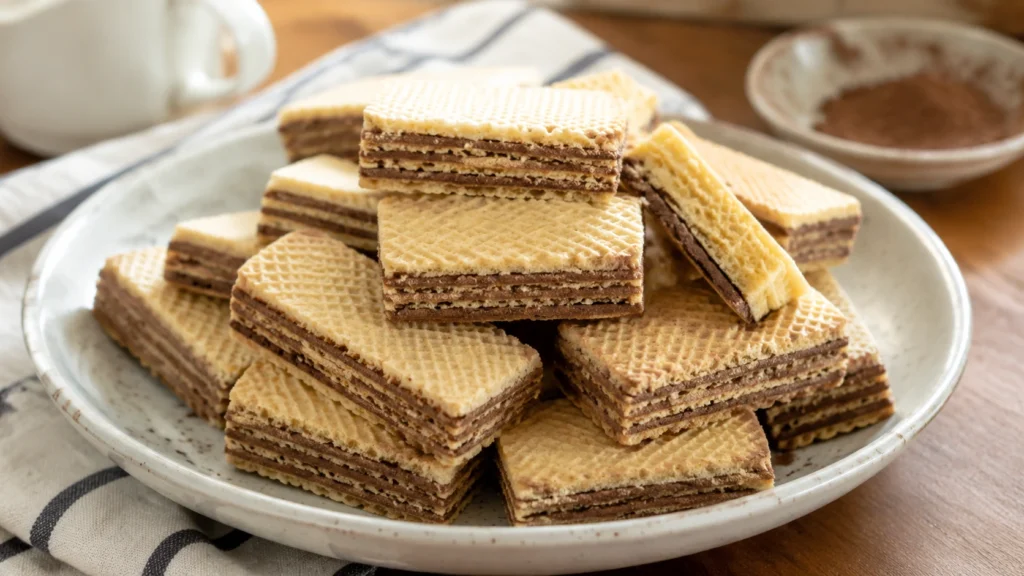
A wafer cookies recipe is a simple butter-based cookie made with flour, butter, and cream. The dough is rolled very thin, coated in sugar, and baked until lightly crisp. Most people serve these cookies plain or sandwiched with buttercream because they stay delicate, flaky, and buttery without becoming hard.
Unlike a regular sugar cookie, wafer cookies contain very little or no sugar in the dough itself. Most of the sweetness comes from the sugar coating or the filling. That gives them their signature light texture and crisp bite.
Many families know these cookies as Cream Wafer Cookies, while others call them Swedish Cream Wafer Cookies, Pariserwafiers, Pariserwafier Cookies, or even Paris Waffles. Although the names vary, the baking method is almost always the same. The dough is chilled, rolled to about 1/8 inch thick, cut into small rounds, coated in sugar, pricked with a fork, and baked just until set.
If you’ve only tried grocery store vanilla wafers, you’re in for a surprise. Homemade wafer cookies are much richer, flakier, and more buttery. They also stay tender inside while developing a delicate crisp edge that is hard to find in packaged cookies.
Why This Wafer Cookies Recipe Is Worth Making
This recipe keeps the traditional method but adds practical tips that many recipes skip. Instead of simply telling you what to do, you’ll learn why each step helps create lighter, flakier cookies.
The dough is easy to handle after chilling, uses everyday pantry ingredients, and can be made well ahead of holidays or family gatherings. Whether you’re baking Christmas cookies, preparing dessert trays, or making cookie sandwiches for birthdays, these cookies fit almost any occasion.
Here’s a quick overview before we begin.
| Detail | Info |
|---|---|
| Prep Time | 20 minutes |
| Chill Time | 30 minutes |
| Cook Time | 8 minutes |
| Total Time | About 58 minutes |
| Servings | 24 sandwich cookies (48 cookie rounds) |
| Difficulty | Easy |
| Cuisine | American with Scandinavian inspiration |
| Calories | About 150 per sandwich cookie |
| Estimated Cost | $5–7 per batch (about $0.20–0.30 per cookie) |
Homemade vs. Store-Bought Cost
One package of premium wafer cookies often costs $4–6, and you usually get fewer cookies than a homemade batch. For only a little more money, this recipe makes enough cookies for sharing while giving you fresher flavor and complete control over the filling, colors, and sweetness.
What Ingredients Make the Best Wafer Cookies?
One reason this recipe works so well is that every ingredient has a job. With only a handful of ingredients, even small changes can affect the final texture.
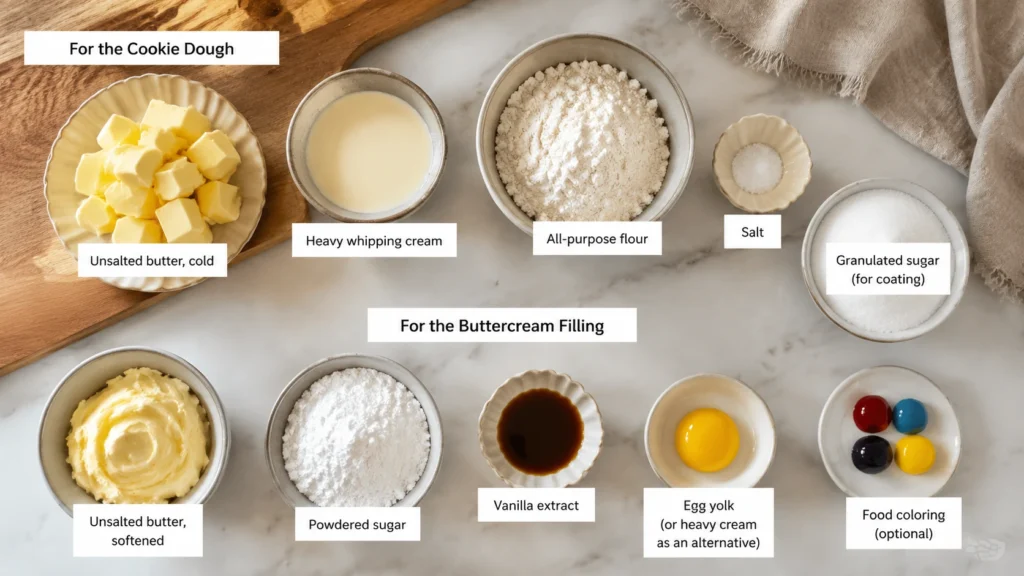
For the Cookie Dough
- Unsalted butter, cold
- Heavy whipping cream
- All-purpose flour
- Salt
- Granulated sugar (for coating)
For the Buttercream Filling
- Unsalted butter, softened
- Powdered sugar
- Vanilla extract
- Egg yolk (or heavy cream as an alternative)
- Food coloring (optional)
Why These Ingredients Matter
Cold butter is the secret to flaky layers. As it melts in the oven, it creates tiny pockets of steam that give wafer cookies their delicate texture. If the butter becomes too warm before baking, the cookies spread more and lose some of their crisp layers.
Heavy cream brings the dough together without using eggs. It adds richness while keeping the cookies tender. If you only have half-and-half, you can use it, but the cookies won’t be quite as flaky because it contains less fat.
Granulated sugar isn’t just for sweetness. Rolling each cookie in sugar creates the light crunch and sparkling finish that classic cream wafer cookies are known for. Skipping this step leaves the cookies noticeably less crisp.
All-purpose flour gives the dough enough strength to hold its shape after rolling very thin. A quality 1-to-1 gluten-free baking flour can work if needed, though the cookies may become a little more delicate.
Easy Substitutions That Actually Work
- Use salted butter if that’s what you have. Simply reduce the added salt by about half.
- Replace the raw egg yolk in the buttercream with 2 tablespoons of heavy cream for a smooth filling without using raw egg.
- For a dairy-free version, use a good-quality plant-based butter and unsweetened dairy-free whipping alternative. The cookies will still bake well, though they’ll be slightly less flaky.
Helpful Equipment Alternatives
You don’t need specialty baking tools to make beautiful wafer cookies.
- No round cookie cutter? Use a clean drinking glass, biscuit cutter, or even a wide bottle lid.
- No piping bag? Fill a zip-top bag and snip one small corner.
- No stand mixer? A simple electric hand mixer works perfectly.
How to Make Wafer Cookies Recipe Step by Step
Making these cookies is easier than it looks. The biggest secret is keeping the dough cool and rolling it thin. Once you understand that, the rest comes together quickly. Work with one piece of dough at a time and keep the second half in the refrigerator so the butter stays cold.
1. Mix the butter and cream
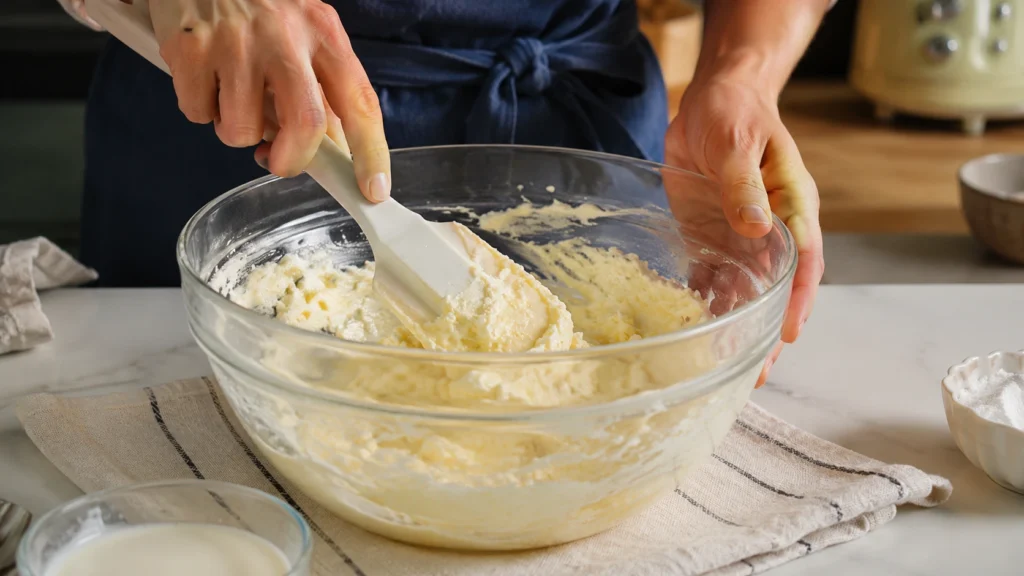
Beat the cold butter until it becomes smooth, then slowly mix in the heavy cream until combined.
The mixture may look slightly curdled at first. That’s completely normal. Stop mixing once it comes together so the butter doesn’t separate.
2. Add the dry ingredients
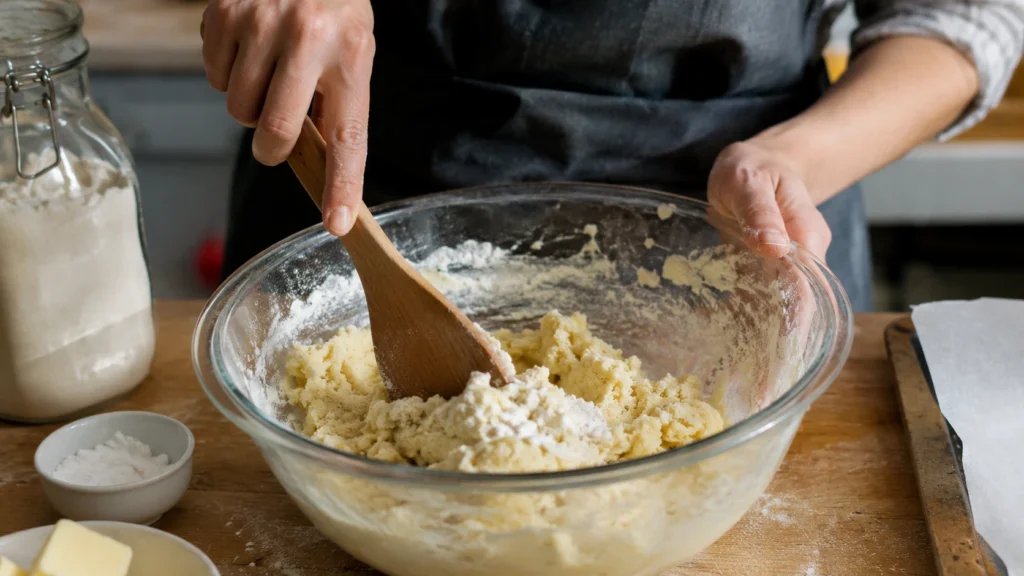
Mix the flour and salt into the butter mixture until a soft dough forms.
It will look crumbly for the first minute. Keep mixing gently and it will come together into a smooth ball. Avoid overmixing because too much gluten makes the cookies less tender.
3. Chill the dough
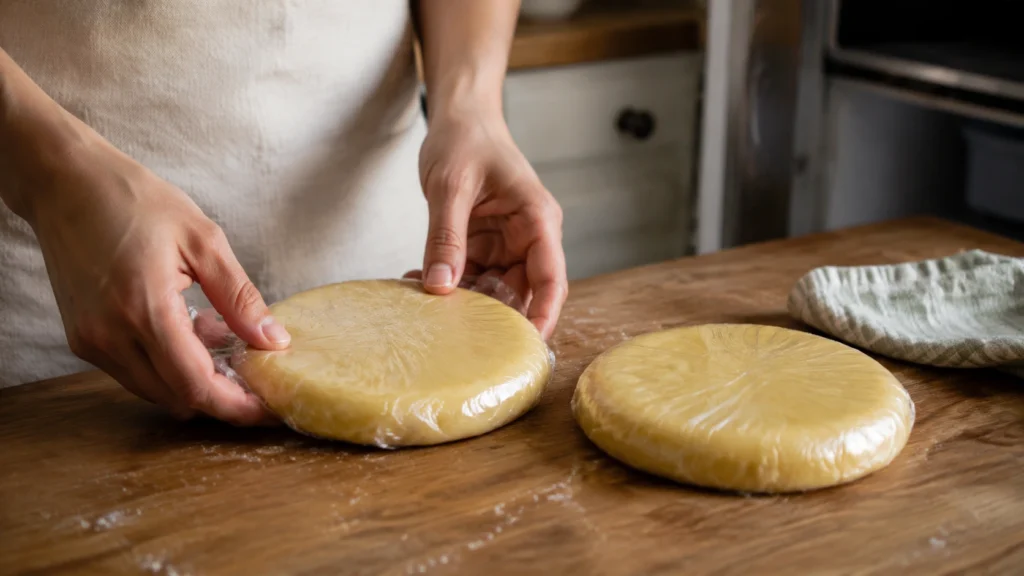
Divide the dough into two flat discs, wrap each one tightly, and refrigerate for at least 30 minutes.
Cold dough is much easier to roll and cut. It also helps the cookies keep their shape while baking instead of spreading.
4. Roll the dough very thin

Lightly flour your work surface and roll one dough disc to about 1/8 inch thick.
If the dough starts sticking, dust it with just a little more flour. You should almost be able to see light through the dough without tearing it.
5. Cut and coat

Cut small circles with a cookie cutter or glass. Dip both sides of each cookie into granulated sugar until fully coated.
This sugar coating does more than sweeten the cookies. As it melts in the oven, it creates the delicate crackled finish and light crunch that make homemade wafer cookies stand out.
6. Prick each cookie
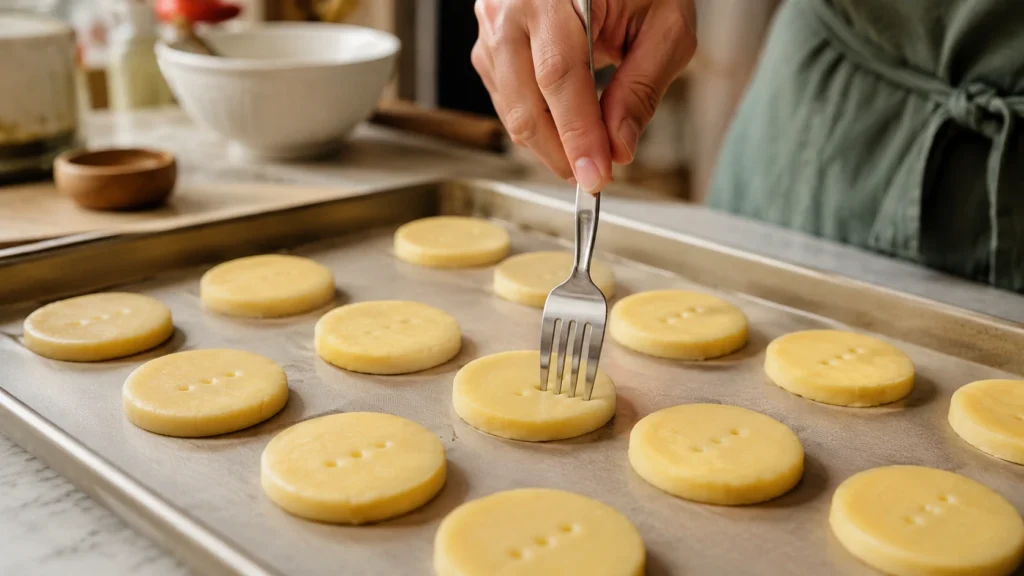
Place the cookies on an ungreased baking sheet and prick each one three times with a fork.
Don’t skip this step. The tiny holes let steam escape, which keeps the centers from puffing too much. That makes it easier to sandwich two cookies together later.
7. Bake until just set
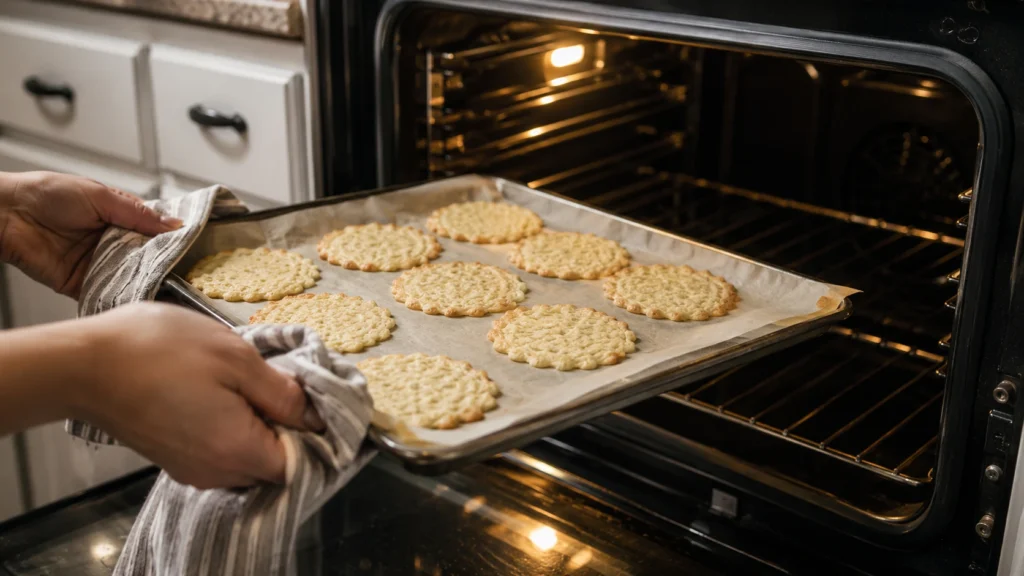
Bake in a 375°F (190°C) oven for 7–9 minutes.
The cookies should stay mostly pale with lightly golden edges. They will smell rich and buttery but should not turn deep brown. Overbaking is the fastest way to lose their tender texture.
8. Cool completely
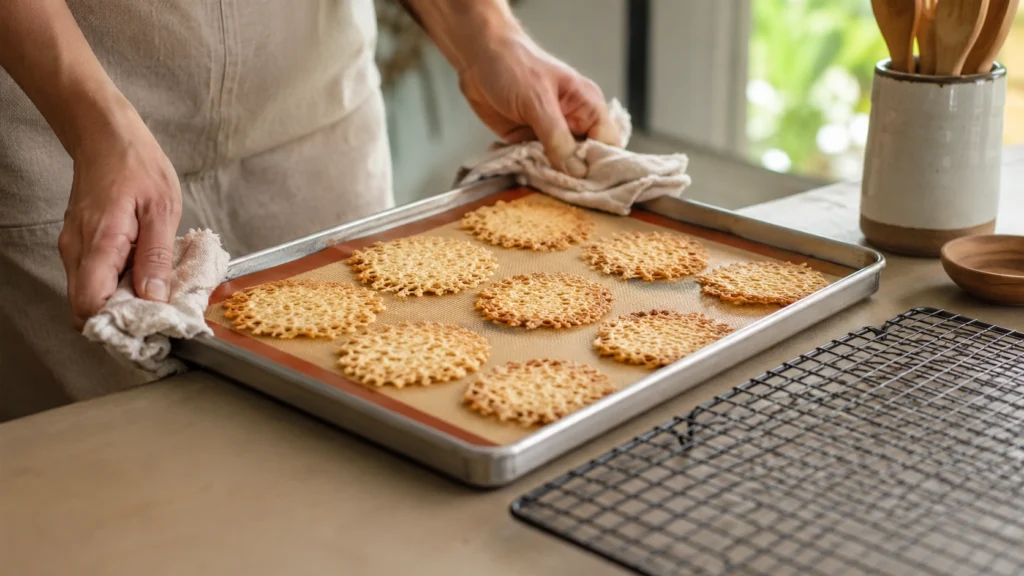
Leave the cookies on the baking sheet for two minutes before moving them to a wire rack.
They become crisp as they cool. If you try to move them too soon, they may break because they’re still very delicate.
9. Make the buttercream
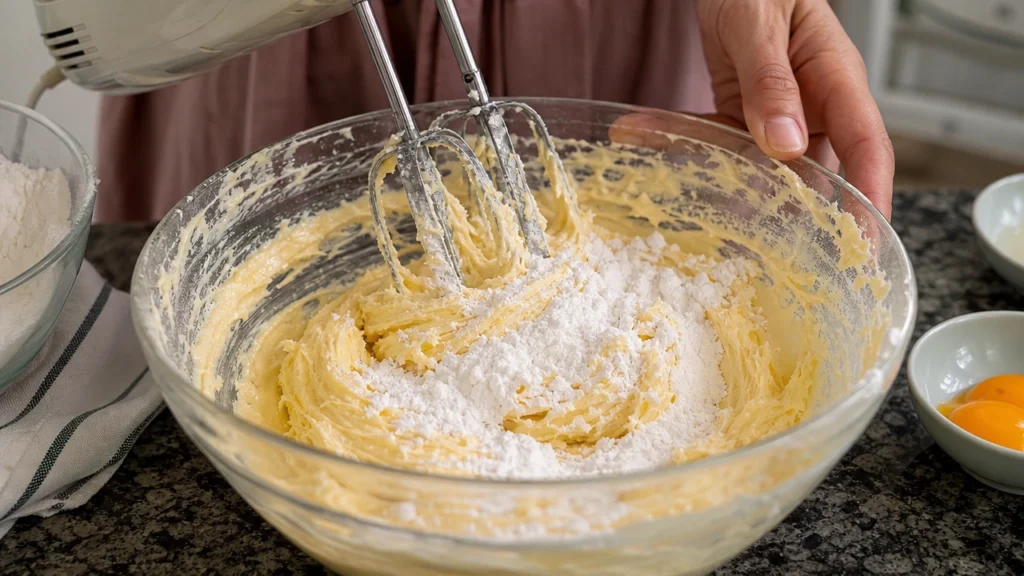
Beat the softened butter until fluffy. Mix in the vanilla and egg yolk, then slowly add powdered sugar until smooth.
If you prefer not to use raw egg, replace it with 2 tablespoons of heavy cream. The filling will still be rich and easy to pipe.
10. Fill the cookies
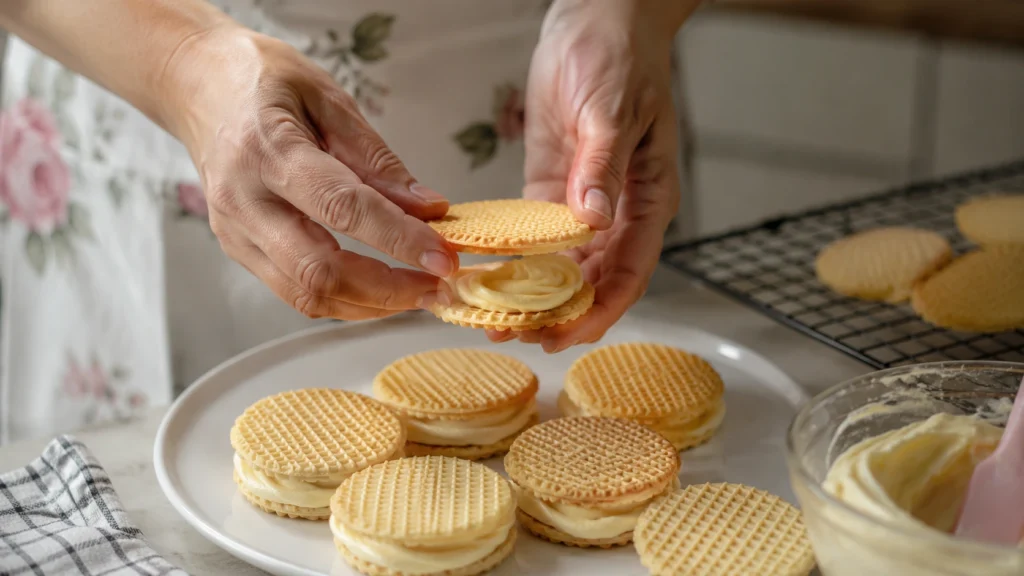
Pipe or spread a small amount of buttercream onto one cookie, then gently press another cookie on top.
The filling should reach close to the edges without spilling over. Let the sandwiches rest for about 15 minutes so everything sets before serving.
The Common Mistake That Ruins Wafer Cookies
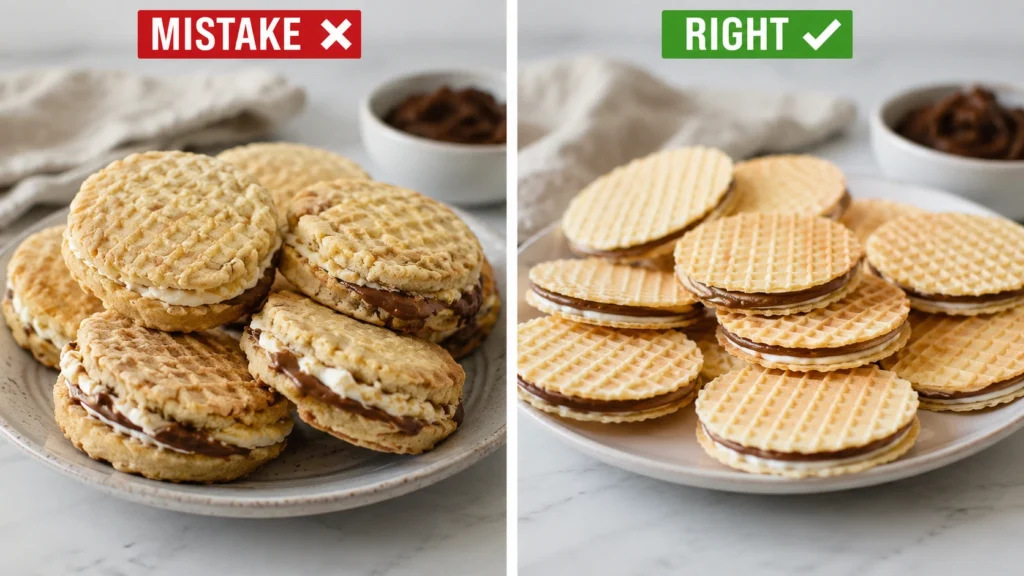
The biggest mistake is using warm dough.
When the butter softens too much, the cookies spread instead of puffing into flaky layers. The edges become uneven, and the finished cookies lose their light texture. If your kitchen is warm, return the dough to the refrigerator for 10 to 15 minutes before rolling again.
Another common mistake is rolling the dough too thick.
These cookies are supposed to be thin. Thick dough creates soft cookies that taste more like sugar cookies than classic wafer cookies. Aim for about 1/8 inch every time.
Many first-time bakers also leave the cookies in the oven until they’re brown.
That feels natural because most cookies brown as they bake. Wafer cookies are different. They should stay fairly pale with only lightly golden edges. They continue crisping as they cool, so pulling them out early gives the best texture.
Finally, don’t skip the fork holes.
Those tiny holes release steam while baking. Without them, the cookies puff unevenly, making it difficult to sandwich them neatly with frosting.
Quick Success Tips
- Keep the dough cold from start to finish.
- Roll every batch to 1/8 inch thickness.
- Prick every cookie before baking.
- Bake only until the edges turn lightly golden.
- Cool completely before adding the filling.
Pro Tip: The Small Step That Makes the Biggest Difference
After coating the cookies in sugar, let them sit on the baking sheet for 3 to 5 minutes before they go into the oven.
This short rest allows the sugar to cling better to the dough. As it bakes, the sugar caramelizes more evenly, creating the signature light crunch and delicate sparkle. It’s a tiny step that most recipes never explain, but it noticeably improves both texture and appearance.
Easy Variations You Can Try at Home
Once you’ve mastered the basic dough, it’s easy to change the flavor without changing the technique.
- Chocolate Wafer Cookies: Replace part of the flour with black cocoa powder and Dutch-process cocoa powder for a rich chocolate flavor.
- Vanilla Wafer Cookies: Add extra vanilla extract and leave the cookies plain or sandwich them with vanilla buttercream.
- Lemon Cream Wafers: Mix fresh lemon zest into the buttercream for a bright, fresh filling.
- Holiday Sandwich Cookies: Tint the buttercream with red or green food coloring for Christmas or pastel colors for Easter and Valentine’s Day.
- Chocolate-Dipped Wafers: Dip half of each finished cookie sandwich in melted chocolate and let it harden.
- Dairy-Free Version: Use plant-based butter and dairy-free whipping cream. The cookies stay crisp with a slightly different flavor.
Love baking from scratch? Explore our Dessert Recipes collection for more easy homemade cookies, bars, cakes, and sweet treats to enjoy after this Wafer Cookies Recipe.
What to Serve With Wafer Cookies for the Best Dessert Spread
These cookies are light enough to enjoy on their own, but they also fit into many desserts. Their crisp texture makes them perfect for pairing with creamy treats, fruit, or warm drinks.
Here are some of my favorite ways to serve them:
- Hot coffee or tea: The buttery cookies soften slightly with each bite, making them perfect for dipping.
- Vanilla ice cream: Sandwich a scoop between two cookies for a quick homemade ice cream sandwich.
- Fresh berries: Strawberries, raspberries, or blueberries add a fresh contrast to the rich buttercream.
- Hot chocolate: The cookies balance the rich chocolate while adding a delicate crunch.
- Holiday dessert trays: Mix them with shortbread, gingerbread, and chocolate cookies for a colorful cookie platter.
Looking for another homemade favorite? Our Fire Honey Recipe adds a sweet kick to everything from toast to desserts. Try a light drizzle over cream-filled wafer cookies for a fun twist that’s surprisingly delicious.
My Honest Experience Making This Wafer Cookies Recipe
The first time I made these cookies, I rolled the dough much too thick because I was worried it would tear. The cookies still tasted good, but they were soft instead of flaky and didn’t sandwich together very well.
The next batch, I rolled the dough to about 1/8 inch and kept it cold the whole time. The difference was huge. They baked into delicate layers with crisp edges and stayed tender in the center.
One surprise was how much the sugar coating changed the finished cookies. I almost skipped that step, thinking it was only for sweetness. It actually creates the light crunch and sparkling finish that make these cookies look and taste special.
How to Store, Freeze, and Reheat Wafer Cookies the Right Way
These cookies keep their texture well when stored correctly. Moisture is the biggest enemy, so always use an airtight container once they have cooled completely.
| Storage Method | How Long |
|---|---|
| Room temperature | Up to 5 days in an airtight container |
| Refrigerator | Up to 1 week if filled with buttercream |
| Freezer (baked cookies) | Up to 3 months |
| Freezer (unbaked dough) | Up to 3 months, tightly wrapped |
| Buttercream | Freeze for 2 months in an airtight container |
Freezing Tips
Freeze the plain baked cookies in a single layer until firm, then transfer them to a freezer bag. This keeps them from sticking together.
If freezing cookie sandwiches, place parchment paper between the layers before storing.
Make-Ahead Option
The dough can be made one day ahead and kept in the refrigerator overnight. You can also cut out the cookies and freeze them before baking. Add one or two extra minutes to the baking time when baking directly from frozen.
Reheating Tip
These cookies don’t need reheating. If frozen, let them sit at room temperature for about 20 to 30 minutes until the buttercream softens and the cookies return to their delicate texture.
What People Really Ask About Wafer Cookies Recipe
Wafer Cookies Recipe
Ingredients
Equipment
Method
- Beat the cold butter until smooth, then slowly mix in the heavy cream until combined. The mixture may look slightly curdled before it comes together.
- Add the flour and salt, mixing just until a soft dough forms. Avoid overmixing to keep the cookies tender.
- Divide the dough into two discs, wrap well, and chill for at least 30 minutes until firm but still easy to roll.
- Roll one dough disc to about ⅛ inch thick on a lightly floured surface. Cut into small rounds and coat both sides with granulated sugar.
- Place the cookies on a baking sheet and prick each one three times with a fork. This helps prevent uneven puffing while baking.
- Bake at 375°F (190°C) for 7–9 minutes, until the edges are lightly golden but the tops remain mostly pale.
- Let the cookies cool on the baking sheet for 2 minutes, then transfer them to a wire rack until completely cool and crisp.
- Beat the softened butter with the vanilla and heavy cream, then gradually add the powdered sugar until smooth and fluffy.
- Spread or pipe a small amount of buttercream onto one cookie and gently top with another cookie. Let the filling set for about 15 minutes before serving.
Notes
- Keep the dough cold while working to create flaky layers and prevent spreading.
- Bake only until the edges turn lightly golden; overbaking makes the cookies too crisp.
- Store filled cookies in an airtight container for up to 1 week in the refrigerator or freeze for up to 3 months.
Final Thoughts on This Wafer Cookies Recipe

This Wafer Cookies Recipe proves that a handful of simple ingredients can create something truly memorable. The buttery, flaky texture and delicate crunch make these cookies feel special, whether you enjoy them plain or filled with a smooth buttercream. Once you understand why the dough stays cold, why it’s rolled so thin, and why each cookie gets a light coating of sugar, the recipe becomes surprisingly easy to repeat.
I still make these whenever I want a homemade cookie that looks beautiful without a lot of complicated work. They’re perfect for holiday cookie trays, afternoon coffee, or simply keeping a batch on hand for a sweet treat. If you make this recipe, I’d love to hear how it turned out for you. Drop a comment below and share your favorite filling or flavor variation.
If you enjoy homemade treats like these, our Blackberry Jelly Recipe is another great recipe to try. Spread it between two wafer cookies for a simple fruity filling or serve it alongside your cookie platter for an extra homemade touch.