
Blackberry Jelly Recipe 5 Mistakes That Ruin Easy Jelly
I used to buy jelly from the store every week without thinking much about it. Then I made my first blackberry jelly recipe at home, and everything changed. It was richer, fruitier, and honestly much simpler than I expected.
Now I make it every summer when blackberry bushes are full and dark purple berries are ready to pick. The kitchen smells sweet, and the jars last us for months. It feels like bottling up wild blackberry flavor for later.
This version keeps things simple, whether you use fresh or frozen berries. You’ll also learn what actually matters in the process so your jelly sets right the first time.
What Is Blackberry Jelly Recipe and Why It Tastes So Fresh and Simple
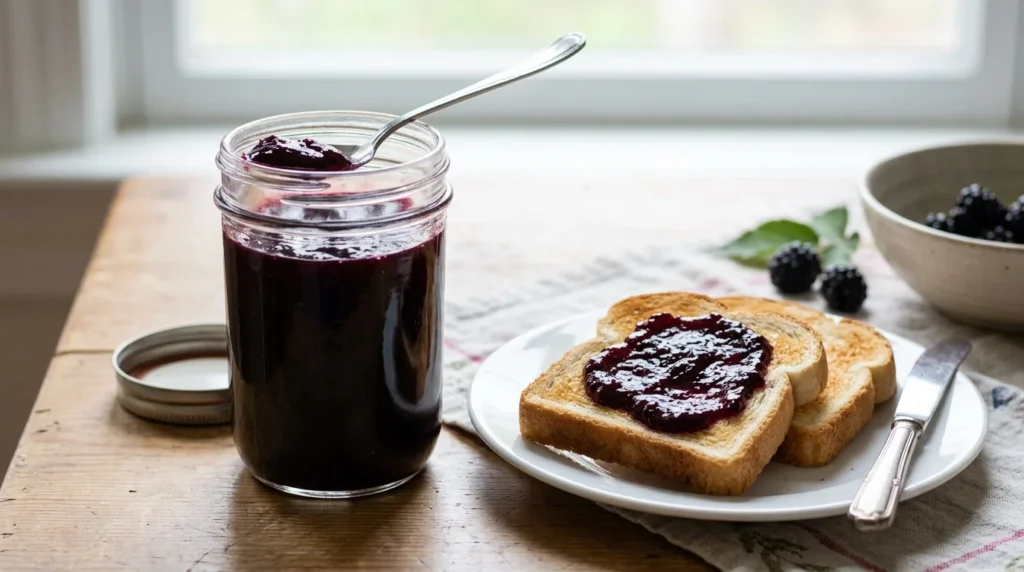
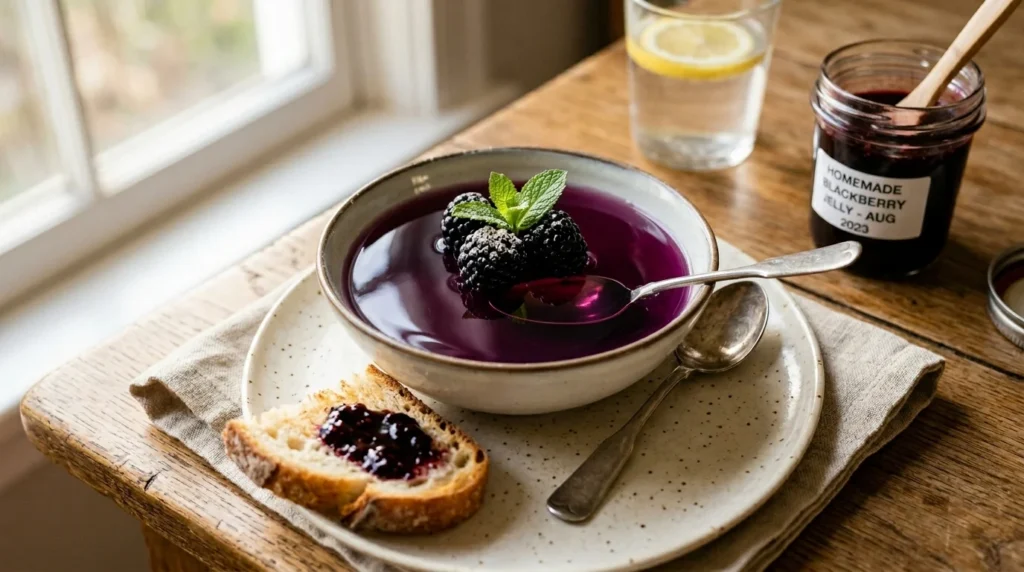
Blackberry jelly is a smooth fruit spread made from blackberry juice, sugar, and pectin or natural fruit gel. It is sweet, slightly tangy, and has a clean fruit taste without seeds or pulp. It usually takes about 1 to 2 hours including prep and setting steps. Most people enjoy it on biscuits or toast because of its smooth texture and bright berry flavor.
A blackberry jelly recipe is a method for turning blackberry juice into a clear, spreadable jelly using heat and sugar. It removes seeds and pulp, leaving only smooth fruit flavor. It is cooked, then jarred for long-term storage. People love it because it captures fresh blackberry taste in a shelf-stable form.
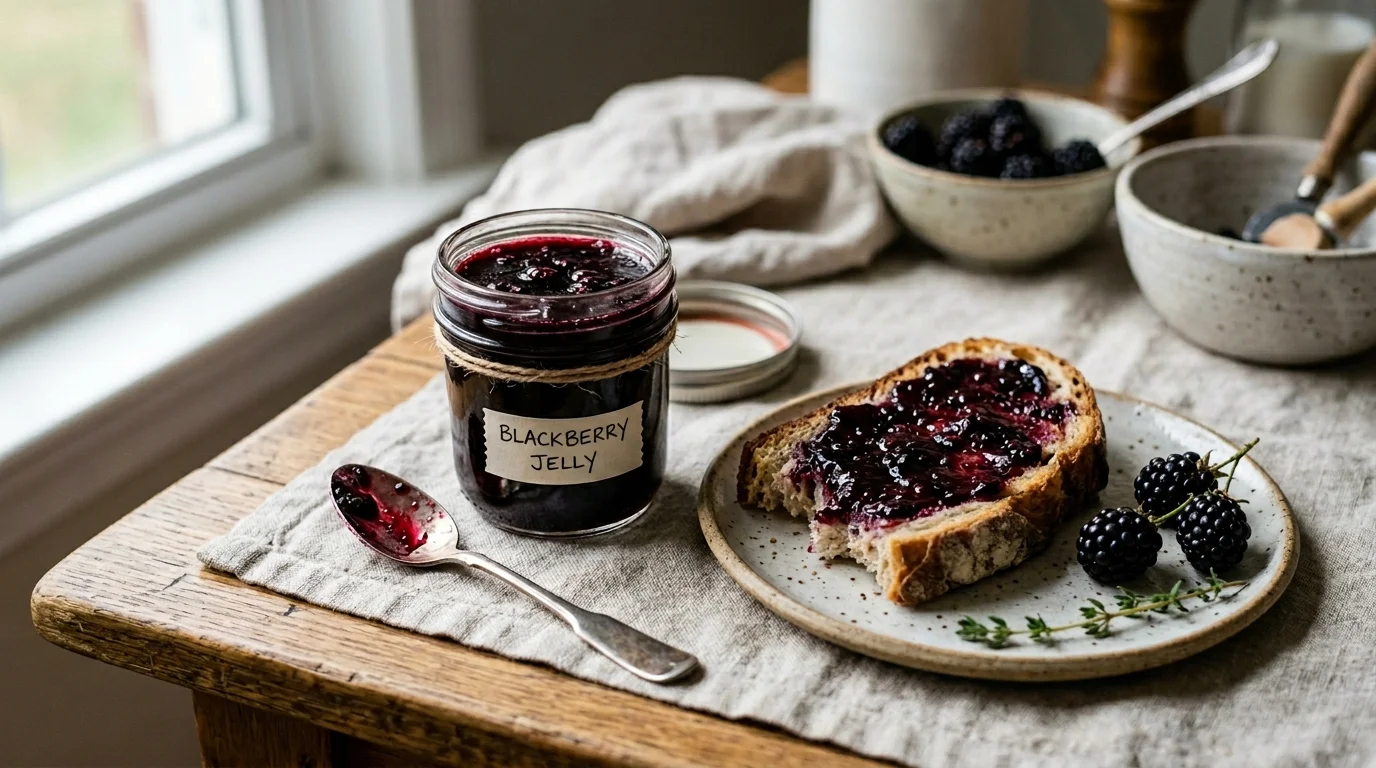
Fresh blackberry jelly tastes lighter and more floral compared to store-bought brands like Smuckers. The texture is smooth and spreadable. You get a clean berry flavor instead of heavy sweetness. It works well for breakfast, snacks, or baking.
Blackberries are naturally rich in flavor, especially when picked at mid to late July when berries turn deep purple. That is when they are ripe and ready.
Recipe Overview What to Expect Before You Start Making Blackberry Jelly Recipe
This jelly is sweet, smooth, and slightly tangy. It works best during blackberry season when fruit is fresh and juicy. You can also use frozen berries if needed, which makes this recipe year-round friendly.
It is great for beginners because the steps are simple, but timing matters. Once you reach a rolling boil, things move fast.
| Detail | Info |
| Prep Time | 25 minutes |
| Cook Time | 20 minutes |
| Total Time | 60 minutes (including setting prep) |
| Servings | 6 half pint jars |
| Difficulty | Easy |
| Cuisine | American Homestead |
| Calories | ~65 per 2 tbsp |
| Cost | ~$8–$12 (less if using wild berries) |
A batch usually yields about 6 half pint mason jars. If you already have canning supplies, the cost per jar drops quite a bit.
Ingredients and What Each One Does in Blackberry Jelly Recipe
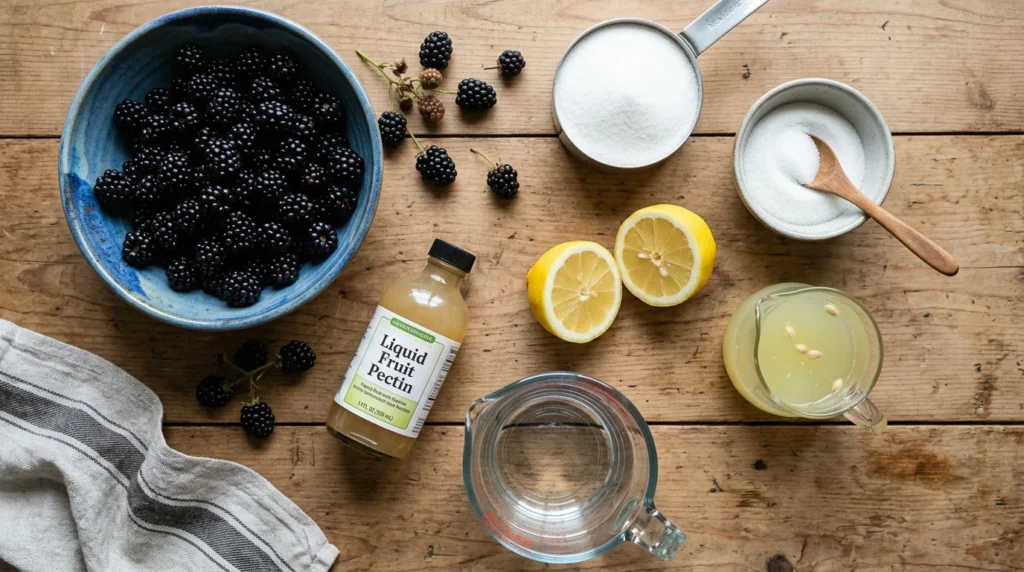
This recipe keeps the ingredient list short and simple. Each one has a clear job in helping the jelly set and taste right.
You will need fresh wild blackberries 2 1/2 quarts or frozen berries, sugar, lemon juice, water, and sometimes pectin depending on the method.
Blackberries are the base. They give the jelly its color and wild blackberry flavor. Fresh berries give stronger aroma, but frozen berries work well too once thawed.
Sugar balances tartness and helps preserve the jelly. It also helps the gel form. White sugar or organic cane sugar both work.
Lemon juice raises acidity. This is important for setting the jelly properly. Without it, your jelly may stay runny.
Pectin or Sure-Jell helps the jelly firm up faster. Some old fashioned recipes skip it, but it makes the process more reliable.
Simple swaps:
- Honey can replace sugar, but the jelly will be softer.
- Frozen berries can replace fresh with no major changes.
- A tight knit strainer or cheesecloth both work for juice extraction.
How to Make Blackberry Jelly Recipe Step by Step Without Stress
The process is simple, but you need to stay focused once boiling starts. The goal is to extract juice, cook it with sugar, and hit the right gel point.
The kitchen will smell like warm berries as the juice cooks down. You will also notice the color deepening into a rich purple-red.
Step 1 Prepare and wash berries
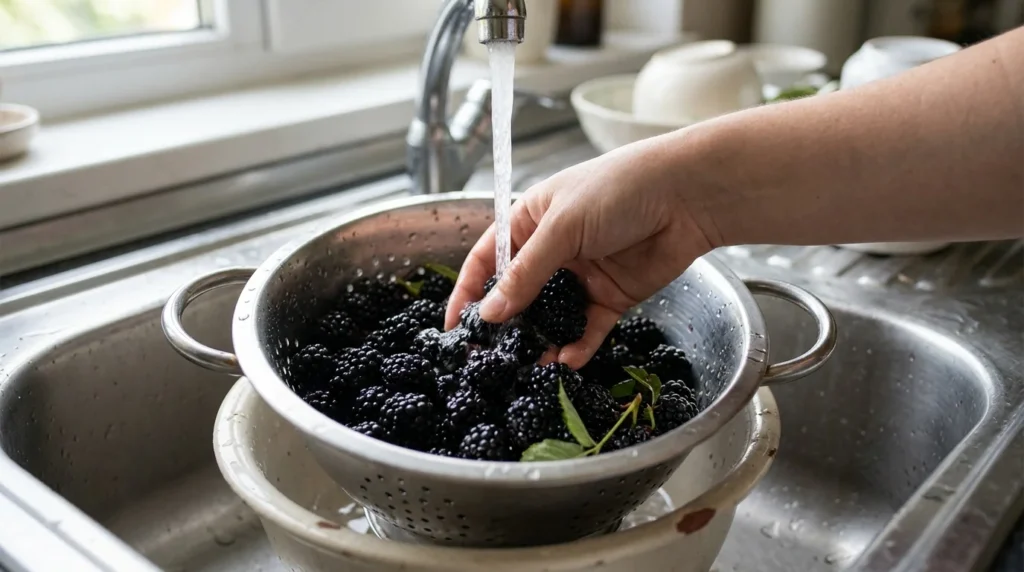
Wash blackberries gently under cool water. Remove leaves or small stems. This helps avoid bitterness later.
Step 2 Cook berries until soft

Add berries to a large pot with a small amount of water. Cook on medium heat for 15 minutes until berries break down and release juice. The smell becomes very strong and fruity.
Step 3 Strain the juice
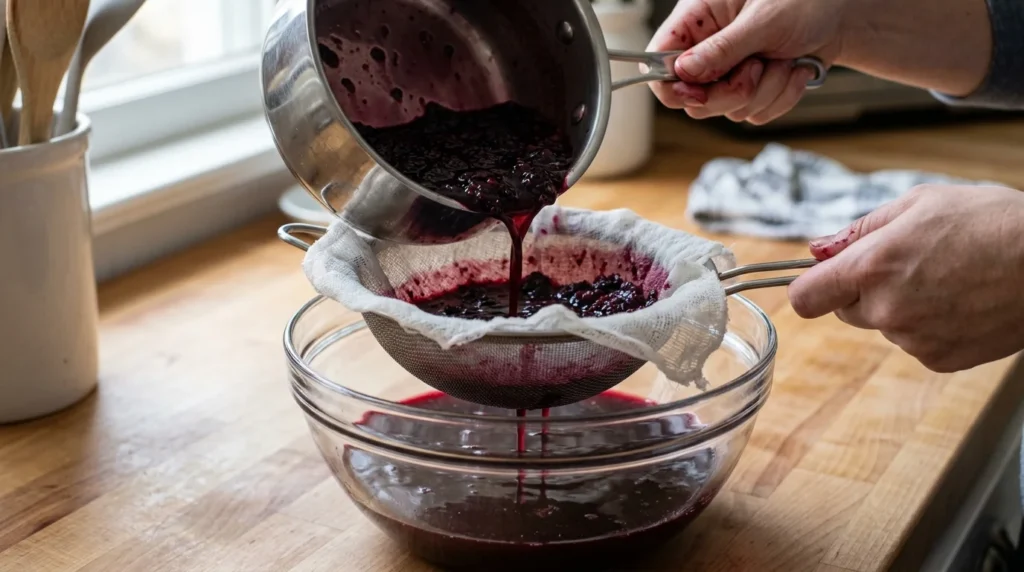
Pour mixture through a tight knit strainer or cheesecloth. Let it drip slowly. You should get about 3 3/4 cups blackberry juice. Do not press too hard or the juice may turn cloudy.
Step 4 Start boiling the jelly base
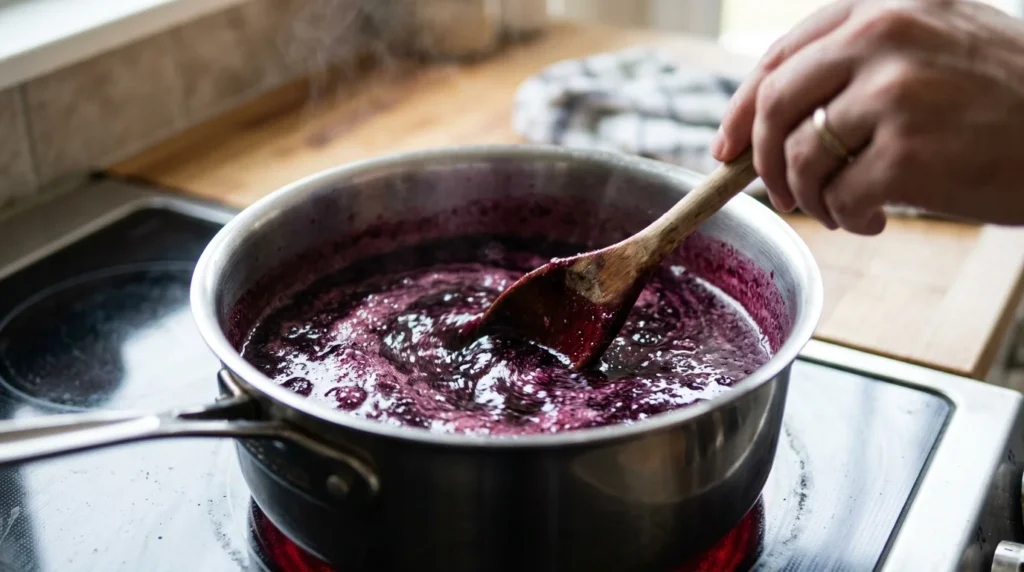
Pour juice into a clean pot. Add sugar and lemon juice. Stir continuously until sugar dissolves. The mixture will look glossy and deep purple.
Step 5 Reach a rolling boil
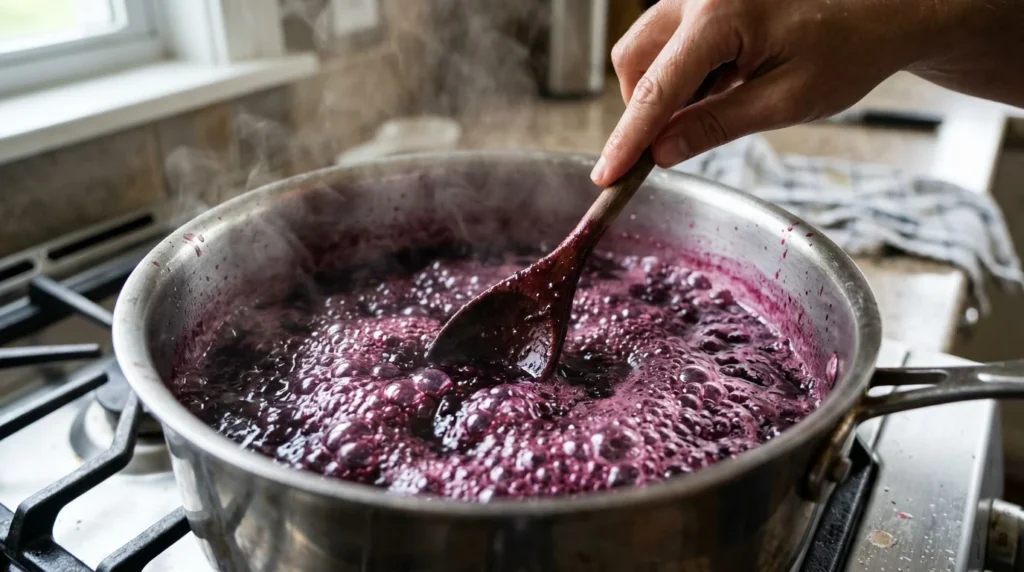
Bring mixture to a rolling boil. This means bubbles that do not stop when stirred. Boil for about 1 minute while stirring.
Step 6 Jar the jelly
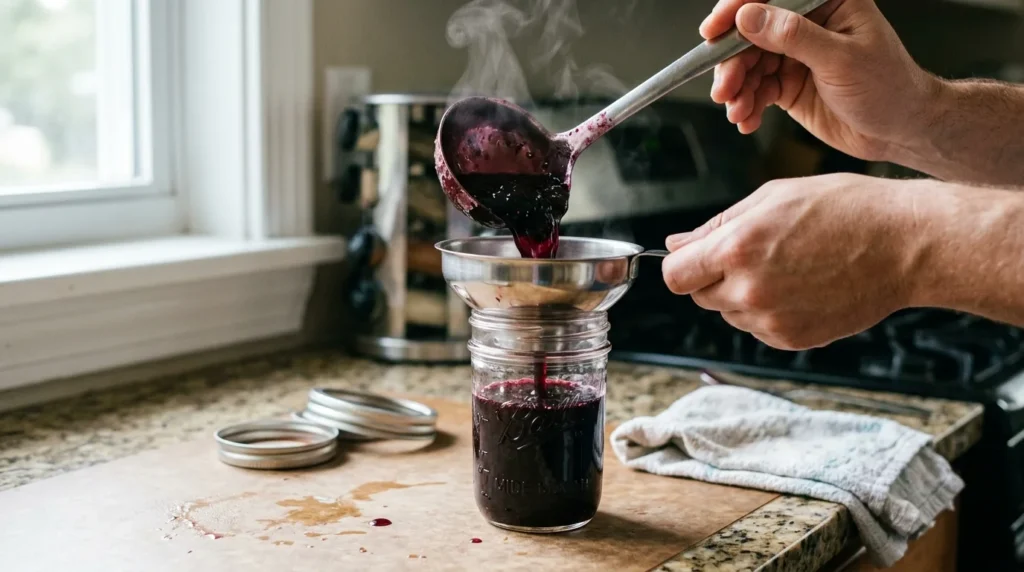
Remove from heat. Use a ladle and funnel to pour into clean empty jars. Leave a small space at the top. Wipe rims, add lids and rings.
Step 7 Let it set
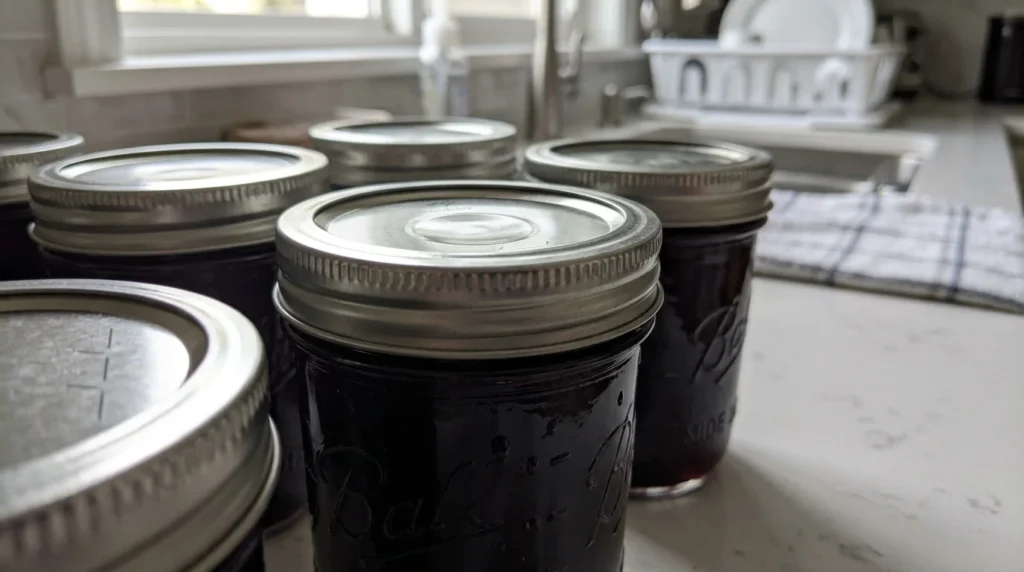
Let jars sit undisturbed for 24 hours. You will hear a “pop” as lids seal. The top should turn slightly concave when set correctly.
The One Mistake That Ruins Blackberry Jelly Recipe and How to Avoid It
The biggest mistake is not reaching the correct temperature or boil stage. Many people stop too early because the mixture looks ready.
If you undercook it, the jelly stays runny. If you overcook it, the pectin breaks down and it never sets right.
Another issue is adding too much water during juice extraction. This weakens flavor and prevents proper gel formation.
Here is what to watch for:
- Do not rush the boiling stage
- Do not skip lemon juice
- Do not guess the setting point
Quick tips:
- Use a thermometer if possible (around 220°F)
- Do a spoon or plate wrinkle test
- Let jars sit full 24 hours before checking
Pro Tip That Improves Blackberry Jelly Recipe Texture Every Time
The small step that makes a big difference is letting the juice strain slowly without pressure.
When you squeeze berries too hard, extra pulp and seeds pass through. This can make jelly cloudy and slightly gritty.
Slow straining gives you a clearer blackberry juice, which leads to a smoother jelly with better shine. It also improves shelf stability because the liquid is cleaner.
It feels like a small detail, but it changes both look and texture in a noticeable way.
Easy Variations You Can Try With Blackberry Jelly Recipe at Home
You can adjust this recipe without breaking it if you stay close to the base ratio.
- Apple and blackberry jelly adds natural pectin and a slightly tart finish
- Blackberry and grape jelly gives a deeper, richer fruit flavor
- Low sugar version uses reduced sugar but needs special pectin
- Frozen blackberry jelly works year-round with the same method
- Blackberry and apple mix helps jelly set faster and taste brighter
Each variation still follows the same cooking steps.
What to Serve With Blackberry Jelly Recipe for Best Flavor Pairings
This jelly is more than just toast spread. It works in both sweet and savory ways.
- Warm homemade biscuits for a classic breakfast pairing
- Fresh bread with butter for a simple snack
- Sharp cheddar cheese for a sweet and salty combo
- Peanut butter sandwiches for a nostalgic twist
- Pancakes or waffles instead of syrup for extra fruit flavor
If you enjoy fruit spreads, you might also like a simple homemade jam recipe from fresh berries for comparison.
My Honest Experience Making This Blackberry Jelly Recipe at Home
The first time I made this, I rushed the boiling step. The jelly never set and stayed syrupy. I thought I had failed completely.
The next batch, I paid attention to temperature and used a thermometer. The difference was huge. It set perfectly and had a clear shine.
What surprised me most was how much better homemade jelly tastes compared to store-bought. It felt lighter and more natural.
How to Store Freeze and Keep Blackberry Jelly Recipe Fresh Longer
Store sealed jars in a cool dark place once cooled. Do not move them for 24 hours while sealing.
- Room temp: up to 24 hours during setting
- Fridge: 3 weeks after opening
- Freezer: up to 6 months in freezer-safe containers
Once opened, always use a clean spoon. This prevents spoilage and keeps flavor fresh longer.
Frequently Asked Questions About Blackberry Jelly Recipe
Blackberry Jelly Recipe
Ingredients
Equipment
Method
- Wash blackberries gently under cool water and remove any leaves or stems. The berries should look clean and dark purple before cooking.
- Add berries to a large pot with a small amount of water and cook over medium heat for about 15 minutes until soft and juicy. The mixture will become fragrant and syrupy.
- Strain cooked berries through a fine mesh strainer or cheesecloth to collect about 3 3/4 cups of smooth blackberry juice. Do not press too hard or the juice may turn cloudy.
- Pour juice into a clean pot and add sugar, butter, and lemon juice. Stir over medium heat until sugar fully dissolves and mixture looks glossy.
- Bring mixture to a rolling boil and cook for 1 minute while stirring constantly. The jelly will deepen in color and slightly thicken.
- Remove from heat and carefully ladle hot jelly into sterilized mason jars using a funnel. Leave a small headspace at the top.
- Wipe jar rims clean, seal with lids and rings, then let sit undisturbed for 24 hours until jars “pop” and fully set. The lid should be slightly concave when sealed.
Notes
Final Thoughts on Blackberry Jelly Recipe and Why It Is Worth Making
This blackberry jelly recipe is simple, but it rewards patience. Once you understand the boiling stage and juice extraction, it becomes very easy to repeat.
It is one of those kitchen projects that feels old fashioned in the best way. You turn fresh berries into jars you can enjoy all year. If you make this, I would love to know how it turned out. Drop a comment below and share your batch results.