Best Aeropress Recipe That Makes Great Coffee Every Time

Most people think making better AeroPress coffee means buying an expensive grinder or copying a championship recipe down to the second. I believed that too. Then I realized the biggest difference came from getting the basics right before chasing tiny details.
After making hundreds of cups at home, I’ve learned that the best AeroPress recipe isn’t always the most complicated one. It should be easy to repeat, forgiving if your grinder isn’t perfect, and flexible enough for light, medium, or dark roast beans. That’s exactly what you’ll find here.
I’ll also show you why each step matters, how to fix common brewing problems, and when it actually makes sense to change the recipe. By the end, you’ll have a reliable everyday brew that tastes clean, balanced, and rich without needing competition-level skills.
What Is the Best AeroPress Recipe?
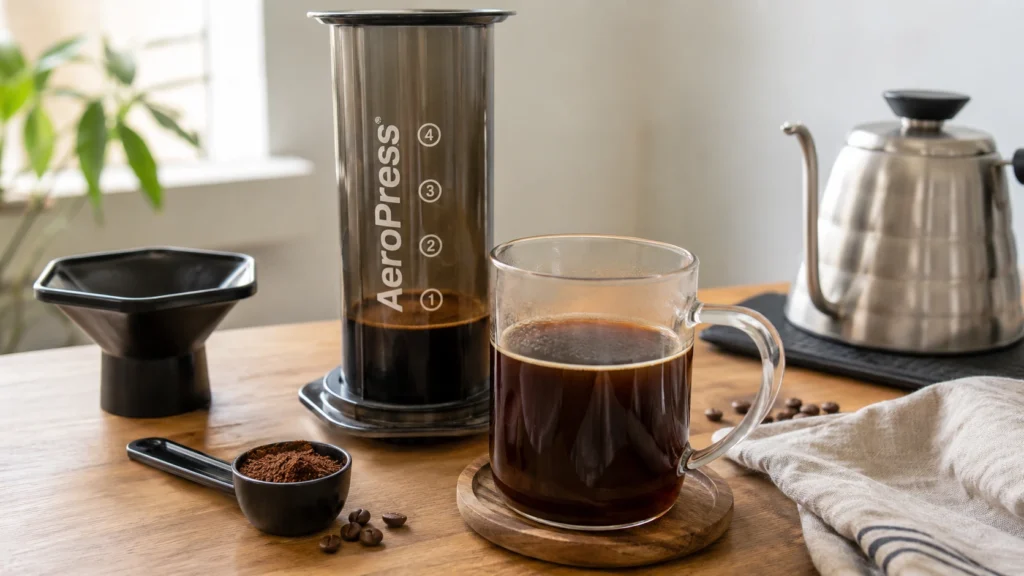
The best AeroPress recipe is a simple coffee brewing method that uses freshly ground coffee, hot water, and an AeroPress brewer to make a smooth, balanced cup in about three minutes. Most people enjoy it because it is fast, easy to clean, highly portable, and simple to adjust for different coffee beans and roast levels.
The AeroPress was invented to make great coffee without the size, cost, or learning curve of an espresso machine. It combines immersion brewing with gentle pressure, giving you a cup that has more body than pour over coffee but less bitterness than many French press brews.
One reason coffee lovers keep coming back to the AeroPress is how flexible it is. Some people prefer the Standard Method, while others like the AeroPress inverted method for longer steep times. World AeroPress Championship winners have even used completely different recipes to reach the top, proving there isn’t only one correct way to brew.
For everyday coffee, though, you don’t need a championship-winning routine. A balanced recipe with the right grind size, water temperature, and brew time delivers excellent results every morning.
Why This Is the Best AeroPress Recipe for Most People
Many famous recipes are excellent. James Hoffmann’s Ultimate AeroPress Recipe, Tim Wendelboe’s classic method, and several World AeroPress Championship recipes have all inspired coffee fans around the world.
The problem is that some of those recipes assume you own expensive equipment, perfectly fresh beans, and a high-end burr grinder. That’s not how most people brew coffee at home.
This version keeps the parts that matter most while staying easy to follow.
It works because:
- It creates a balanced extraction without becoming bitter.
- The coffee stays full of flavor while remaining clean and smooth.
- It works with most medium-quality burr grinders.
- You can easily adjust it for light, medium, or dark roast coffee.
- It takes only a few minutes from start to finish.
Instead of chasing tiny differences between championship recipes, you’ll learn a dependable method you can repeat every day.
Recipe Overview
I use this recipe almost every morning because it’s quick, consistent, and easy to adjust. The finished coffee has a clean aroma, gentle sweetness, medium body, and very little bitterness. It works equally well as black coffee or as the base for an Americano or milk drink.
If you’re buying your first AeroPress or simply want one recipe that rarely disappoints, this is where I’d start.
| Detail | Info |
|---|---|
| Prep Time | 2 minutes |
| Brew Time | 3 minutes |
| Total Time | 5 minutes |
| Servings | 1 large cup |
| Difficulty | Easy |
| Cuisine | Coffee Beverage |
| Calories | ~5 calories |
| Estimated Cost | About $0.70–$1.40 per cup, depending on your coffee beans |
Why the Cost Matters
One thing many coffee guides skip is cost.
A homemade AeroPress coffee usually costs much less than buying one from a café. Even when using premium specialty coffee, a homemade cup is often only a fraction of the price. The brewer also uses inexpensive paper filters, and each brew only takes a few minutes, making it a budget-friendly choice for daily coffee.
Ingredients and What Each One Does
One thing I like about the AeroPress is how little you actually need. Great coffee comes from paying attention to a few important ingredients instead of buying lots of extra equipment.
Ingredients
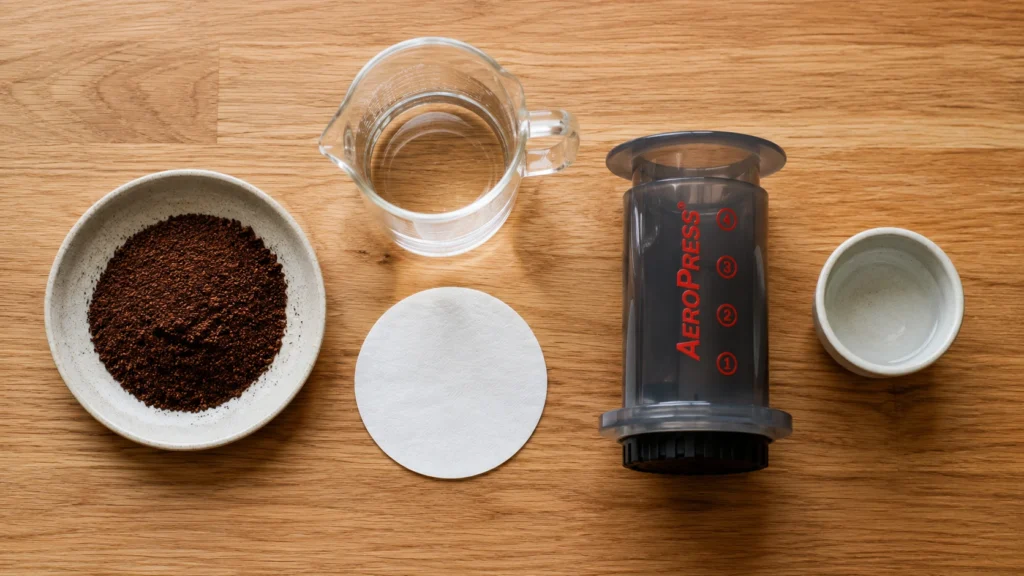
- 14 grams freshly ground coffee
- 200 grams hot water (about 92–96°C depending on the roast)
- 1 AeroPress paper filter
- Optional: filtered water for cleaner flavor
Why Each Ingredient Matters
Fresh coffee beans
Freshly roasted coffee makes the biggest difference. Beans that were roasted within the last few weeks usually produce sweeter flavors and better aroma. Old or stale beans often taste flat no matter how carefully you brew them.
Water
Coffee is mostly water, so its quality matters more than many people realize. If your tap water has a strong chlorine taste, use filtered water instead. Avoid distilled water because it can make the coffee taste dull.
Paper filter
The standard AeroPress paper filter removes most of the coffee oils and fine particles. That gives the cup a cleaner taste and brighter flavor.
If you prefer a fuller body, you can swap to a reusable metal filter. The coffee will contain more natural oils and a little more sediment, similar to a French press.
Coffee grind
A medium-fine grind works best for this recipe. Think slightly finer than drip coffee but not as fine as espresso.
If you’re using supermarket pre-ground coffee, don’t worry. You can still make a very good cup. Let it steep about 20–30 seconds longer to help make up for the less consistent grind.
Equipment You’ll Need
You don’t need expensive coffee gear to make great AeroPress coffee.
- AeroPress brewer
- Kettle
- Digital scale (helpful but optional)
- Burr grinder if using whole beans
- Spoon or stirrer
- Timer
- Mug or server
Easy Ingredient Swaps
- No digital scale? Use one level AeroPress scoop of coffee and fill the brewing chamber to the recommended water mark. It won’t be as precise, but it still works well.
- No burr grinder? Buy freshly ground coffee from a local coffee shop and ask for an AeroPress or medium-fine grind. It usually tastes much better than older supermarket grounds.
How to Make the Best AeroPress Recipe Step by Step
This method follows the Standard Method because it’s easy to repeat and produces a clean, balanced cup. Once you master this version, you can experiment with the Inverted Method or even championship-style recipes.
1. Heat the water
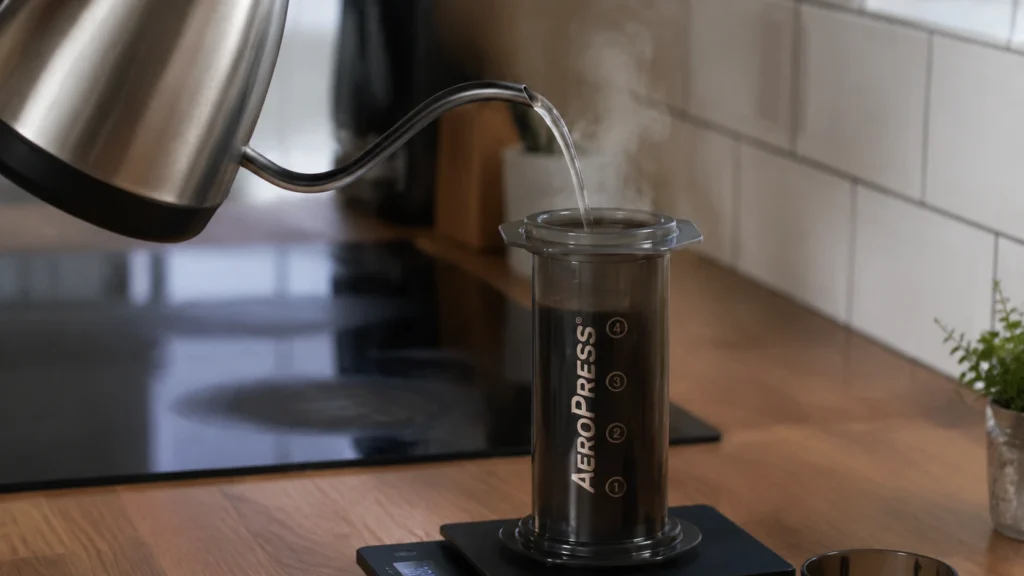
Heat your water to 92–96°C (198–205°F).
If you don’t have a thermometer, let freshly boiled water sit for about 30–60 seconds before pouring. For darker roasts, wait a little longer since slightly cooler water helps reduce bitterness.
Visual cue: The water should stop bubbling hard but still be very hot.
2. Grind the coffee
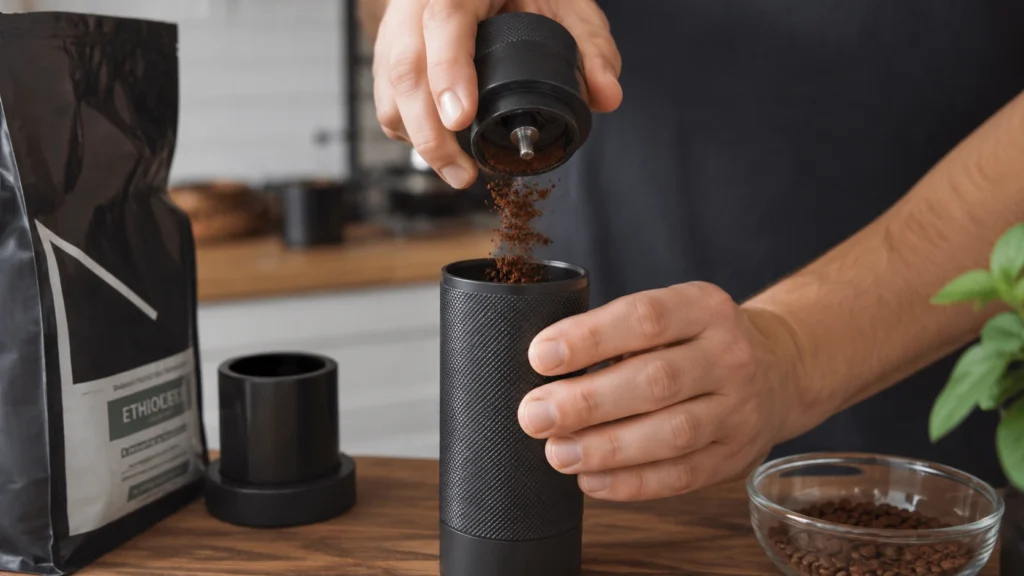
Grind 14 grams of coffee to a medium-fine consistency.
It should feel slightly finer than drip coffee but coarser than espresso. A consistent grind helps every coffee particle extract evenly.
Why this matters: Uneven grounds create a mix of sour and bitter flavors in the same cup.
3. Prepare the AeroPress
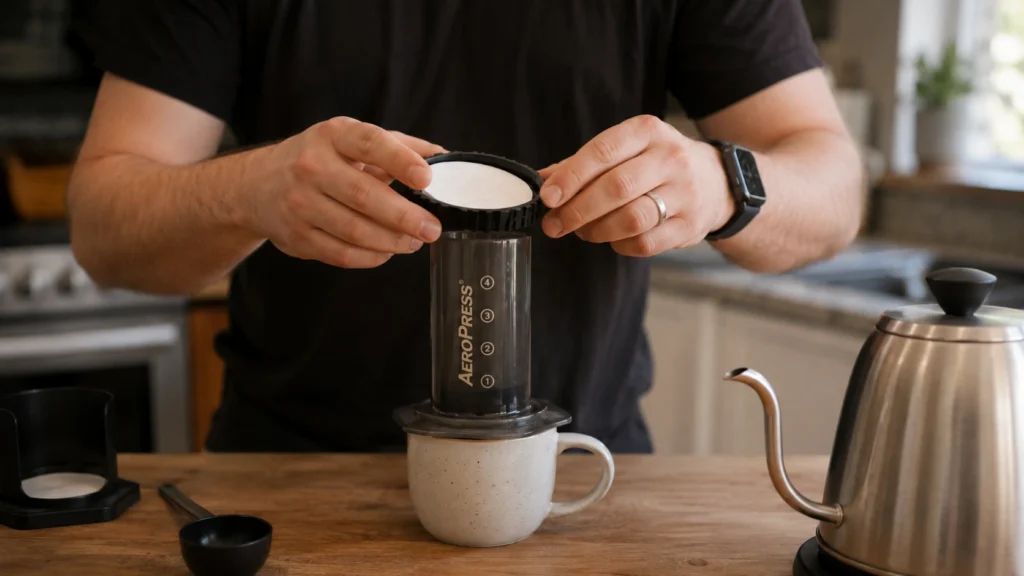
Insert a paper filter into the cap and attach it to the AeroPress.
Place the brewer over your mug or server in the standard position.
Some people rinse the paper filter first. I usually skip it because I don’t notice a meaningful difference in the finished cup.
4. Add the coffee
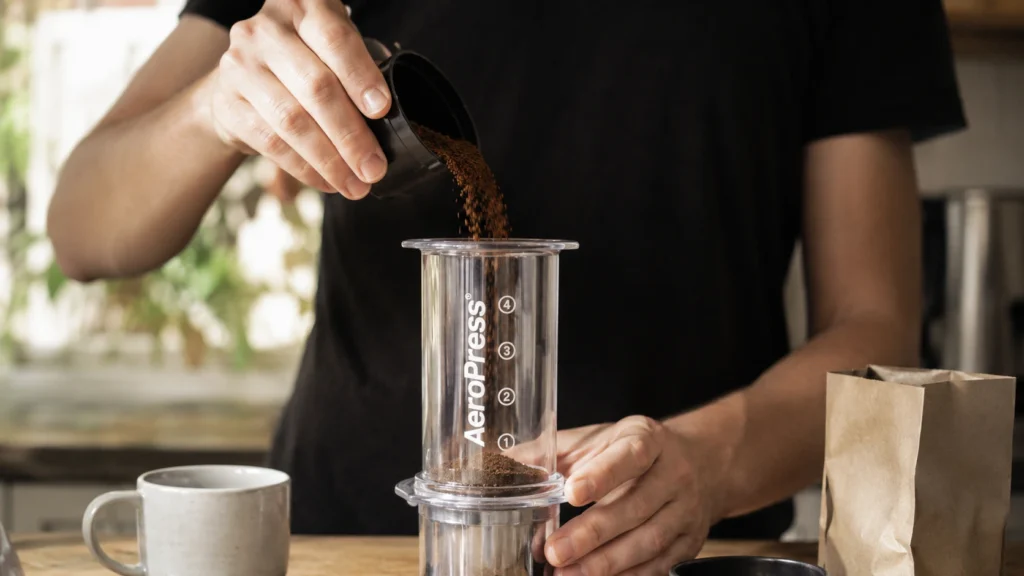
Pour the ground coffee into the brew chamber.
Give the AeroPress one gentle shake so the coffee bed sits level.
Visual cue: The grounds should form a flat surface instead of a mound.
5. Start brewing
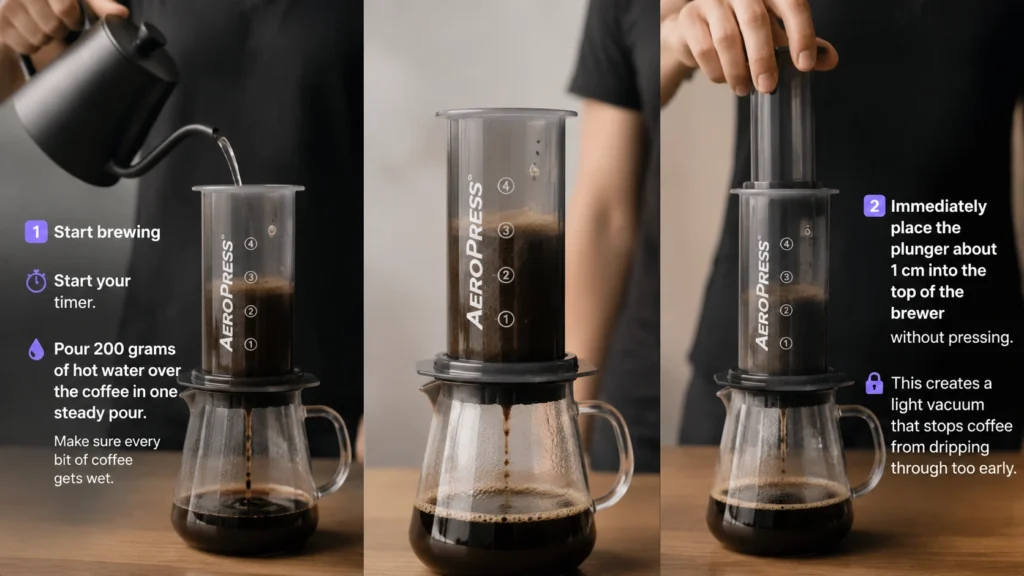
Start your timer.
Pour 200 grams of hot water over the coffee in one steady pour. Make sure every bit of coffee gets wet.
Immediately place the plunger about 1 cm into the top of the brewer without pressing.
This creates a light vacuum that stops coffee from dripping through too early.
6. Let it steep
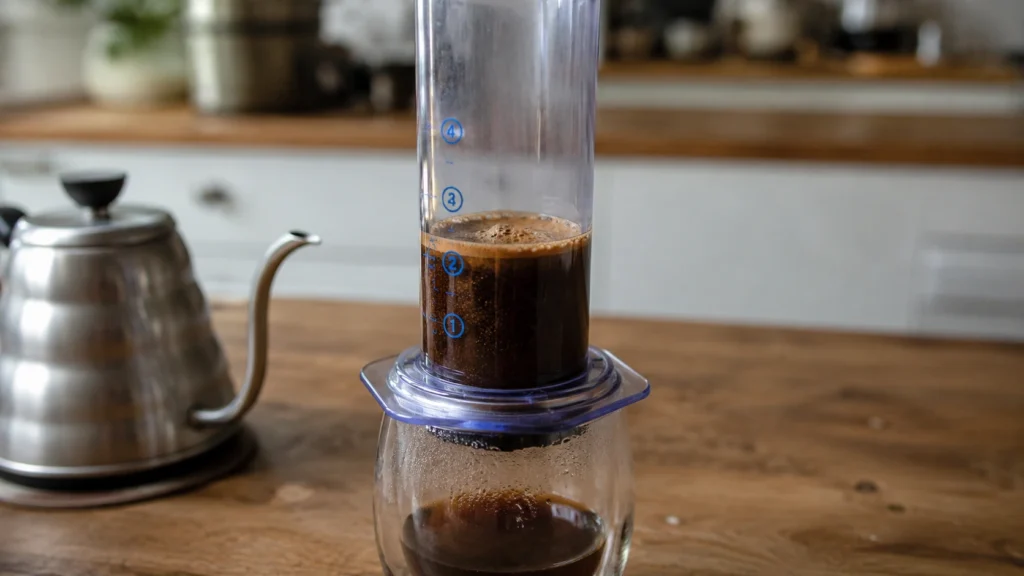
Leave the coffee alone for 2 minutes.
Don’t stir during this time. The coffee extracts naturally while the crust forms on top.
Visual cue: You’ll see a dark layer floating on the surface.
7. Swirl instead of stirring
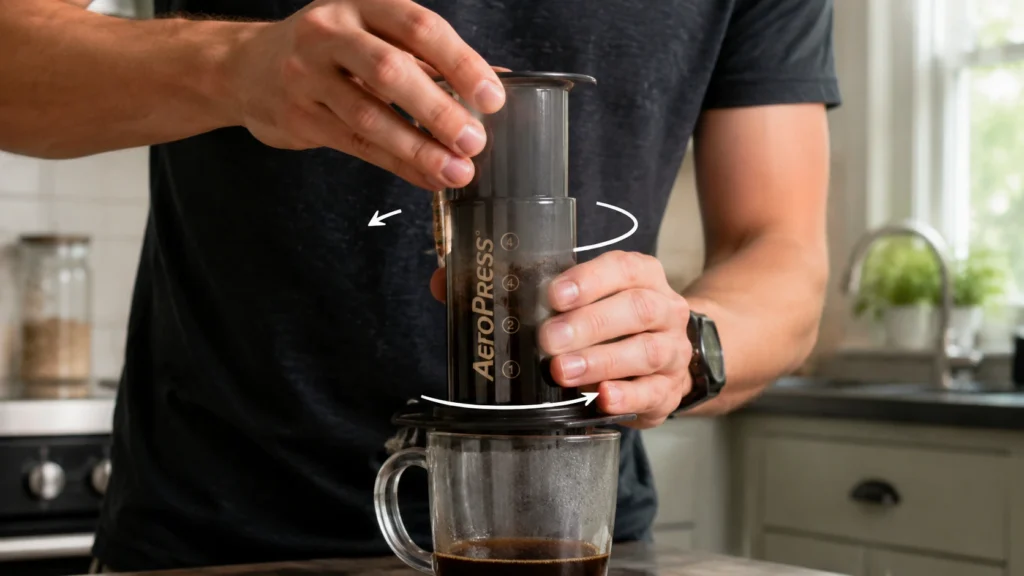
After two minutes, hold both the brewer and plunger.
Give the AeroPress one gentle swirl.
This breaks the crust without adding too much turbulence.
Why this works: A gentle swirl settles the coffee bed more evenly than aggressive stirring, helping produce a cleaner cup.
8. Wait a little longer
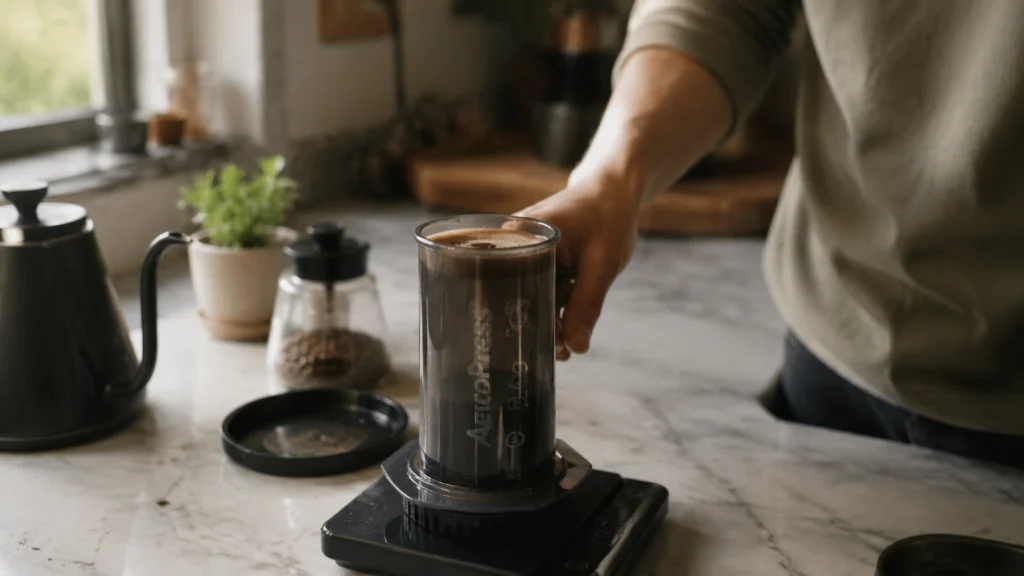
Let the coffee rest for another 30 seconds.
This short pause allows many of the tiny coffee particles to settle before pressing.
9. Press slowly
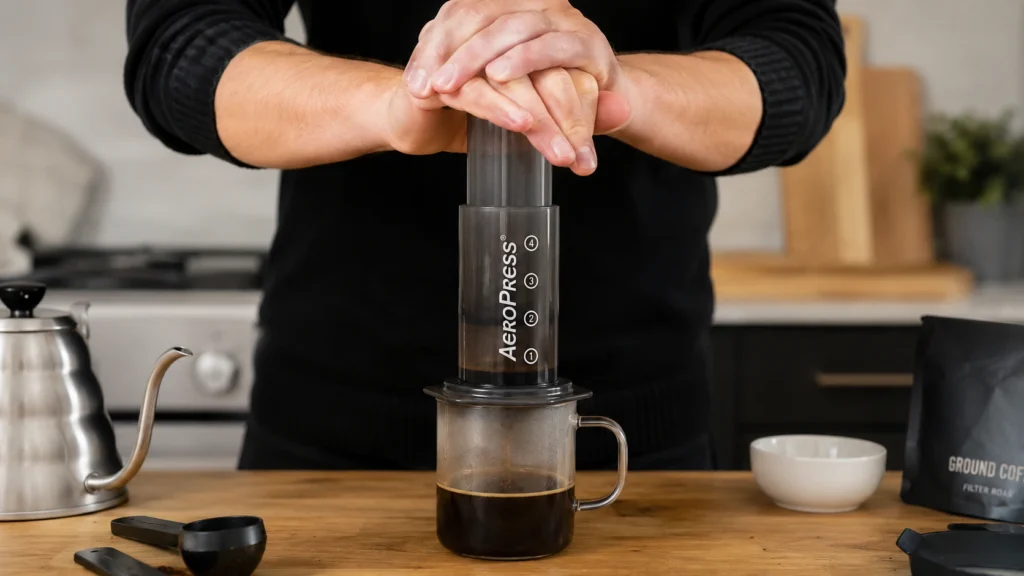
Press the plunger down with steady pressure.
The press should take about 30 seconds.
Visual cue: The plunger should move smoothly. If you have to force it, your grind is probably too fine.
I stop pressing when I first hear the hiss. Pushing farther won’t ruin the coffee, but stopping there usually keeps extra bitterness out of the cup.
10. Taste before changing anything
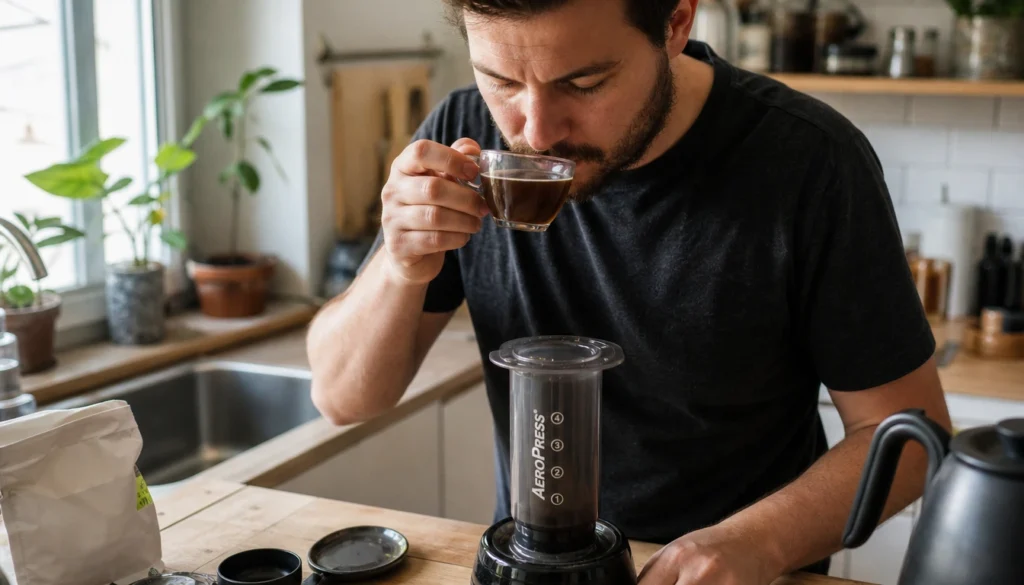
Take your first sip while the coffee is still warm.
Before changing the recipe, think about what you taste.
- Sour usually means the coffee needs a finer grind or a little more brewing time.
- Bitter often means the grind is too fine or the water is too hot.
- Weak usually means you need a little more coffee or less water.
Only change one variable at a time. That’s the easiest way to improve your next cup.
Why This Recipe Works
Many AeroPress recipes focus on exact numbers but never explain why those numbers matter.
The biggest reason this recipe works is balanced extraction.
A medium-fine grind gives plenty of surface area without slowing the press too much. The two-minute steep pulls out sweetness and body, while the gentle swirl helps the coffee extract evenly. Pressing slowly avoids disturbing the coffee bed too much, leaving fewer fine particles in your mug.
Each step is simple on its own. Together, they create a cup that’s smooth, sweet, and full of flavor without needing championship-level precision.
The Most Common AeroPress Mistakes (And How to Fix Them)
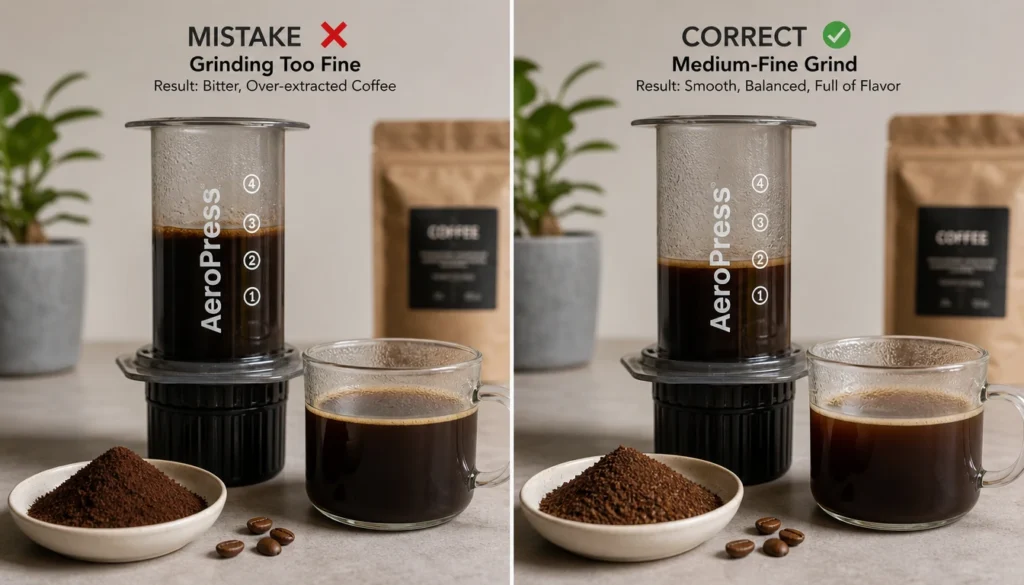
Most bad AeroPress coffee isn’t caused by the recipe. It’s caused by one small mistake that changes the extraction.
Here are the problems I see most often.
Grinding too fine
Many beginners think finer always means stronger.
It doesn’t.
If the grind is too fine, the coffee extracts too much. The cup becomes bitter, harsh, and harder to press.
Instead, move one grind setting coarser and try again.
Using old coffee beans
Fresh beans make a much bigger difference than buying expensive equipment.
Even the best AeroPress recipe can’t rescue stale coffee.
If your coffee smells dull before brewing, it will probably taste dull afterward too.
Pouring water too slowly
Take too long to pour, and the coffee begins extracting before all the grounds are wet.
That often leads to uneven flavor.
Aim for one smooth pour that wets every bit of coffee within a few seconds.
Pressing too hard
The AeroPress doesn’t need lots of force.
If you’re leaning your whole body onto the plunger, something is wrong.
Usually, the grind is too fine.
Slow, gentle pressure produces a cleaner cup and makes pressing much easier.
Changing too many things
This is the mistake I made for months.
I’d change the grind, coffee dose, water temperature, and brew time all at once. Then I had no idea which change actually helped.
Adjust only one thing per brew. You’ll improve much faster.
Quick Tips
- Use fresh beans whenever possible.
- Keep your grind medium-fine for everyday brewing.
- Press gently instead of forcing the plunger.
- Change one brewing variable at a time.
- Taste every cup before adjusting the recipe.
Pro Tip: The Small Wait That Makes a Better Cup
The easiest upgrade isn’t buying a new grinder.
It’s waiting 30 seconds after the swirl before pressing.
That short pause lets many of the fine coffee particles settle toward the bottom of the brew chamber. The result is a cleaner cup with better clarity and less grit.
It only adds half a minute to your brew, but it’s one of the simplest ways to make your AeroPress coffee taste more balanced.
Troubleshooting Guide: Fix Your AeroPress Coffee Fast
| Problem | Most Likely Cause | Easy Fix |
|---|---|---|
| Coffee tastes sour | Grind too coarse or brew too short | Use a finer grind or steep 20–30 seconds longer |
| Coffee tastes bitter | Grind too fine or water too hot | Grind slightly coarser or lower the water temperature |
| Coffee tastes weak | Too little coffee or too much water | Increase the coffee dose or reduce the water slightly |
| Coffee tastes flat | Old beans or poor water quality | Use freshly roasted beans and filtered water |
| Plunger is very hard to press | Grind too fine | Adjust one grind setting coarser |
| Coffee presses too quickly | Grind too coarse | Make the grind slightly finer |
| Too much sediment | Pressing too hard or using a metal filter | Press gently or switch to a paper filter |
| Coffee drips before pressing | Plunger wasn’t inserted early | Insert the plunger immediately after pouring to create a vacuum |
Easy Variations to Make the Best AeroPress Recipe Your Own
Once you’re happy with the basic recipe, try changing just one thing at a time. Small changes can make a surprising difference without making brewing more complicated.
- For light roast coffee: Use 93–96°C water and grind slightly finer to bring out fruity, bright flavors.
- For medium roast coffee: Stick with the base recipe. It gives the most balanced sweetness and body.
- For dark roast coffee: Lower the water temperature to 85–90°C and use a slightly coarser grind to reduce bitterness.
- For a stronger cup: Increase the coffee to 16–18 grams while keeping the same brew time. Add a splash of hot water afterward if it feels too concentrated.
- For an Americano-style coffee: Brew a concentrated cup, then add 60–120 ml of hot water until it tastes right to you.
- For iced coffee: Brew directly over a mug filled halfway with ice. Use a little less brewing water so the melting ice doesn’t weaken the flavor.
- For a latte: Brew a stronger concentrate and top it with steamed or hot milk.
- For decaf coffee: Follow the same recipe. Decaf sometimes extracts a little faster, so if it tastes bitter, grind one step coarser.
If you’re planning a cozy dinner, pair your homemade orangecello with our Mamaliga Recipe. This traditional cornmeal dish has a creamy, comforting texture that goes beautifully with hearty meats, rich stews, or roasted vegetables.
What Does Each Brewing Variable Actually Change?
Many recipes tell you what to do but not why. Once you understand these four variables, you can adjust almost any AeroPress recipe with confidence.
Grind size
Grind size controls how quickly water extracts flavor. A finer grind extracts faster and creates a richer cup. Too fine, though, and bitterness starts to take over. A coarser grind slows extraction and makes the coffee lighter.
Water temperature
Hotter water pulls flavor from the coffee more quickly. Lighter roasts usually taste better with hotter water because they’re denser. Dark roasts already extract easily, so slightly cooler water often produces a smoother cup.
Brew time
Longer steeping extracts more flavor. If your coffee tastes weak, adding another 15 to 30 seconds is often enough. If it’s bitter, shortening the brew can help.
Stirring and swirling
Moving the coffee grounds increases extraction. A gentle swirl creates even extraction without disturbing the coffee bed too much. Aggressive stirring creates extra turbulence that can sometimes add bitterness.
Why Water Quality Matters More Than Most People Think
People often blame their beans when the real problem is the water. Coffee is about 98% water, so poor water can hide good flavors.
For the best results:
- Use filtered water if your tap water tastes strongly of chlorine.
- Avoid distilled water because it lacks the minerals that help extract flavor.
- Very hard water can make coffee taste dull.
- Water softened with salt can leave an unusual aftertaste.
A simple kitchen water filter is usually enough. You don’t need expensive bottled water.
How to Brew Without a Scale or Thermometer
Not everyone owns coffee gear, and that’s completely fine.
Here’s the method I recommend.
No scale?
Use one level AeroPress scoop of coffee. Fill the brewing chamber close to the number 4 mark with hot water. Your ratio won’t be exact, but you’ll still make a very enjoyable cup.
No thermometer?
Bring the kettle to a boil. Wait about 30 seconds before pouring for medium roasts. For darker roasts, wait closer to one minute.
That simple trick gets you surprisingly close to the right brewing temperature.
Using Pre-Ground Coffee? Here’s What to Change
Many recipes assume everyone grinds fresh beans. In reality, lots of people buy pre-ground coffee, and that’s perfectly okay. Since pre-ground coffee loses freshness faster, try these adjustments:
- Buy the smallest bag you can finish within two or three weeks.
- Keep it in an airtight container away from heat and sunlight.
- Let the coffee steep about 20–30 seconds longer if it tastes weak.
- If it tastes bitter, shorten the brew instead of using hotter water.
Freshly ground beans still produce the best flavor, but good pre-ground coffee can make an excellent AeroPress brew.
How to Make AeroPress Coffee for Two
One standard AeroPress isn’t designed for two large mugs, but you can still make enough coffee.
Here’s the easiest method.
- Brew a stronger concentrate using 26 grams of coffee and 200 grams of water.
- Divide the concentrate evenly between two mugs.
- Add about 100–120 grams of hot water to each mug.
- Taste and adjust with more water if needed.
This produces two balanced cups without needing to brew twice.
Paper Filter vs Metal Filter: Which Should You Choose?
This question comes up all the time, and both options work well.
| Feature | Paper Filter | Metal Filter |
|---|---|---|
| Flavor | Clean and bright | Fuller and richer |
| Coffee Oils | Mostly removed | More oils remain |
| Sediment | Very little | Slightly more |
| Cleanup | Throw away filter | Rinse filter after brewing |
| Long-Term Cost | Ongoing paper filter cost | Higher upfront cost, reusable |
I usually reach for a paper filter when I want a clean, crisp cup. If I’m brewing darker roasts or want more body, a metal filter is a great choice.
Neither is objectively better. It depends on what you enjoy drinking.
Is an AeroPress Worth the Money?
For most home coffee drinkers, I think the answer is yes. The brewer is affordable, doesn’t take much counter space, and needs very little maintenance.
Here’s a rough comparison using specialty coffee.
| Brewing Method | Approximate Cost Per Cup |
|---|---|
| Homemade AeroPress | $0.70–$1.40 |
| Homemade French Press | $0.70–$1.40 |
| Homemade Drip Coffee | $0.40–$1.00 |
| Coffee Shop Brewed Coffee | $3–$6 |
| Coffee Shop Latte | $5–$8 |
Even if you drink one cup every day, the AeroPress usually pays for itself fairly quickly compared with buying coffee from a café.
One extra benefit is that paper filters cost very little, and the brewer itself is durable enough to last for years with normal care.
Why Choose an AeroPress Instead of Other Brewing Methods?
Every brewing method has its strengths. I own an AeroPress, a French press, and a pour-over dripper, and I still use all three. The “best” choice depends on what kind of coffee you want that day.
| Brewing Method | Best For | Body | Clarity | Brew Time | Cleanup |
|---|---|---|---|---|---|
| AeroPress | Everyday coffee, travel, quick brewing | Medium | High | 3–5 minutes | Very easy |
| French Press | Rich, full-bodied coffee | Heavy | Medium | 4–5 minutes | Moderate |
| Pour Over | Bright, clean flavors | Light | Very high | 4–6 minutes | Easy |
| Espresso Machine | Milk drinks and concentrated coffee | Very heavy | High | 1–2 minutes | More involved |
Here’s my honest take:
- Pick an AeroPress if you want a great cup with very little fuss.
- Choose a French press when you like a heavier mouthfeel and don’t mind a little sediment.
- Go with pour over if you enjoy delicate, fruity coffees.
- An espresso machine is worth it if you mostly drink cappuccinos, lattes, or flat whites and don’t mind the higher cost.
One thing I appreciate about the AeroPress is how forgiving it is. Even if you’re a little off with your timing or water temperature, you can still make a delicious cup.
What to Serve With AeroPress Coffee
A balanced AeroPress brew pairs well with both sweet and savory foods. Since the coffee is clean and smooth, it doesn’t overpower breakfast or dessert.
Here are a few of my favorite pairings:
- Buttery croissants for a simple café-style breakfast.
- Blueberry muffins because the fruit pairs beautifully with light and medium roasts.
- Avocado toast when you want something filling without masking the coffee’s flavor.
- Chocolate brownies for darker roasts with rich chocolate notes.
- Homemade biscotti if you enjoy dipping cookies into coffee.
Love pairing your coffee with something homemade? Our Blackberry Jelly Recipe is sweet, fruity, and perfect on warm toast, biscuits, or scones alongside a fresh cup of AeroPress coffee. It’s an easy recipe that makes breakfast or an afternoon coffee break even better.
My Honest Experience Making This Recipe
The first few times I used my AeroPress, I pressed far too hard because I thought more pressure would make better coffee. Instead, every cup tasted bitter and muddy.
Once I slowed down and let the coffee steep properly, everything changed. The cup became sweeter, cleaner, and much easier to enjoy.
The biggest surprise wasn’t buying better equipment. It was learning that small adjustments—like grind size and a gentle press—made a bigger difference than expensive gear ever did.
Today, this is still the recipe I return to when I simply want a dependable cup without thinking too much about it.
How to Store Coffee Beans for Better AeroPress Coffee
Good storage keeps your coffee tasting fresh much longer. Most people blame their brewing technique when stale beans are actually the problem.
Here’s what I recommend:
| Storage Method | How Long |
|---|---|
| Room temperature (sealed container) | 2–4 weeks after opening |
| Freezer (airtight bag, unopened portions) | Up to 3 months |
| Fridge | Not recommended |
My storage tips
- Keep beans in an airtight container.
- Store them away from heat, sunlight, and moisture.
- Buy smaller bags if you don’t drink coffee every day.
- Freeze only portions you won’t use for a few weeks.
- Avoid opening and closing frozen bags repeatedly because condensation can affect the beans.
Fresh coffee smells sweet and lively. If the aroma has almost disappeared, your coffee has probably lost much of its flavor too.
How to Clean and Maintain Your AeroPress
Cleaning an AeroPress only takes about a minute.
After brewing:
- Unscrew the filter cap.
- Push the plunger fully to eject the coffee puck.
- Rinse the brewer, plunger, and cap with warm water.
- Let everything dry before putting it away.
Every few weeks, wash the brewer with mild dish soap to remove coffee oils.
When should you replace the rubber seal?
If the plunger starts sliding too easily or no longer creates a good seal, it’s probably time for a replacement.
Most home users get several years of use before needing a new seal.
Frequently Asked Questions About the Best AeroPress Recipe
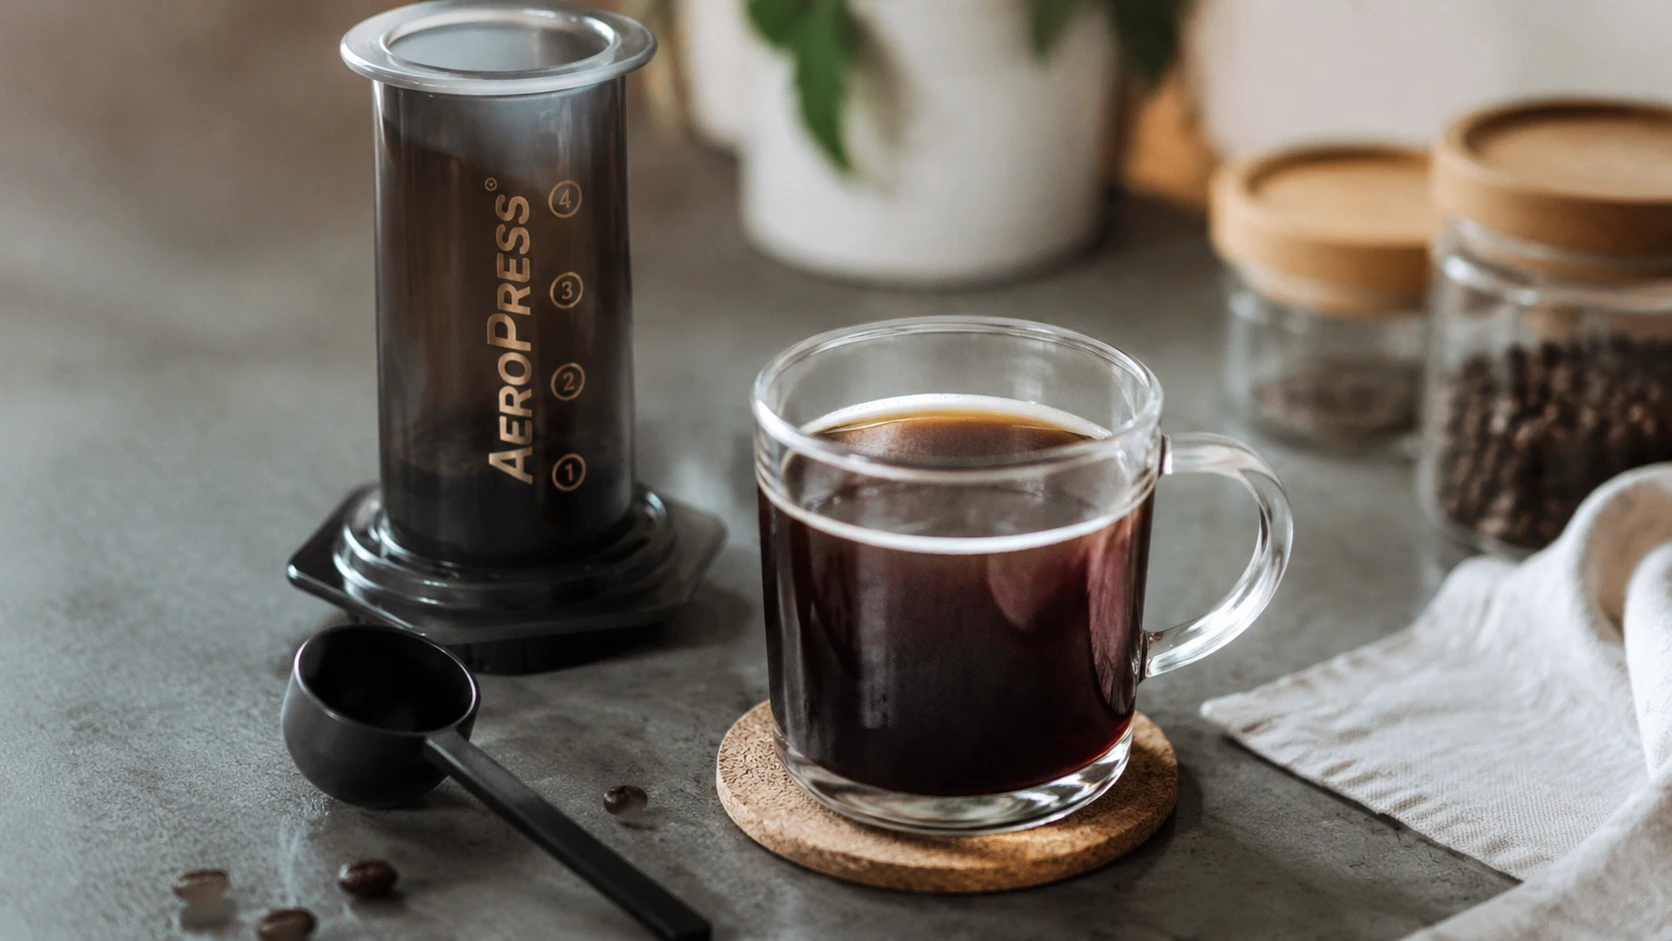
Best Aeropress Recipe
Ingredients
Equipment
Method
- Insert a paper filter into the AeroPress cap and attach it to the brewer. Place the AeroPress in the standard position on your mug or server.
- Grind 11 grams of coffee to a fine consistency, slightly coarser than espresso, then add it to the AeroPress. Level the coffee bed.
- Start a timer and immediately pour 200 ml of hot water over all the grounds, making sure they are fully saturated.
- Insert the plunger about 1 cm into the brewer to create a vacuum. This helps prevent the coffee from dripping through too early.
- Let the coffee steep for 2 minutes without stirring. The coffee bed should settle naturally.
- Gently swirl the AeroPress to break the crust and evenly redistribute the grounds. Let it rest for another 30 seconds.
- Press the plunger slowly and steadily for about 30 seconds. Stop when you hear the final hiss.
- Remove the AeroPress, discard the coffee puck, and serve immediately while the coffee is hot.
Notes
- Freshly roasted whole beans produce the best flavor and aroma.
- A burr grinder gives a more even grind for better extraction.
- If the coffee tastes bitter, grind slightly coarser. If it tastes sour or weak, grind a little finer or increase the brew time slightly.
Final Thoughts on the Best AeroPress Recipe
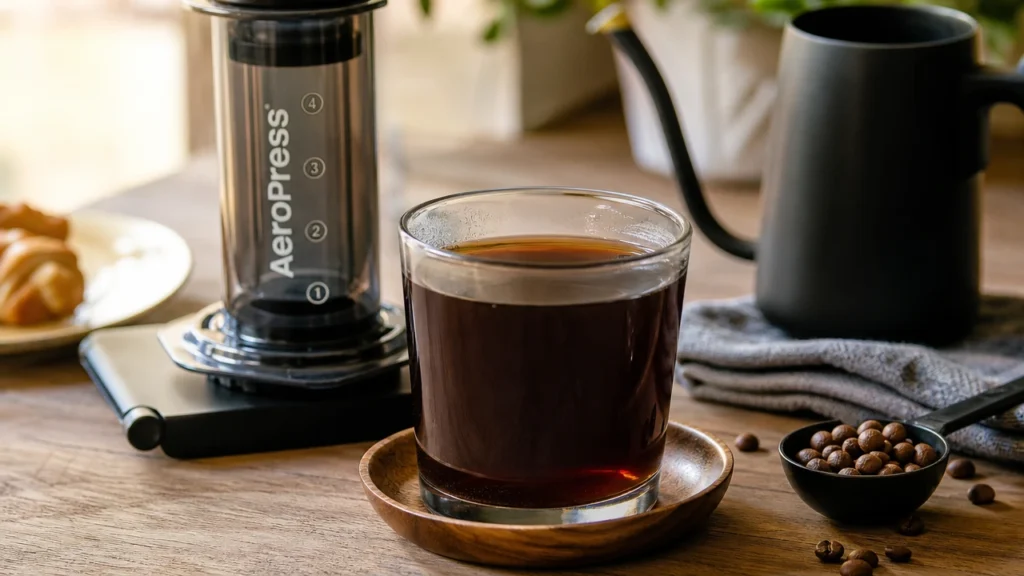
The best AeroPress recipe isn’t the one that wins a championship. It’s the one you can make consistently before your first cup of the day without pulling out a notebook and a stopwatch.
Start with the recipe in this guide, then adjust one variable at a time. A small change in grind size, water temperature, or brew time can completely change the flavor, and that’s part of what makes the AeroPress so much fun to use.
I hope this guide helps you brew a cup that tastes better than yesterday’s. If you make this recipe, I’d love to hear how it turned out. Drop a comment below and share the changes that worked best for you.
If you enjoy making coffee at home, browse our collection of drink recipes for more refreshing, cozy, and easy beverages to try throughout the year.