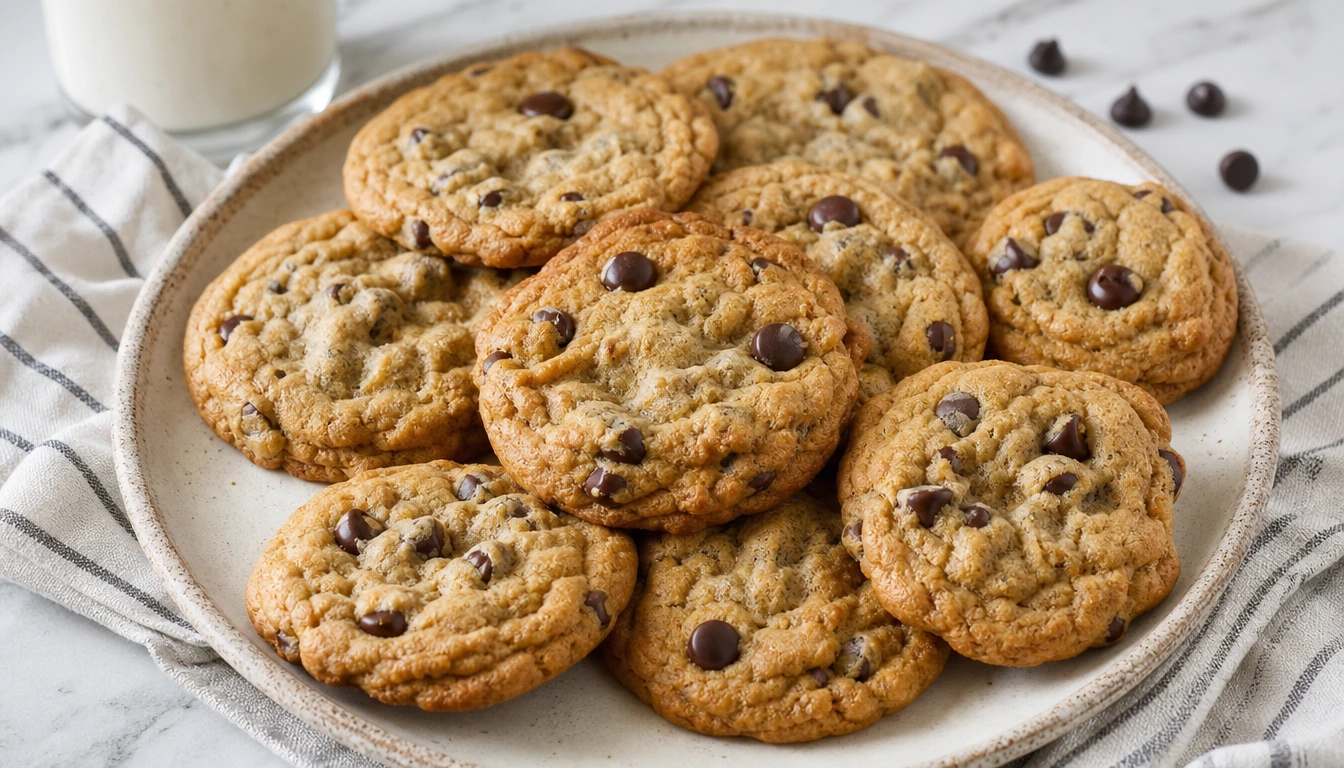
Mrs Fields Cookie Recipe That Brings Back the Original Mall Taste

Most copycat cookie recipes promise bakery-quality results, but very few explain why they work. I learned that after baking batch after batch, changing one small thing at a time until the cookies finally had the soft centers, chewy edges, and rich buttery flavor I remembered from the mall.
This Mrs Fields Cookie Recipe is based on the classic style that made the brand famous, but it also clears up the confusing advice you’ll find online. Some recipes tell you to use cold butter, while others insist on softened butter. Bake times range from 300°F to 350°F, and ingredient lists often change from one version to the next. I’ll explain what each method does so you can choose the texture you want instead of guessing.
I’ll also cover the little details many recipes skip, including ingredient substitutions that actually work, the real cost of baking these cookies at home, and why a few simple techniques make such a big difference.
What Is Mrs Fields Cookie Recipe?
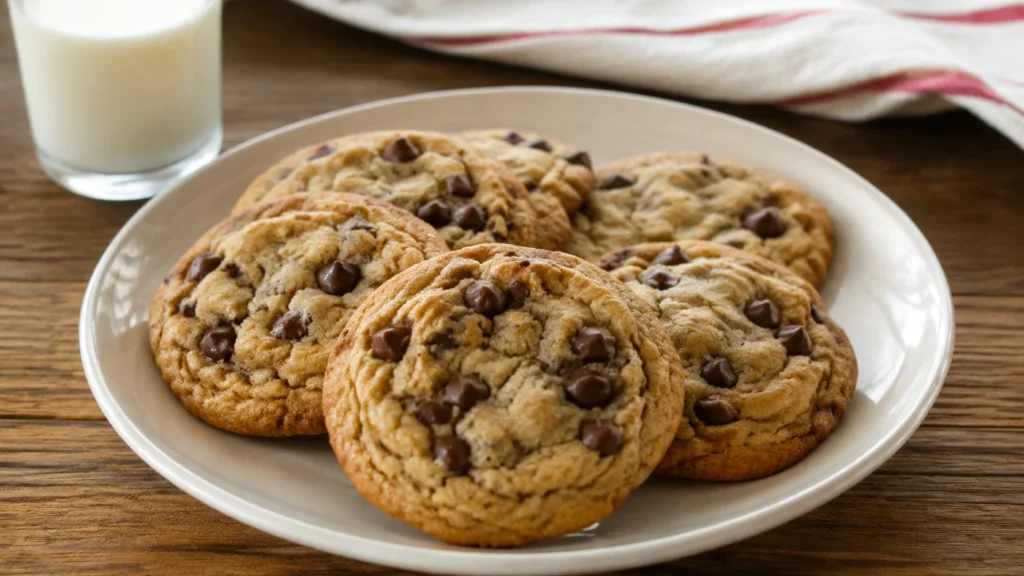
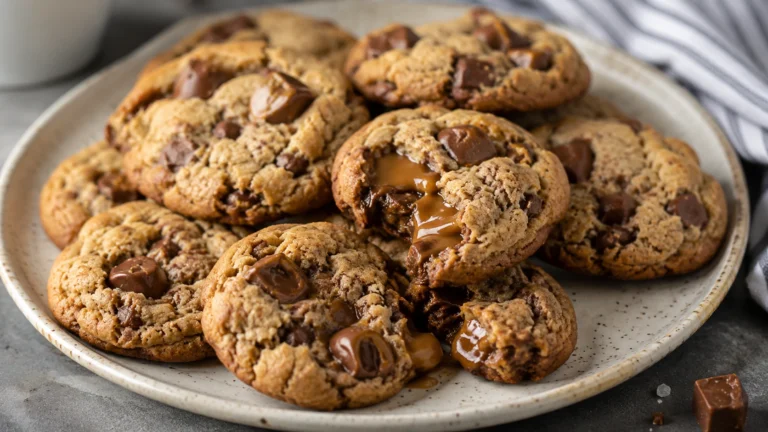
Mrs Fields Cookie Recipe is a copycat chocolate chip cookie recipe made with butter, brown sugar, white sugar, flour, eggs, vanilla, and semi-sweet chocolate chips. It bakes into soft, thick cookies with chewy edges and rich chocolate flavor. Most batches are ready in about an hour, including chilling time, and are popular because they recreate the classic bakery-style cookies many people remember from shopping malls.
The original Mrs. Fields bakeries became famous during the 1980s for serving warm cookies that were noticeably softer than many packaged cookies available at the time. Instead of thin, crisp cookies, they offered large, buttery chocolate chip cookies with plenty of melted chocolate in every bite.
Over the years, several versions of the recipe have appeared in cookbooks, magazines, and online. Some claim to be the authentic original recipe, while others are modern adaptations. The truth is that no home version is exactly the same as the bakery’s current formula, but a well-made copycat comes surprisingly close. The biggest difference is that homemade cookies taste fresher because they come straight from your oven.
Why This Mrs Fields Cookie Recipe Is Worth Making
If your goal is a cookie with crisp edges, a soft center, and plenty of chocolate, this recipe checks every box.
Unlike many copycat recipes, this version explains the reason behind each important step. Instead of simply telling you to chill the dough or avoid overmixing, you’ll learn why those steps matter and how they affect the final cookie.
Another reason I keep coming back to this recipe is that it uses simple pantry ingredients. There are no unusual flavorings or specialty baking products that you’ll only use once.
It is also easy to customize. You can make smaller cookies, oversized bakery-style cookies, or freeze part of the dough for another day without changing the recipe.
Recipe Overview
Before you start baking, here’s a quick look at what to expect.
| Detail | Information |
|---|---|
| Prep Time | 15 minutes |
| Chill Time | 30–60 minutes |
| Cook Time | 14–18 minutes |
| Total Time | About 1 hour |
| Servings | 18–20 large cookies |
| Difficulty | Easy |
| Cuisine | American |
| Calories | About 250–300 per cookie (varies by size) |
| Estimated Cost | About $9–12 per batch |
Homemade vs. Buying Mrs. Fields Cookies
One thing I rarely see recipe sites mention is the actual savings.
Here’s a simple comparison.
| Option | Approximate Cost |
|---|---|
| Homemade batch (18–20 cookies) | $9–12 |
| Bakery dozen | Around $40 |
| Single bakery cookie | Around $3–4 |
If you bake often, making them at home costs much less per cookie. Even after buying good butter and quality chocolate chips, each cookie usually ends up costing well under a dollar.
That doesn’t mean homemade cookies are identical to the bakery version. Commercial bakeries use ingredients and equipment that home kitchens don’t have. But for most people, the fresh flavor and lower cost easily make homemade the better choice.
What Makes This Copycat Different?
Many recipes confidently say they are the “original” Mrs. Fields recipe, yet they often disagree with one another. Some versions use cold butter cut into cubes. Others cream softened butter until fluffy. Some bake at 300°F for more than 20 minutes, while others bake at 350°F for about 14 minutes. Neither method is automatically wrong. They simply create different cookies.
Cold butter melts more slowly in the oven. That means the dough spreads less before the flour sets, giving you a thicker cookie with a chewy center. Softened butter traps more air while mixing. Those tiny air pockets create a cookie that spreads a bit more and has a lighter texture. The same idea applies to oven temperature. Baking at 300°F gives the dough more time to spread before it sets, while 350°F creates slightly taller cookies with better browning.
Knowing the reason behind each method lets you bake the cookie you actually want instead of wondering why two recipes produce different results.
Ingredients and Why Each One Matters
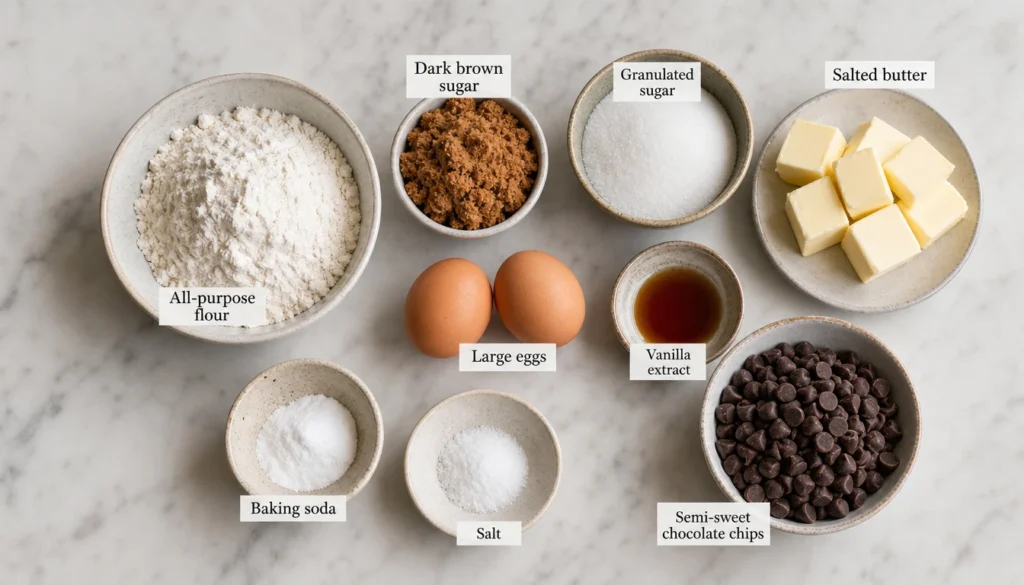
This recipe uses everyday baking ingredients, but each one plays an important role.
- All-purpose flour gives the cookies structure while keeping them tender.
- Dark or light brown sugar adds moisture, chewiness, and a deeper caramel flavor.
- Granulated sugar helps create lightly crisp edges.
- Salted butter brings richness and balances the sweetness.
- Large eggs hold the dough together while adding moisture.
- Vanilla extract rounds out the chocolate flavor.
- Baking soda helps the cookies rise while encouraging even browning.
- Salt sharpens all the flavors instead of making the cookies taste salty.
- Semi-sweet chocolate chips provide the classic bakery-style chocolate flavor.
The Ingredients That Make the Biggest Difference
Butter
One of the biggest debates is whether to use salted or unsalted butter.
If you use salted butter, reduce any extra salt only if your recipe already contains a generous amount. If you only have unsalted butter, simply add a little more salt to the dough. Both work well, but salted butter gives the cookies a slightly richer balance between sweet and savory flavors.
Brown Sugar
Dark brown sugar creates a deeper caramel taste and a softer texture because it contains more molasses.
Light brown sugar still works beautifully if that’s what you have. The cookies will simply taste a little lighter and bake with a slightly different color.
Chocolate Chips
Good chocolate makes a noticeable difference.
Semi-sweet chocolate chips give the closest flavor to the classic bakery cookies. If you prefer a sweeter cookie, try milk chocolate chips. White chocolate chips also work well, especially when paired with chopped macadamia nuts.
Easy Ingredient Substitutions That Actually Work
Some substitutions change the cookie much less than people expect.
| Original Ingredient | Substitute | Result |
|---|---|---|
| Salted butter | Unsalted butter + extra salt | Very similar flavor |
| Dark brown sugar | Light brown sugar | Slightly lighter caramel flavor |
| Semi-sweet chocolate chips | Milk or white chocolate chips | Sweeter cookie |
| Chopped walnuts | Pecans | Similar crunch |
| Vanilla extract | Vanilla bean paste | Stronger vanilla flavor |
One substitution I don’t recommend is replacing butter with margarine. The extra water changes how the dough spreads, and the cookies often turn thinner than expected.
A Small Flour Detail That Prevents Dry Cookies
One cup of flour isn’t always the same from one kitchen to another.
If you scoop flour directly with the measuring cup, you can accidentally pack in much more than the recipe needs. That extra flour makes cookies dry and dense.
For the most reliable results, fluff the flour first, spoon it into the measuring cup, then level it with a straight edge. If you own a kitchen scale, weighing the flour gives the most consistent results every time.
How to Make Mrs Fields Cookie Recipe Step by Step
Making these cookies is straightforward, but a few small details have a big impact on the final texture. Mix only until each ingredient disappears into the dough, chill when needed, and bake just until the edges are set. Those three habits make the difference between average cookies and cookies that remind you of the bakery.
1. Mix the Dry Ingredients
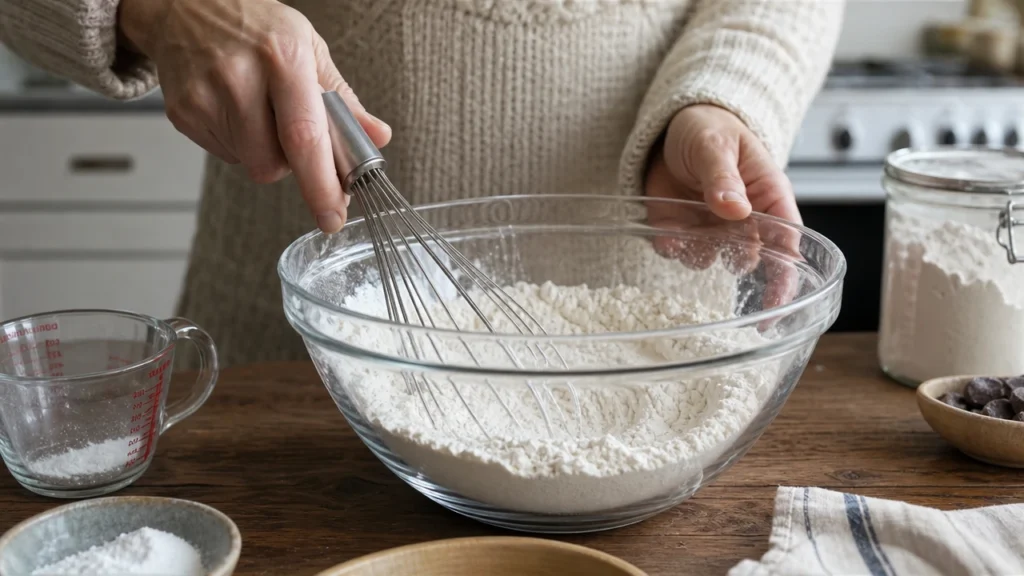
Whisk the flour, baking soda, and salt together in a medium bowl. This simple step spreads the baking soda evenly through the flour, so every cookie bakes the same way. The mixture should look light and evenly blended with no white streaks.
2. Cream the Butter and Sugars
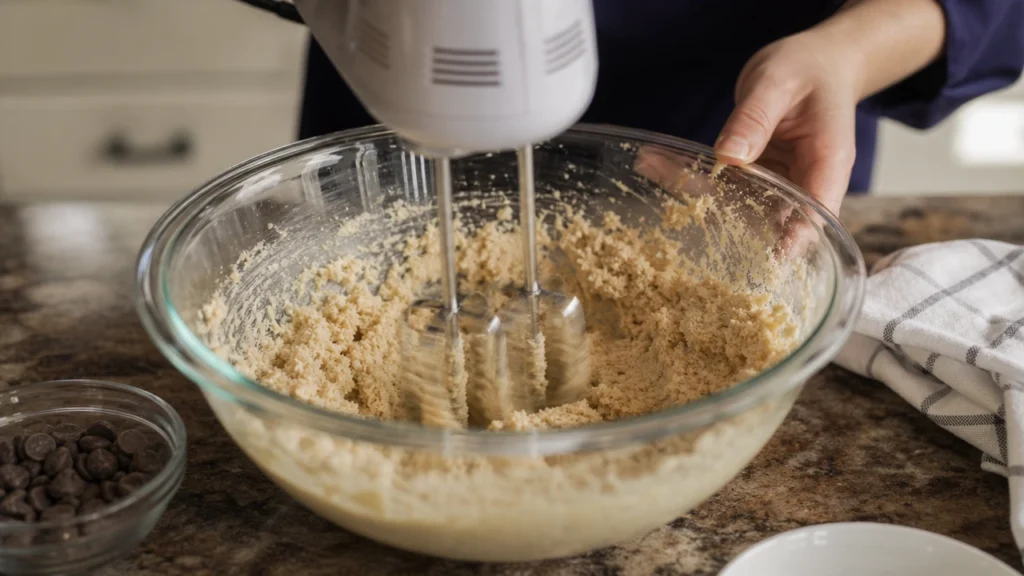
In a large mixing bowl, beat the butter with the brown sugar and granulated sugar until the mixture becomes light and fluffy. If you’re using softened butter, this usually takes about 3 to 5 minutes. If you’re following the cold butter method, keep mixing until the butter breaks down into a coarse, grainy paste.
Why it matters: Creaming traps tiny air bubbles in the butter. Those air pockets help create a lighter cookie while giving the dough enough structure to rise evenly.
Visual cue: The mixture should look lighter in color and slightly fluffy instead of greasy.
3. Add the Eggs and Vanilla
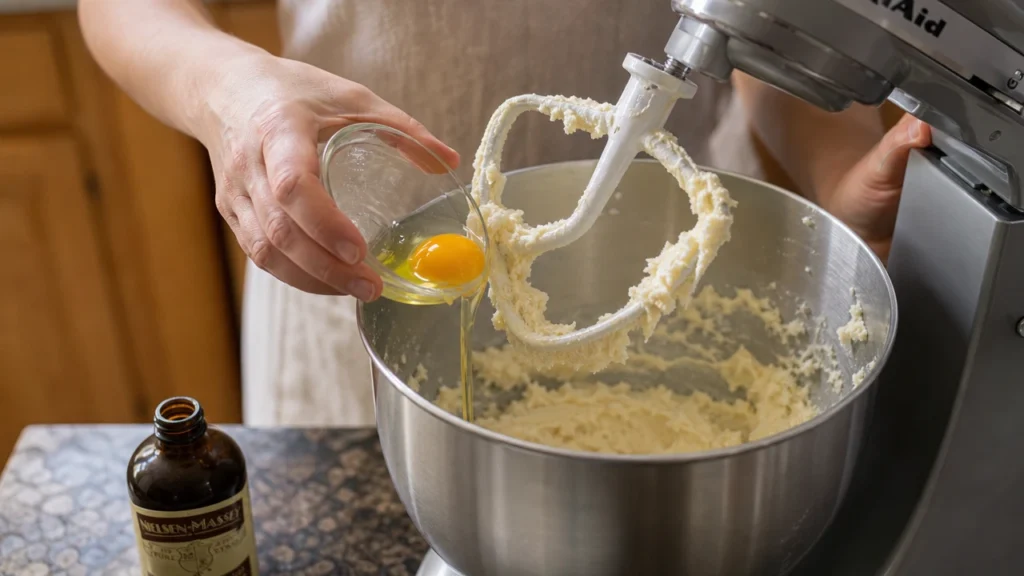
Mix in the eggs one at a time, then add the vanilla extract. Stop mixing as soon as everything is combined.
Why it matters: Overmixing after the eggs are added develops more gluten later when the flour goes in. Too much gluten creates cookies that feel tougher instead of soft.
Visual cue: The batter should look smooth, creamy, and silky without separated butter.
4. Fold in the Dry Ingredients
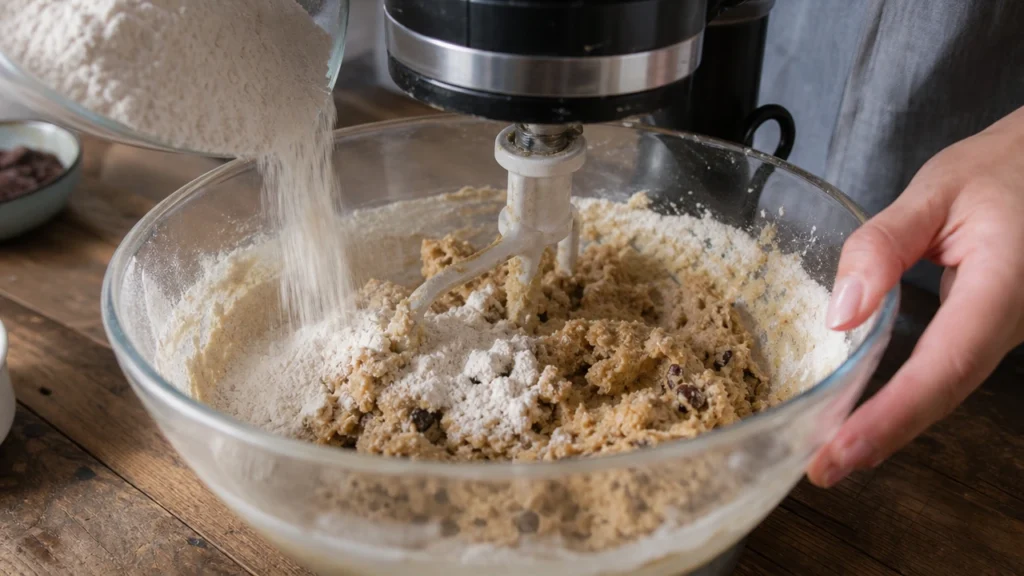
Add the flour mixture gradually while mixing on low speed. Once only a few streaks of flour remain, stop the mixer and finish with a spatula if needed.
Why it matters: Less mixing means a softer cookie. Every extra minute of mixing builds more gluten.
Visual cue: You should no longer see dry flour, but the dough should still feel soft instead of sticky.
5. Stir in the Chocolate Chips
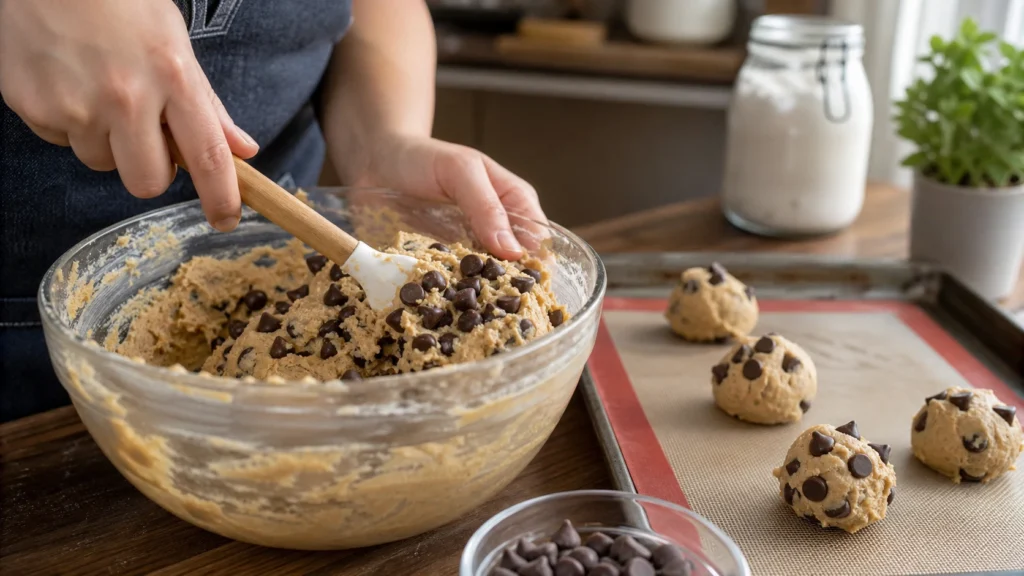
Fold the chocolate chips into the dough until they are evenly distributed. If you want that classic bakery look, press a few extra chocolate chips onto the outside of each dough ball before baking. That simple trick makes the finished cookies look much more inviting because plenty of melted chocolate stays visible on top.
6. Scoop Even Portions
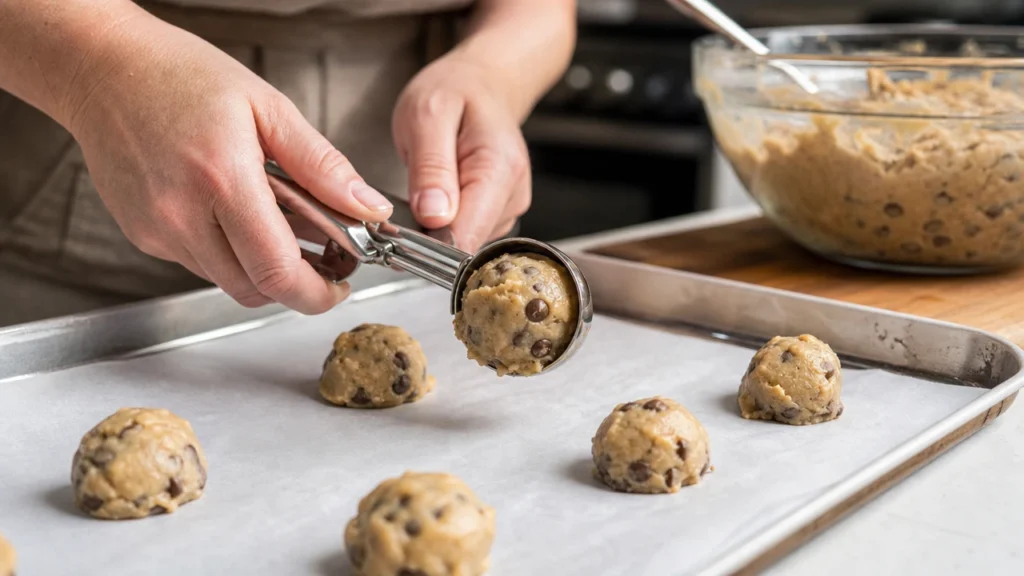
Use a large cookie scoop for consistent results. Keeping every dough ball close to the same size helps every cookie finish baking at the same time. If you’re making oversized bakery-style cookies, use about ¼ cup of dough for each cookie.
Visual cue: Each dough ball should look smooth and rounded without cracks.
7. Chill the Dough
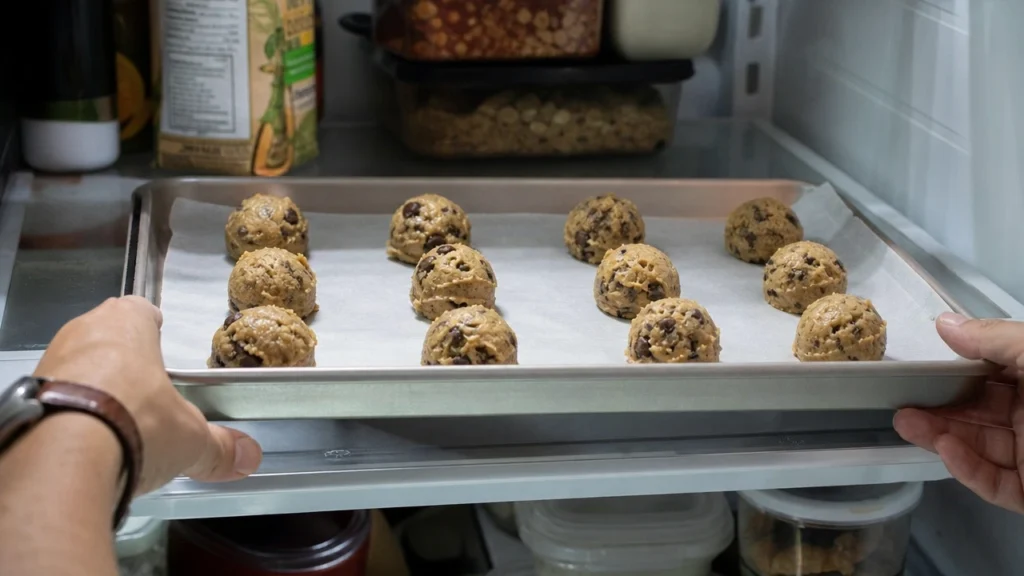
Place the cookie dough balls on a parchment-lined baking sheet or plate and refrigerate them for at least 30 minutes. If you have extra time, chilling for one hour produces even better results.
Why Chilling Works
Many recipes simply tell you to chill the dough, but here’s what’s actually happening. While the dough rests, the flour absorbs moisture from the butter and eggs. At the same time, the butter becomes firm again. When the cookies go into the oven, the butter melts more slowly. That means the cookies spread less before the structure sets, giving you thicker cookies with soft centers.
Visual cue: The dough should feel firm but still easy to scoop.
8. Bake Until the Edges Are Set
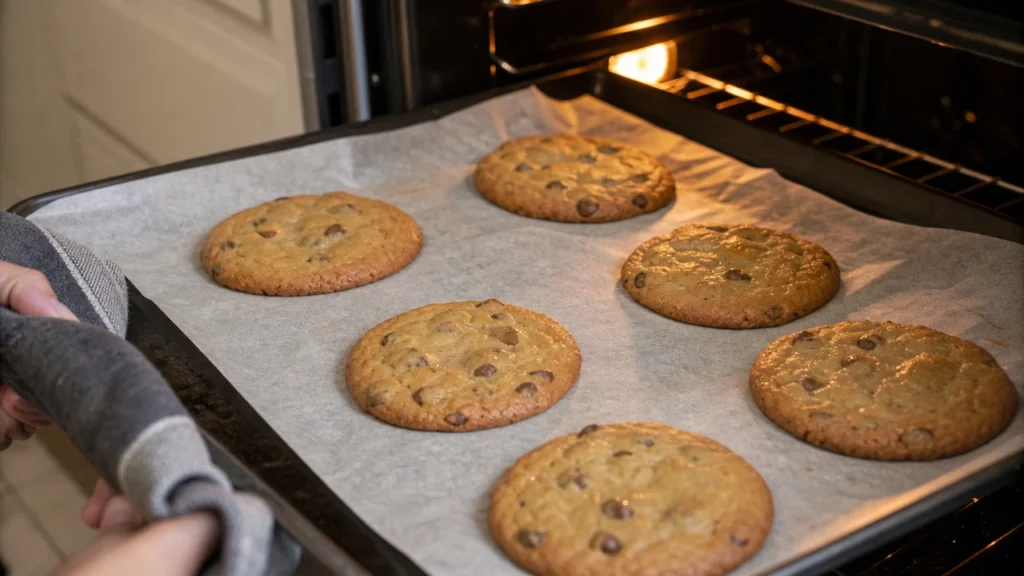
Place the chilled dough balls on a parchment-lined baking sheet, leaving about 2 inches between each cookie. Bake until the edges turn lightly golden while the centers still look slightly underdone. Don’t wait for the middle to become completely firm.
Why it matters: The centers continue cooking from the leftover heat after the cookies leave the oven.
Visual cue: The edges should be golden brown, while the center remains slightly glossy.
The cookies should smell buttery with warm vanilla and chocolate.
9. Cool Before Moving
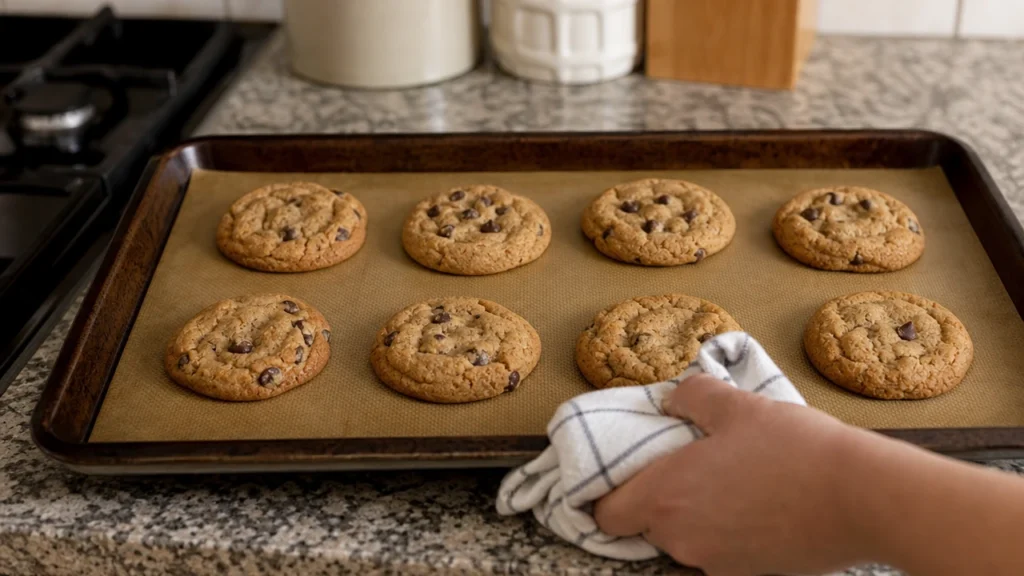
Leave the cookies on the baking sheet for about 5 to 10 minutes before transferring them to a wire rack. Moving them too early can cause them to break because the centers are still setting. After cooling, the cookies should feel soft in the middle with lightly chewy edges.
300°F vs. 350°F: Which Baking Temperature Is Better?
One of the biggest disagreements between copycat recipes is the baking temperature.
Here’s what each one does.
| Baking Temperature | Result | Best For |
|---|---|---|
| 300°F (149°C) | More spreading, softer texture, lighter color, chewier bite | People who want cookies closer to older bakery-style versions |
| 350°F (177°C) | Less spreading, better browning, thicker cookies, crisp edges | People who like modern bakery-style chocolate chip cookies |
Which One Do I Recommend?
If you’re making this recipe for the first time, start at 350°F. The cookies brown more evenly, develop better flavor, and are easier for beginners to judge.
If you enjoy extra-chewy cookies with lighter tops, try the 300°F method next time and compare the two yourself.
The Common Mistake That Ruins Mrs Fields Cookies
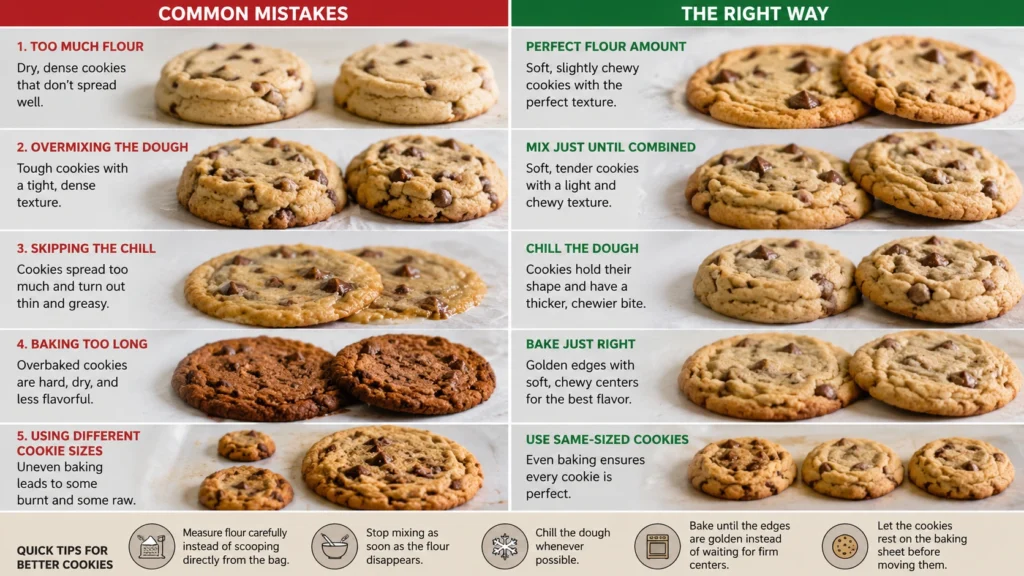
Most cookie problems happen long before the tray goes into the oven.
Here are the mistakes I see most often.
Mistake #1: Adding Too Much Flour
Packing flour into the measuring cup adds more than the recipe calls for. The result is dry, heavy cookies that don’t spread enough. Instead, spoon the flour into the measuring cup or weigh it with a kitchen scale.
Mistake #2: Overmixing the Dough
Once the flour is added, many people keep mixing until the dough looks perfectly smooth. That extra mixing develops gluten, making the finished cookies tougher and less tender. Stop mixing as soon as the flour disappears.
Mistake #3: Skipping the Chill
It can be tempting to bake the dough immediately. Warm dough spreads quickly before the flour has time to set, leading to thin cookies with uneven edges. Even a short 30-minute chill helps create thicker cookies.
Mistake #4: Baking Too Long
Many home bakers wait until the centers look fully baked. By then, the cookies are already overdone. Take them out while the middle still looks slightly soft. Residual heat finishes the baking as the cookies cool.
Mistake #5: Using Different Cookie Sizes
If one dough ball is twice as large as another, one cookie finishes while the other is still raw. Using a cookie scoop keeps everything uniform and gives you predictable baking times.
Quick Tips for Better Cookies
- Measure flour carefully instead of scooping directly from the bag.
- Stop mixing as soon as the flour disappears.
- Chill the dough whenever possible.
- Bake until the edges are golden instead of waiting for firm centers.
- Let the cookies rest on the baking sheet before moving them.
Pro Tip: Let the Dough Rest Overnight
If I know I’m baking the next day, I mix the dough the night before and leave it covered in the refrigerator.
This is one of the easiest upgrades you can make. Overnight resting gives the flour more time to absorb moisture, which creates a richer flavor and a slightly chewier texture. It also helps the cookies bake with thicker centers because the dough starts out colder. It takes no extra work, but the difference is easy to notice.
Easy Variations You Can Try at Home
Once you’ve mastered the classic version, it’s fun to change things up without changing the whole recipe.
- Replace half of the chocolate chips with white chocolate chips and macadamia nuts for a bakery favorite.
- Add chopped walnuts or pecans for extra crunch and a richer flavor.
- Stir in old-fashioned oats to create a heartier cookie with more chew.
- Sprinkle a little flaky sea salt over the cookies before baking to balance the sweetness.
- Swap some chocolate chips for toffee bits if you enjoy a buttery caramel flavor.
- For a dairy-free version, use a good-quality plant-based butter and dairy-free chocolate chips. The cookies will spread a little more but still bake beautifully.
Love homemade sweets? Explore our collection of easy dessert recipes for more bakery-style treats and family favorites.
What to Serve With Mrs Fields Cookie Recipe
Fresh chocolate chip cookies are delicious on their own, but they become even better with the right drink or dessert. If you’re baking for a party or holiday gathering, these simple pairings help turn a plate of cookies into something special.
- Cold milk is the classic choice. It balances the rich butter and chocolate perfectly.
- Hot coffee pairs well with the sweet cookie and brings out the deeper caramel notes from the brown sugar.
- Hot chocolate makes a cozy dessert, especially during the colder months.
- Vanilla ice cream turns warm cookies into an easy homemade dessert. Place a scoop between two cookies for a simple ice cream sandwich.
- Fresh berries add a bright, fresh flavor that cuts through the richness.
These soft, buttery cookies pair wonderfully with a refreshing drink, especially on warm afternoons. Our Coconut Mojito Recipe combines fresh lime, mint, and coconut for a cool, tropical flavor that balances the richness of chocolate chip cookies. Serve them together for an easy dessert or afternoon snack everyone will enjoy.
My Honest Experience Making This Recipe
The first time I made this recipe, I baked the cookies until the centers looked completely done. They tasted good, but once they cooled, they were much firmer than I wanted.
The next batch came out of the oven when the centers still looked slightly glossy. That one small change made all the difference. The cookies stayed soft for days and had the chewy texture I had been trying to recreate.
I also learned that using a cookie scoop gives much more even results than shaping the dough by hand. Every cookie finished baking at the same time, and the whole batch looked like it came from a bakery display.
How to Store, Freeze, and Reheat Mrs Fields Cookie Recipe
Chocolate chip cookies are easy to store, but the method you choose affects how long they stay soft.
Place completely cooled cookies in an airtight container before storing them. Trapping warm cookies can create condensation, which makes the cookies soggy.
| Storage Method | How Long | Best Practice |
|---|---|---|
| Room Temperature | 4–5 days | Store in an airtight container. Add a slice of bread to help keep cookies soft. |
| Refrigerator | Up to 1 week | Not my favorite because cookies become firmer, but it works if your kitchen is very warm. |
| Freezer (Baked Cookies) | Up to 3 months | Freeze in layers with parchment paper between cookies. |
| Freezer (Cookie Dough) | Up to 3 months | Freeze dough balls individually, then transfer to a freezer bag. Bake straight from frozen by adding 2–3 minutes. |
Reheating Tip
Warm a cookie in the microwave for about 8 to 10 seconds. The chocolate softens again, and the cookie tastes almost freshly baked.
If you’re reheating several cookies, place them in a 300°F oven for about 5 minutes.
Common Cookie Problems and How to Fix Them
Even experienced bakers have a batch that doesn’t turn out exactly as planned. Here’s a quick guide to the most common problems.
| Problem | Likely Cause | Easy Fix |
|---|---|---|
| Cookies spread too much | Butter too warm or dough not chilled | Chill the dough for at least 30 minutes before baking. |
| Cookies stay thick but dry | Too much flour | Spoon and level the flour or weigh it instead of scooping. |
| Cookies are tough | Dough was overmixed | Stop mixing once the flour disappears. |
| Cookies don’t brown well | Oven temperature too low or baking time too short | Bake a little longer until the edges turn golden. |
| Chocolate chips sink | Dough became too warm | Chill the dough before scooping or baking. |
| Cookies bake unevenly | Dough balls are different sizes | Use a cookie scoop for even portions. |
Estimated Nutrition Per Cookie
Nutrition varies depending on cookie size and the brands you use, but this estimate is helpful if you’re planning portions.
| Nutrient | Approximate Amount |
|---|---|
| Calories | 250–300 |
| Carbohydrates | 30–35g |
| Protein | 3–4g |
| Fat | 12–15g |
| Saturated Fat | 7–8g |
| Sugar | 17–22g |
| Sodium | 80–150mg |
These values are estimates only and will change if you use different chocolate chips, butter, or cookie sizes.
Frequently Asked Questions About Mrs Fields Cookie Recipe
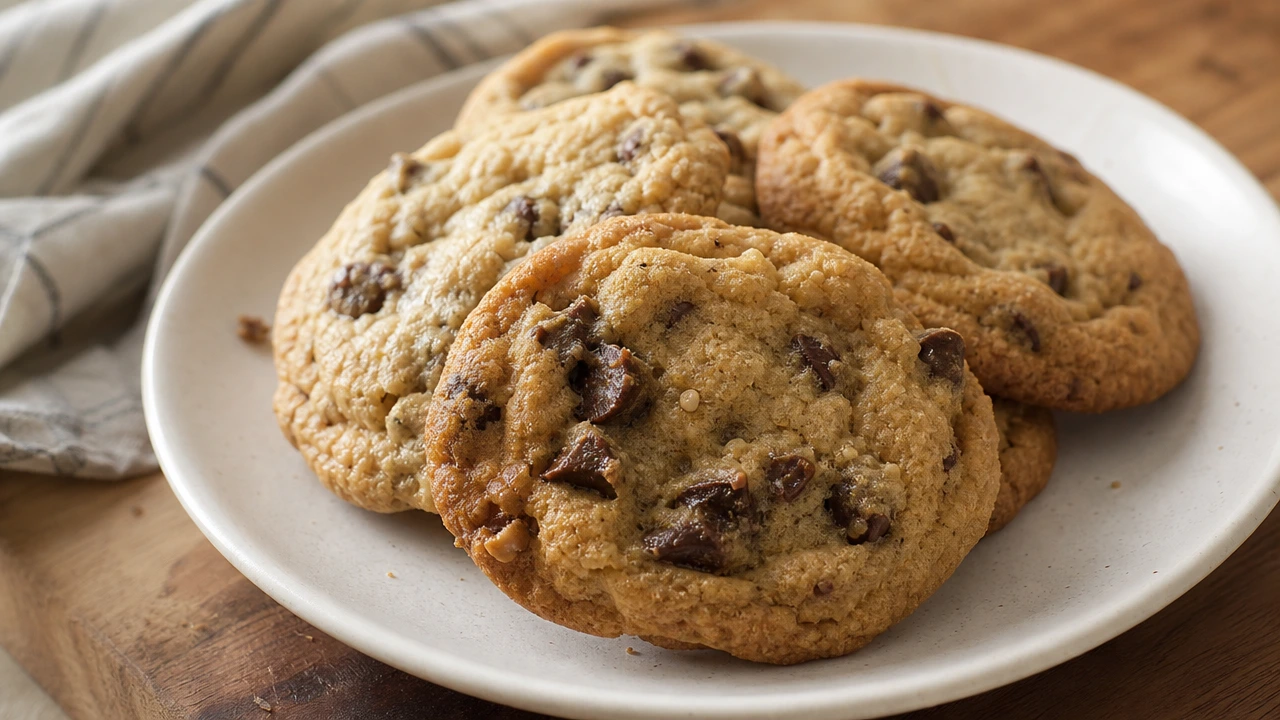
Mrs Fields Cookie Recipe
Ingredients
Equipment
Method
- Preheat the oven to 350°F (177°C) and line a baking sheet with parchment paper. Whisk together the flour, baking soda, and salt until evenly combined.
- Beat the softened butter with the brown sugar and granulated sugar for 3–5 minutes until the mixture looks light, fluffy, and creamy.
- Add the eggs one at a time, then mix in the vanilla extract. Stop mixing once the batter is smooth and fully combined.
- Gradually add the dry ingredients on low speed until no dry flour remains. Fold in the chocolate chips with a spatula until evenly distributed.
- Scoop about ¼ cup of dough for each cookie and place on a tray. Chill the dough for at least 30 minutes so the cookies bake thicker with chewy centers.
- Arrange the chilled dough balls 2 inches apart on the prepared baking sheet. Bake for 14–16 minutes until the edges are lightly golden and the centers still look slightly soft.
- Let the cookies cool on the baking sheet for 5–10 minutes. Transfer to a wire rack to cool completely; they will finish setting as they cool.
Notes
- Chill the dough for at least 30 minutes to reduce spreading and create thicker cookies.
- Remove the cookies while the centers still look slightly underbaked for the softest texture.
- Store cooled cookies in an airtight container with a slice of bread to help keep them soft for several days.
Final Thoughts on Mrs Fields Cookie Recipe
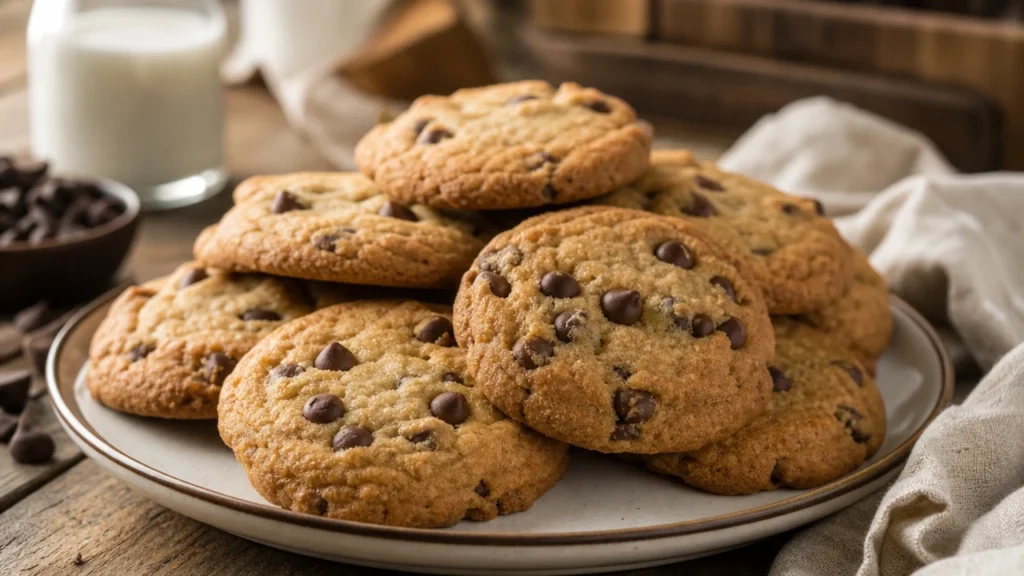
There is a reason this recipe has stayed popular for decades. It uses simple ingredients, doesn’t require advanced baking skills, and consistently produces soft, buttery cookies that feel special straight from the oven.
What I like most is that you can adjust the recipe to match your own preferences. Chill the dough for thicker cookies, bake at a lower temperature for extra chew, or add your favorite mix-ins without changing the foundation of the recipe. Once you understand why each step matters, it becomes much easier to bake great cookies every time.
If you enjoy making homemade treats from scratch, don’t miss our Blackberry Jelly Recipe. It’s sweet, fruity, and surprisingly easy to make with just a few simple ingredients. Spread it on warm toast alongside these cookies for breakfast, or add a spoonful to a dessert board for a fresh burst of berry flavor. It’s another classic homemade recipe that’s well worth trying.