Cream Cheese Brownie Recipe: 7 Secrets for Perfect Swirls
Most people overbake cream cheese brownies and never know why. I did it too the first few times I made them. The brownie layer turned dry, the cream cheese sank, and the swirls disappeared into one giant chocolate blob.
After a lot of testing, I finally figured out what makes a great cream cheese brownie recipe work. The brownie batter needs to stay thick and fudgy. The cream cheese layer needs the right texture, too. Once those two parts balance each other, the brownies bake up rich, smooth, and perfectly swirled every time.
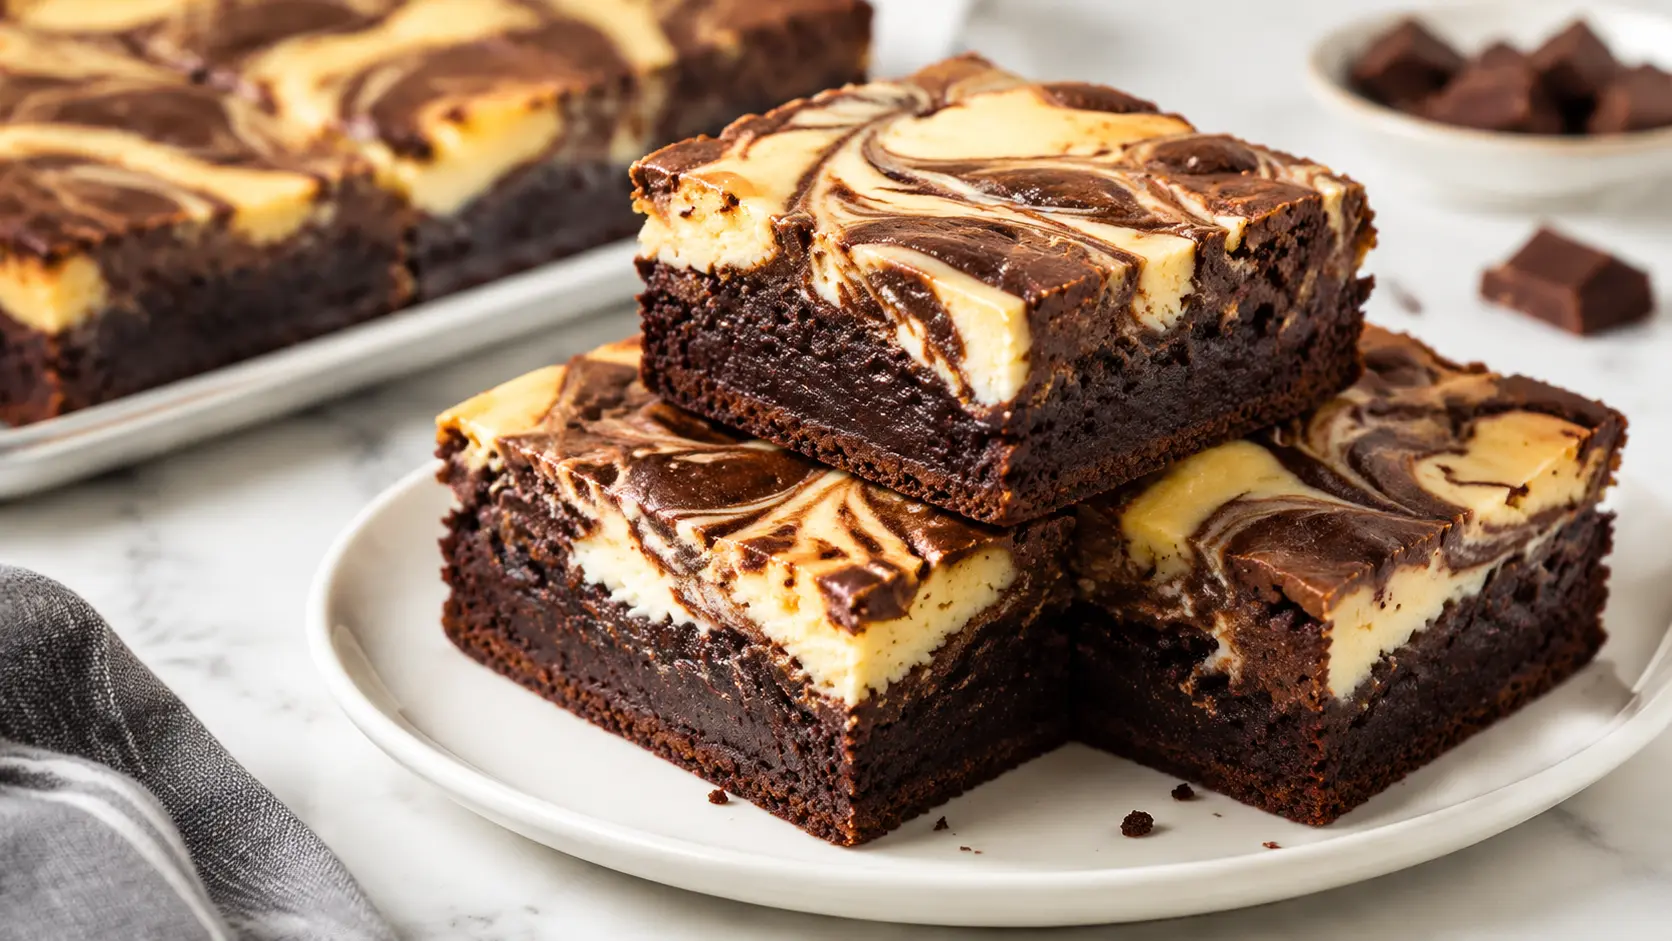
These homemade brownies have deep chocolate flavor, a creamy cheesecake layer, and soft centers with fudgy crumbs. They work great for birthdays, potlucks, Christmas parties, or just a Friday night dessert craving. Here is exactly how I make them at home.
What Is a Cream Cheese Brownie Recipe?
A cream cheese brownie recipe is a layered dessert made with chocolate brownie batter and a sweet cream cheese mixture. It is rich, fudgy, creamy, and takes about 50 minutes to make. Most people serve it chilled or slightly warm because the cheesecake swirl stays soft and smooth.
Cream cheese brownies became popular in American home baking because they combine two favorite desserts in one pan. You get the deep flavor of a classic fudgy chocolate brownie plus the tangy richness of cheesecake.
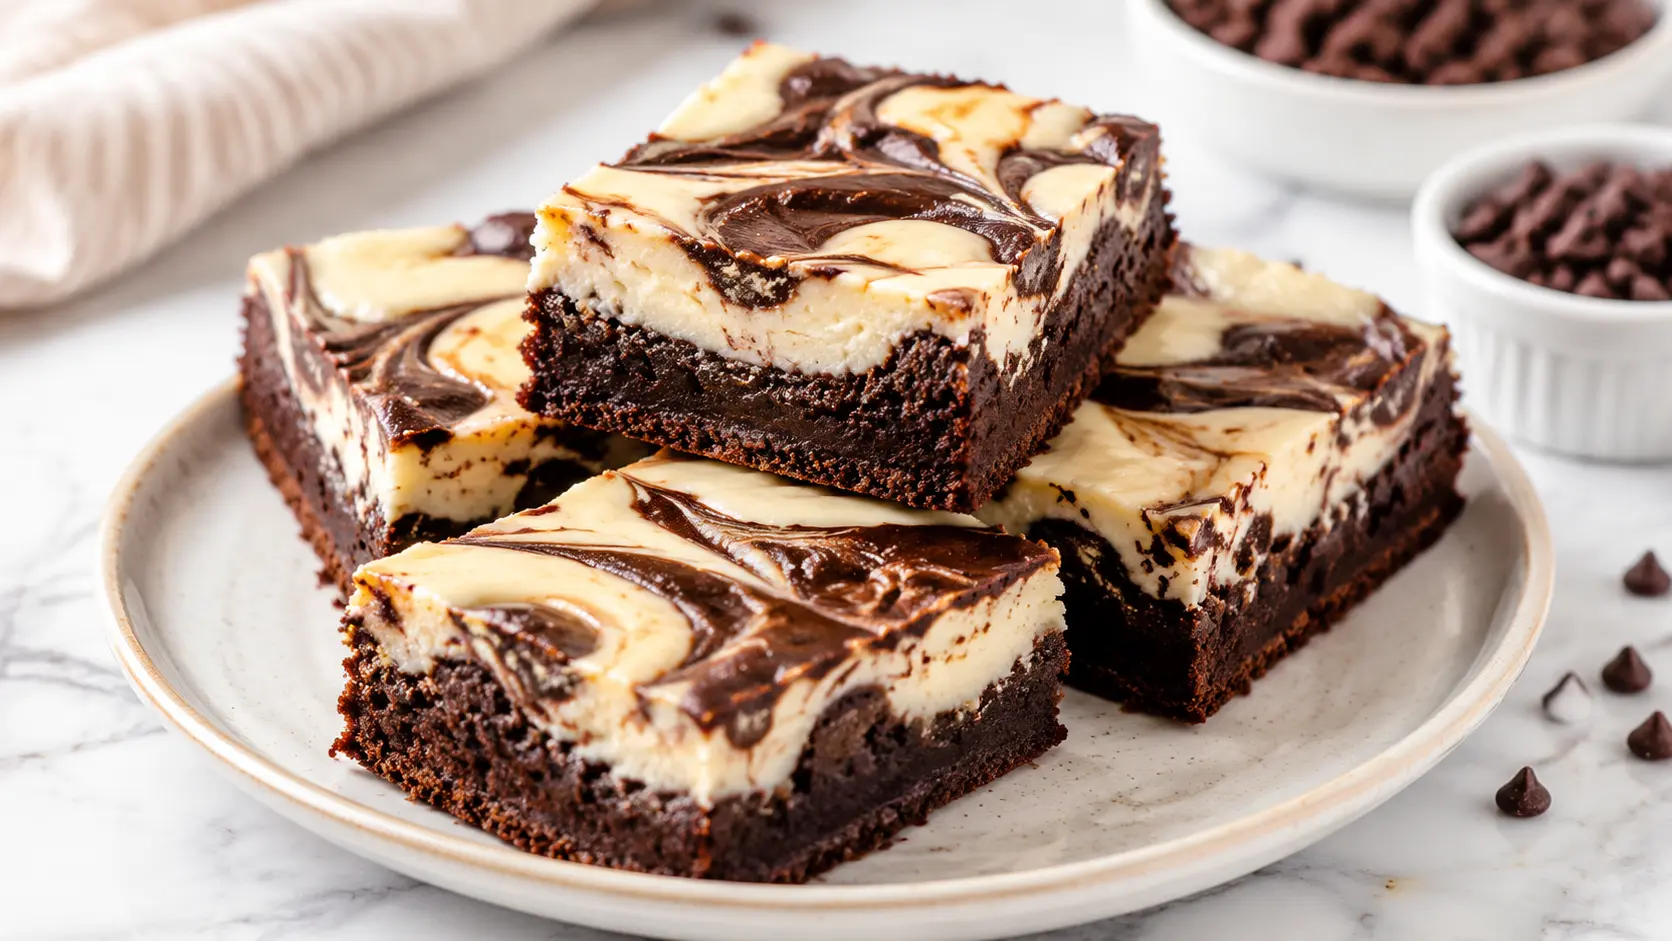
The top usually has swirls or marble patterns. Some bakers make bold “S” curves, while others create tiger stripes or heart swirls for holidays. The smell while baking is pure chocolate with a slight vanilla cheesecake scent that fills the whole kitchen.
Why This Cream Cheese Brownie Recipe Works So Well
This recipe gives you moist brownies with clean layers and a creamy center. The brownie base stays dense enough to hold the cheesecake layer without sinking.
The texture is different from boxed brownies. These are softer, richer, and closer to a chocolate truffle bar than a chewy snack brownie. That extra moisture comes from the cream cheese layer.
| Detail | Info |
| Prep Time | 20 minutes |
| Cook Time | 30–35 minutes |
| Total Time | 50–55 minutes |
| Servings | 16 brownies |
| Difficulty | Easy |
| Cuisine | American |
| Calories | ~290 per serving |
| Cost | ~$12–$18 per batch |
What Changes the Cost?
| Ingredient Choice | Approximate Batch Cost | Result |
| Store-brand cream cheese + basic cocoa | ~$12 | Still rich and fudgy |
| Philadelphia cream cheese + premium cocoa | ~$18 | Slightly creamier and deeper chocolate flavor |
I tested both versions. Honestly, the cheaper version still tasted great. Premium cocoa adds a stronger chocolate flavor, but store brands work perfectly for casual baking.
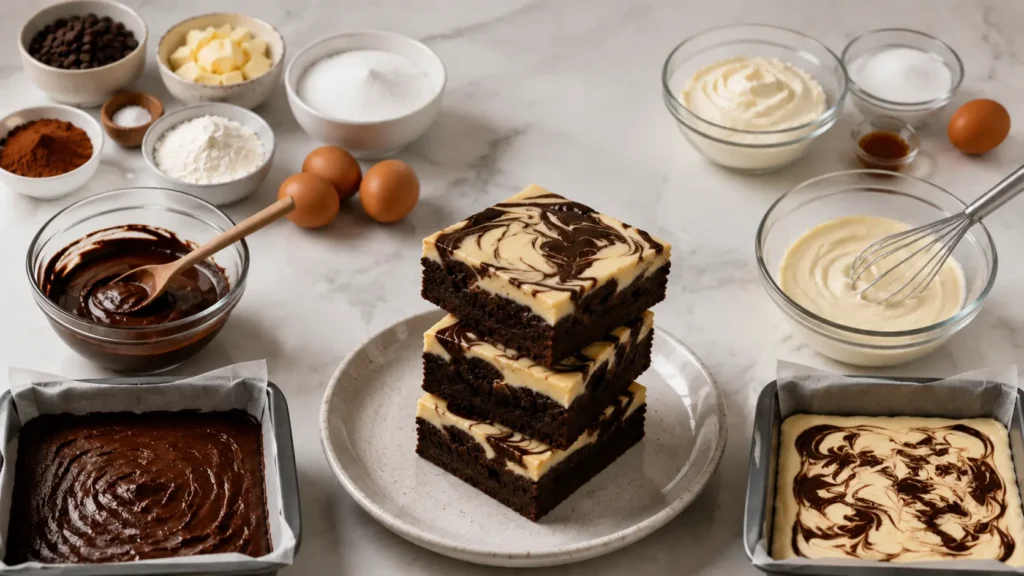
What Ingredients Matter Most in This Recipe
This recipe uses simple baking ingredients, but each one has a job. The balance between chocolate and cream cheese is what keeps the layers clean instead of muddy.
For the Brownie Layer
- Unsalted butter
- Semisweet chocolate chips
- Unsweetened cocoa powder
- Granulated sugar
- Brown sugar
- Eggs
- Vanilla extract
- All-purpose flour
- Salt
For the Cream Cheese Layer
- Brick-style cream cheese
- Sugar
- Egg
- Vanilla extract
Why Brick-Style Cream Cheese Matters
Brick-style cream cheese is thicker than tub cream cheese. That thickness helps the cheesecake layer stay on top instead of melting into the brownie batter.
Low-fat cream cheese works in a pinch, but the layer bakes softer and can turn watery by day two.
Natural Cocoa vs Dutch-Process Cocoa
Natural cocoa powder has more acidity. That sharpness balances the richness of cream cheese really well.
Dutch-process cocoa tastes smoother and darker, but it lowers acidity. The brownies rise a little less and feel denser. Both work, but natural cocoa gives the best balance for cheesecake swirled brownies.
Best Substitutions That Actually Work
| Substitute | What Changes |
| Neufchâtel cheese | Slightly less rich and softer texture |
| Mascarpone | Creamier and sweeter, needs 3–5 extra baking minutes |
| Greek yogurt | Tangier flavor and softer center |
| Vegetable oil instead of butter | More moisture but less flavor |
How to Make Cream Cheese Brownie Recipe Step by Step
The process is simple. You make a thick brownie batter first, then layer the cream cheese mixture on top before swirling everything together.
1. Prep the Pan and Oven
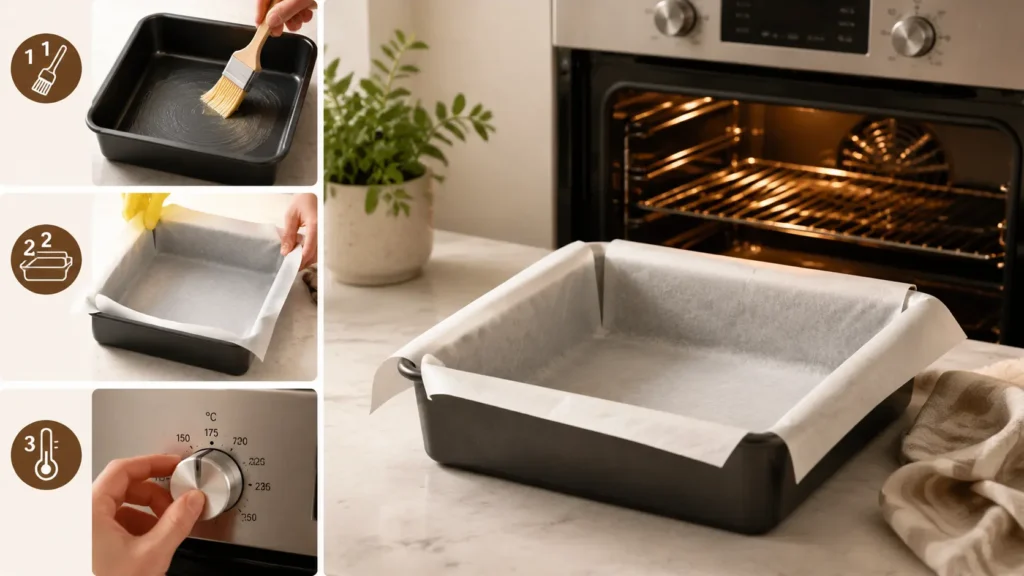
Preheat the oven to 350°F. Line an 8-inch square baking pan with parchment paper and lightly spray it with nonstick cooking spray.
Leave a little parchment overhang on the sides. That makes lifting the brownie slab out much easier later.
2. Melt the Butter and Chocolate
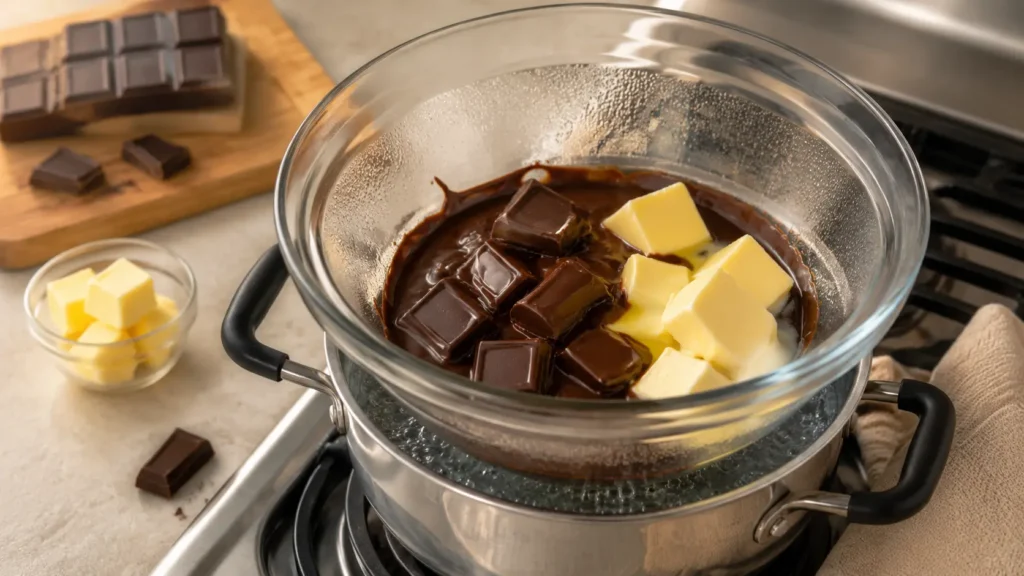
Add butter and semisweet chocolate chips to a microwave-safe bowl or double boiler. Heat slowly until smooth and glossy.
Do not rush this step. Burned chocolate smells bitter and can make the brownies grainy.
3. Mix the Sugars and Eggs
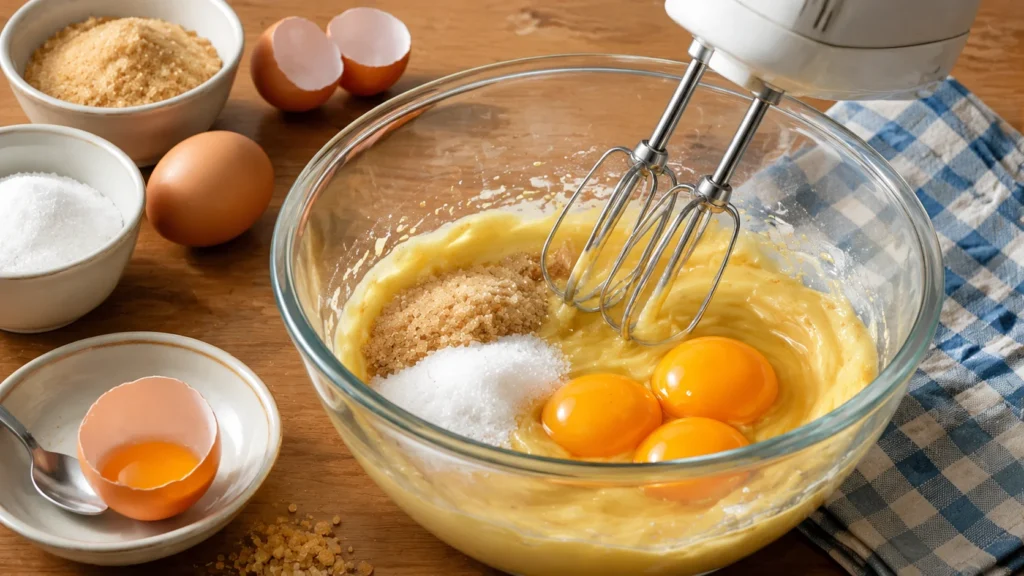
Whisk in granulated sugar and brown sugar while the chocolate is still warm. The mixture should look thick and shiny.
Add eggs one at a time. The batter turns smoother and slightly lighter in color as you mix.
4. Add Dry Ingredients
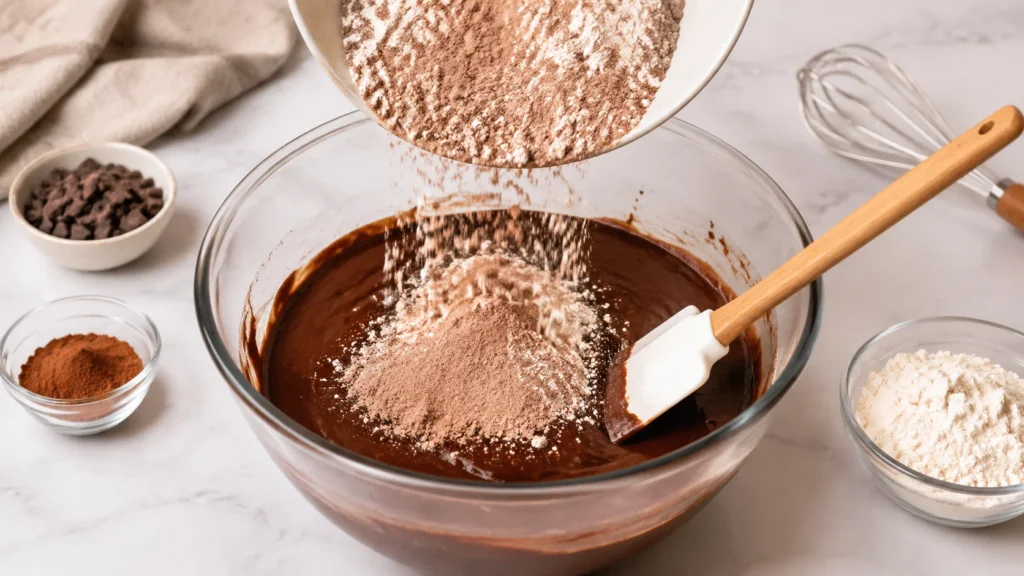
Fold in cocoa powder, flour, and salt until no dry streaks remain. Stop mixing once combined.
Overmixing adds too much air and creates cakier brownies instead of fudgy brownies.
5. Make the Cream Cheese Layer
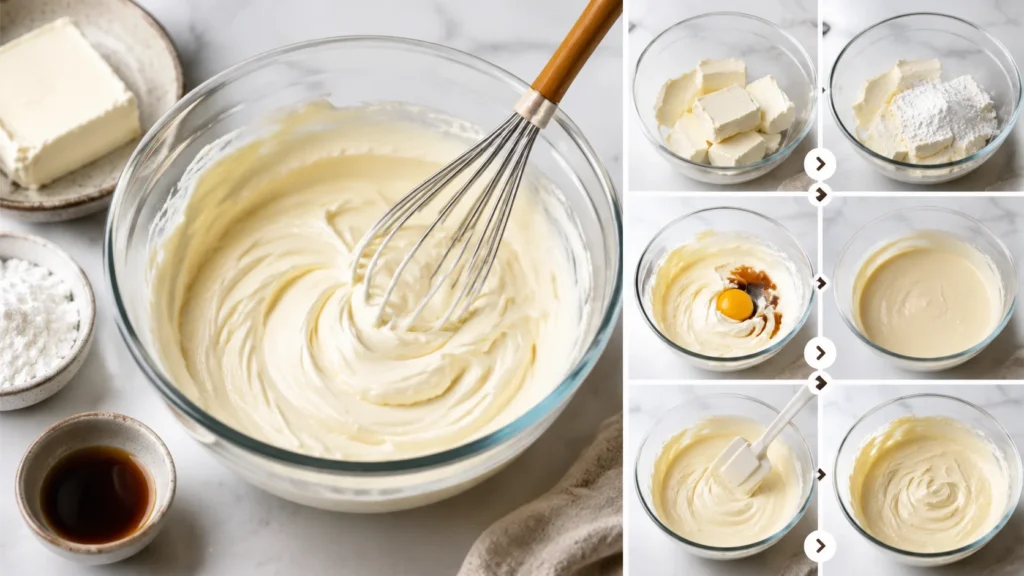
In a medium bowl, beat softened cream cheese, sugar, egg, and vanilla extract until smooth.
The mixture should look creamy and lump-free. If it feels stiff or grainy, microwave it for 5 seconds and whisk again.
6. Layer and Swirl
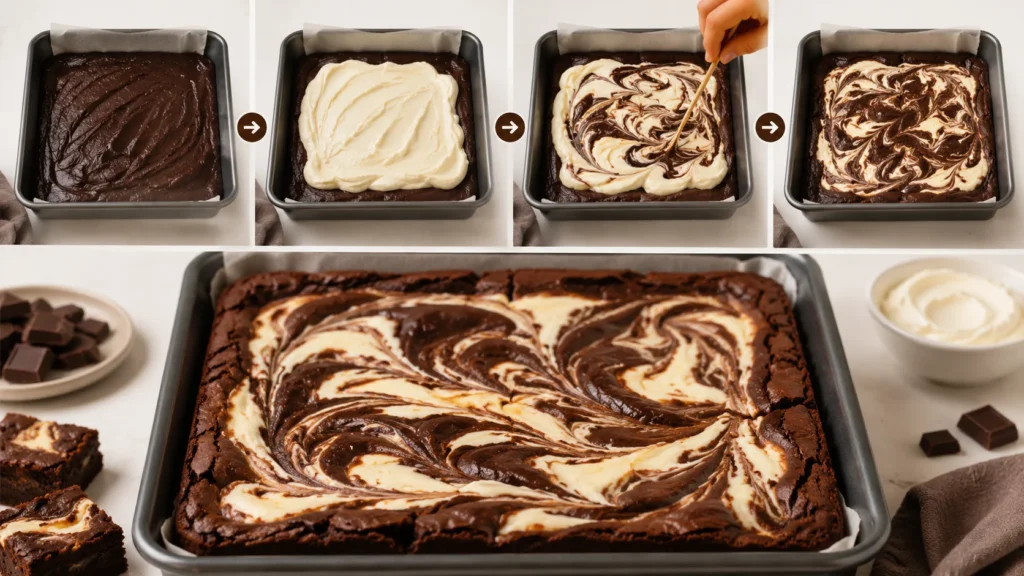
Spread most of the brownie batter into the prepared pan. Spoon the cream cheese mixture over the top.
Drop small dollops of reserved brownie batter over the cream cheese layer. Use a knife to swirl gently.
For marble swirls, drag the knife in wide circles. For tiger swirls, make long straight lines. For heart swirls, create loops with a toothpick.
7. Bake Until Just Set
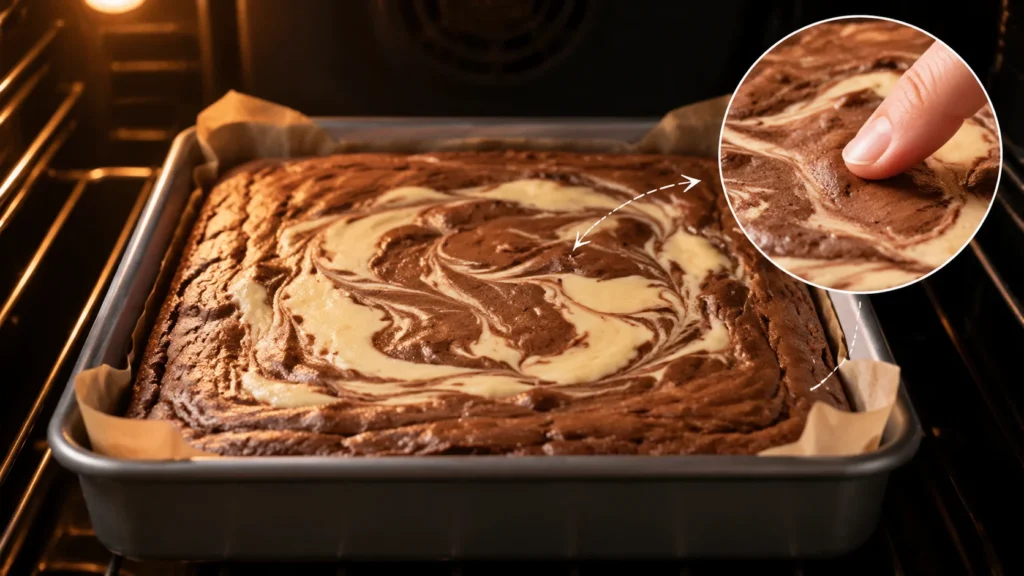
Bake for 30–35 minutes. The edges should look firm while the center still jiggles slightly.
A toothpick inserted near the center should come out with moist crumbs, not wet batter.
8. Cool Before Cutting
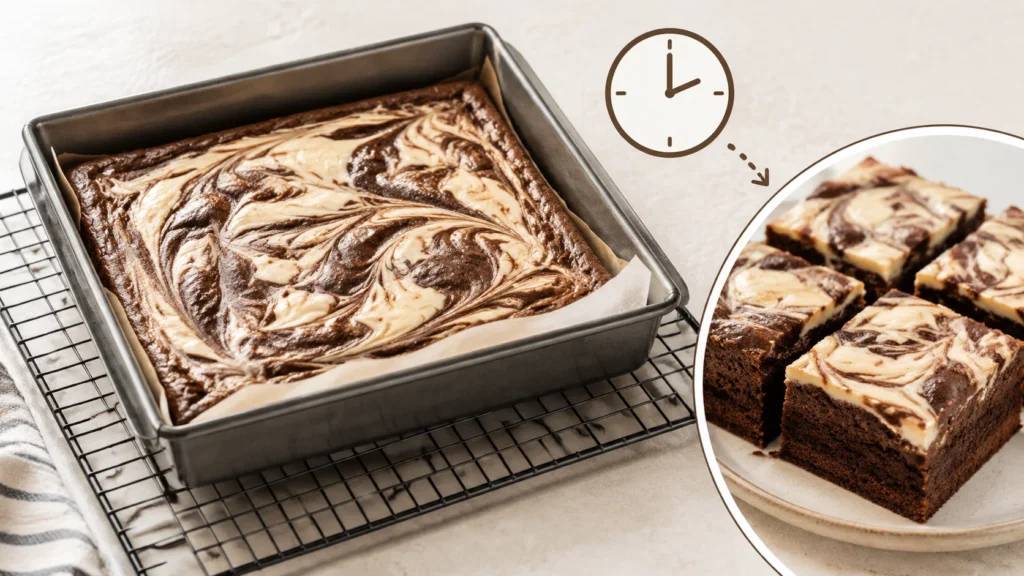
Let the brownies cool completely. Then refrigerate them for at least 1 hour before slicing.
Warm brownies fall apart easily. Chilled brownies cut into neat squares with clean swirls.
Why the Swirl Science Matters More Than Most Recipes Explain
This is the biggest mistake beginners make.
If the brownie batter is too thin, the cream cheese sinks. Then the layers blend and bake unevenly.
Fudgy brownie batter works better because it has higher viscosity, which means it is thicker and heavier. That thicker base supports the cheesecake layer.
If you use boxed brownie mix, reduce the liquid by about half. That small change keeps the swirls from disappearing during baking.
The cream cheese layer matters too. Cold cream cheese creates lumps and uneven pockets. Room-temperature cream cheese blends smoothly and spreads evenly.
The Common Mistake That Ruins Cream Cheese Brownies
The biggest mistake is baking them too long.
The cream cheese layer stays soft even after the brownies finish baking. Many people keep baking because the center still looks creamy. That extra time dries out the chocolate layer.
Another common problem is overmixing the batter. Too much mixing traps air inside the brownies. Instead of a fudgy center, you get a dry cake texture.
The third mistake is using the wrong pan size. A 9×13 pan spreads the batter too thin and makes dry brownies fast.
Quick Fix Tips
- Use an 8-inch or 9×9 pan for thicker brownies
- Stop mixing once the flour disappears
- Pull brownies at 195°F internal temperature
- Chill before slicing for cleaner cuts
- Use room-temperature cream cheese
The Secret Trick for Bakery-Style Brownies
Use a thermometer instead of relying only on a toothpick.
Cream cheese brownies are tricky because the cheesecake layer stays soft while hot. A toothpick can fool you.
The sweet spot is 195°F in the center. That temperature gives you set brownies with fudgy centers.
Anything above 205°F makes the cream cheese rubbery and dry. Below 190°F, leave the raw batter underneath.
That one little trick changed my brownies completely.
What Easy Variations Work Best at Home
You can change these brownies in a lot of fun ways without ruining the texture.
- Swirl Nutella into the cream cheese layer for hazelnut flavor.
- Add chopped walnuts or pecans for crunch.
- Mix white chocolate chunks into the brownie batter.
- Add lemon curd to the cheesecake layer for a brighter flavor.
- Use gluten-free flour blend for gluten-free brownies.
- Top with sprinkles for birthday parties or Valentine’s Day.
What to Serve With Cream Cheese Brownies for the Best Dessert Plate
These brownies are rich, so I like pairing them with lighter toppings or cold desserts.
- Vanilla ice cream adds cool contrast to the warm chocolate.
- White chocolate mousse makes the plate feel bakery-style.
- Fresh berries help cut through the richness.
- Whipped cream adds softness without extra sweetness.
- Peanut butter fluff spread tastes great with the chocolate layer.
If you love chocolate desserts, our homemade Peanut Butter Brownies also pair well with coffee nights. Our Raspberry Cheesecake bars are another good choice for holiday dessert trays.
My Honest Experience Making This Recipe
The first time I made these, I used cold cream cheese straight from the fridge. Huge mistake. The cheesecake layer stayed lumpy, and the swirls looked messy after baking.
I also overbaked the pan because the center looked soft. The brownies tasted dry around the edges and rubbery in the middle.
Now I let the cream cheese sit out for about 30 minutes first. I also pull the brownies earlier than I used to. The texture stays smooth, creamy, and much more fudgy.
How to Store, Freeze, and Reheat Cream Cheese Brownies
Because of the cream cheese layer, these brownies need slightly different storage than regular brownies.
Sugar pulls moisture from cream cheese over time. That can create tiny moisture beads called “weeping.” The brownies still taste good, but the tops can get sticky.
Pro Tip: Place a paper towel inside the storage container lid. It helps absorb extra moisture.
- Room temperature: Up to 1 day
- Fridge: Up to 5 days in an airtight container
- Freezer: Up to 3 months wrapped in plastic wrap and stored in freezer-safe containers
For reheating, microwave one brownie for about 10 seconds. Longer heating melts the cream cheese too much.
How to Fix Common Cream Cheese Brownie Problems
Cream Cheese Brownie Recipe
Ingredients
Equipment
Method
- Preheat the oven to 350°F and line an 8-inch baking pan with parchment paper. Lightly spray the pan so the brownies lift out easily later.
- Melt the chocolate chips and butter together in a microwave-safe bowl or double boiler until smooth and glossy. Stir slowly so the chocolate does not burn.
- Whisk in the cocoa powder, granulated sugar, and brown sugar until thick and shiny. Add the eggs one at a time, then stir in the vanilla extract.
- Fold in the flour and salt just until no dry streaks remain. The batter should look thick and fudgy, not airy.
- In another bowl, beat the softened cream cheese, sugar, egg, and vanilla until smooth and creamy. Make sure there are no lumps in the mixture.
- Spread most of the brownie batter into the prepared pan. Spoon the cream cheese mixture evenly over the top.
- Drop small spoonfuls of the remaining brownie batter over the cream cheese layer. Use a knife to gently swirl the layers together for a marbled look.
- Bake for 30–35 minutes until the edges are firm and the center has a slight jiggle. A toothpick should come out with moist crumbs, not wet batter.
- Let the brownies cool completely in the pan before slicing. Chill for cleaner cuts and neater swirls.
Notes
Final Thoughts on This Cream Cheese Brownie Recipe
This cream cheese brownie recipe works because it focuses on texture as much as flavor. The thick brownie batter keeps the layers clean, while the cheesecake swirl adds creaminess without making the brownies soggy.
I also love how flexible these brownies are. You can dress them up for holidays, freeze them for later, or keep the recipe simple for weekend baking. If you make this, I would love to know how it turned out. Drop a comment on the Cookiva recipe and share your favorite swirl style.