There’s something undeniably comforting about the smell of warm syrup pooling over a stack of pancakes on a slow weekend morning. That golden, sweet aroma instantly evokes childhood breakfasts, cozy weekends, and the satisfying ritual of pouring the perfect drizzle over waffles or French toast. While store bought maple syrup is convenient, making your own at home can be just as easy, infinitely customizable, and, surprisingly, much more budget friendly.
This maple syrup recipe isn’t about tapping maple trees or hours of slow simmering. It’s a quick, foolproof method using everyday pantry ingredients that captures the same warm, caramel kissed flavor we all love. With just sugar, water, and a touch of maple extract, you can whip up a syrup that tastes indulgent yet stays surprisingly light and versatile. Whether for breakfast stacks, baking, or coffee, this homemade version brings a rich sweetness without any artificial additives.
Making your own syrup also means total control over texture and sweetness. Runny for drizzling over fruit? Thick and luxurious for pancakes? You decide. Plus, it’s the perfect base for experimenting with subtle flavors vanilla, cinnamon, or even a touch of espresso. Let’s dive into everything you need to know to master easy homemade maple syrup that will impress both your taste buds and your wallet.
What Is Maple Syrup Recipe and Why It’s Still a Breakfast Favorite
Despite its ubiquity on breakfast tables, many people don’t fully understand what maple syrup recipe actually is. At its core, traditional maple syrup is the boiled down sap of sugar maple trees, rich in natural sugars and trace minerals like zinc and manganese. The flavor ranges from light and delicate to dark and robust, depending on the season and grade.
Modern homemade or store bought versions often mimic this taste using sugar, water, and natural or imitation maple extract, creating a syrup that’s versatile for any breakfast dish. It’s still widely beloved because it pairs perfectly with pancakes, waffles, French toast, oatmeal, and even yogurt or coffee. Making syrup at home doesn’t just save money, it allows anyone to enjoy that iconic maple sweetness without additives or preservatives.
Preserve your farm-fresh eggs for months with this simple water glassing eggs recipe that keeps them safe, fresh, and ready for baking or breakfast.
Recipe Overview: What to Expect From This Maple Syrup Recipe
This recipe produces a syrup that is golden, smooth, and luxuriously pourable. The flavor is sweet with a gentle maple note that doesn’t overpower breakfast dishes, and the texture is thick enough to coat pancakes without feeling sticky or gloopy.
The syrup is perfect for quick morning meals, brunch gatherings, or drizzling over dessert. You’ll love the aroma that fills your kitchen as it cooks, a warm, comforting scent reminiscent of autumn mornings.
| Prep Time | Cook Time | Total Time | Servings | Difficulty | Cuisine | Calories |
| 5 mins | 10 mins | 15 mins | 12 oz | Easy | American | 52 kcal per 2 tbsp |
The Real Cost Breakdown: Why Homemade Maple Syrup Wins
A common reason people hesitate to make syrup at home is cost, but the numbers speak for themselves.
| Syrup Type | Price per Ounce | Ingredients | Shelf Life |
| Pure Maple Syrup | ~$0.67/oz | 100% maple sap | 1+ year unopened |
| Store Bought Pancake Syrup | ~$0.42/oz | Corn syrup, sugar, artificial flavors | 6–12 months |
| Homemade Maple Syrup Recipe | ~$0.046/oz | Sugar, water, maple extract | 3–4 weeks refrigerated |
A 12 oz bottle of pure maple syrup recipe at retail costs around $8. This homemade batch yields roughly the same amount for only about $0.55 over 90% cheaper, and it tastes delightfully fresh.
Ingredients Maple Syrup Recipe and Why Each One Matters
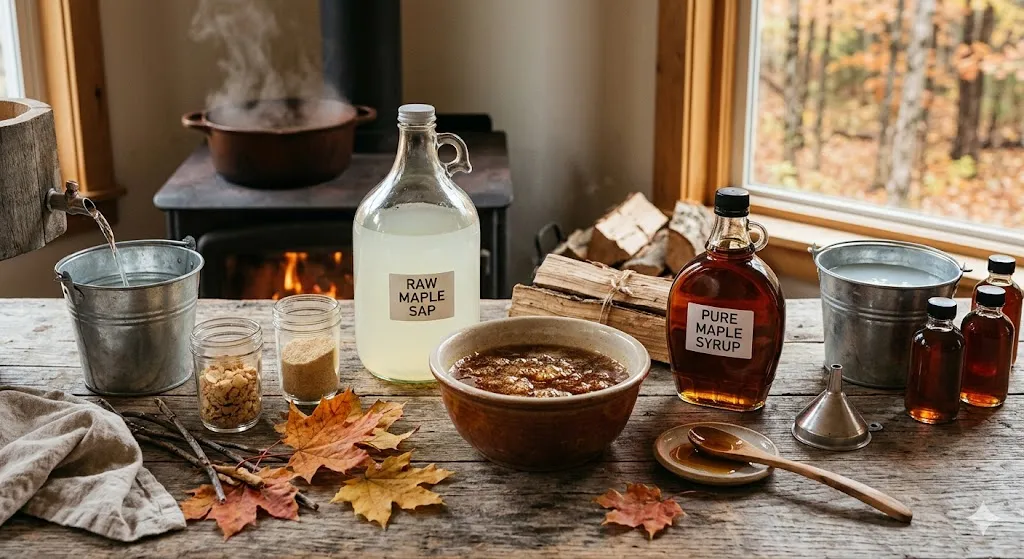
This recipe is simple, but every ingredient plays a crucial role in texture and flavor:
- Granulated sugar (1 cup) The backbone of your syrup, providing sweetness and structure. Can substitute with light brown sugar for a hint of caramel or coconut sugar for a richer flavor.
- Water (1/2 cup) Dissolves the sugar and controls the syrup consistency.
- Karo Light Corn Syrup (1/2 cup) Prevents crystallization and keeps your syrup smooth. Optional, but highly recommended.
- Maple flavored extract (1–2 tsp) Provides authentic maple flavor without needing tree sap. Pure maple extract or Mapeline extract works best.
- Vanilla extract (1 tsp) Adds depth and rounds out sweetness.
Pro Tip: Adjust sugar ratios to control thickness: 1:1 sugar to water yields thinner syrup, 2:1 yields thicker syrup like commercial maple syrup.
How to Make Maple Syrup Recipe the Right Way
The key to perfect homemade syrup is dissolving sugar completely and controlling the simmer.
- In a medium saucepan, combine sugar, corn syrup, and water over medium heat. Stir gently until sugar fully dissolves.
- Increase to medium high heat and bring the mixture to a low boil. Let it boil gently for 3–4 minutes, watching closely.
- Remove from heat and stir in maple extract and vanilla. Taste and adjust maple flavor as needed.
- Let syrup cool slightly before pouring into a glass jar or airtight container. Syrup will thicken as it cools.
Visual cues: The syrup should be glossy and coat the back of a spoon. Too thick? Stir in a teaspoon of water and reheat gently.
Pro Tip for Best Results: Prevent Crystallization
One of the most common complaints about homemade syrup is crystal formation. To avoid this:
- Don’t stir after the syrup begins boiling.
- Use light or dark brown sugar instead of all white sugar if you want natural acidity.
- Adding a teaspoon of corn syrup or a drop of lemon juice stabilizes the sugar.
If crystals form, gently warm the syrup in a pot of simmering water while stirring until smooth.
Common Mistakes and Why They Ruin Your Syrup
Even a simple syrup can go wrong:
- Overheating causes burning and bitterness.
- Undissolved sugar Seeds crystallization.
- Ignoring ratios: Too much water = thin syrup; too little = overly thick glaze.
Quick Tips: Always measure sugar and water accurately, dissolve sugar fully, and taste test before storing.
Variations, Substitutions, and When to Use Them
Maple syrup can be customized:
- Coconut sugar Deep caramel flavor, darker color.
- Honey Adds floral notes; thinner consistency.
- Molasses Strong, robust taste; reduces sweetness.
- Vanilla only If maple extract unavailable, add vanilla and a pinch of fenugreek powder for a maple like note.
These swaps are great for dietary preferences or flavor experimentation.
My Experience Making This Recipe at Home
When I first made this syrup, I skipped corn syrup and ended up with crystals along the jar edges. A quick tip from experience: never skip the stabilizer. Adding corn syrup made all the difference, producing a silky, pourable syrup that lasts for weeks. Now, I keep a small bottle in the fridge for weekday breakfasts. It’s convenient and reliable.
Whip up a creamy, spreadable treat with this easy maple butter recipe that’s perfect for toast, pancakes, or drizzling over warm desserts.
Benefits of Homemade Maple Syrup Recipe
Beyond taste, homemade syrup has a few practical perks:
- Fresh flavor without preservatives
- Control over sweetness and consistency
- Cost effective and easy to make
- Versatile for breakfast, baking, and drinks
Baking With Homemade Maple Syrup: Conversion Tips
This syrup isn’t just for pancakes:
| Sugar Type | Amount to Replace 1 Cup | Liquid Reduction | Oven Temp Adjustment | Notes |
| Granulated sugar | 3/4 cup | Reduce 2–4 tbsp liquids | Lower 25°F | Optional ¼–½ tsp baking soda |
| Brown sugar | 3/4 cup | Reduce 2 tbsp | Lower 25°F | Adds richer flavor |
Use this guide to substitute in muffins, cakes, and sauces.
Storage, Freezing, and Reheating Best Practices
Store syrup properly to maintain freshness:
- Refrigerator: 3–4 weeks for basic syrup
- Freezer: Up to 6 months; thaw gently before use
- Room temperature: Only for short term serving; always covered
Look for signs of spoilage: cloudiness, off smell, or bubbling indicates fermentation.
Nutrition & Honest Health Notes
| Syrup Type | Calories (per 2 tbsp) | Sugar (g) | Notable Minerals | Artificial Ingredients |
| Pure Maple Syrup | 100 | 26 | Zinc, Manganese | None |
| Homemade Recipe | 52 | 13 | None | None |
| Store Bought Pancake Syrup | 56 | 14 | None | Preservatives, colorants |
While homemade syrup is cleaner than store bought, real maple syrup still provides trace minerals and antioxidants.
FAQ: Real Questions People Ask About Maple Syrup Recipe
Why is my homemade syrup too thin?
If your syrup is thin, the sugar to water ratio may be low or it hasn’t boiled long enough. Simmer a few extra minutes until slightly thicker.
Can I use maple syrup in baking?
Yes, but reduce other liquids and lower oven temperature slightly. Follow the baking conversion chart above for best results.
Why does maple syrup crystallize?
Crystallization occurs if sugar isn’t fully dissolved or the syrup cools too quickly. Add corn syrup or gently reheat to fix.
How long does homemade syrup last?
In the fridge, 3–4 weeks. Freezing extends shelf life up to 6 months.
Can I make this vegan or paleo?
Yes, by substituting sugar with coconut sugar or maple sugar. Flavor and color may vary slightly.
What’s the difference between real and imitation maple extract?
Pure extract is derived from maple sap; imitation uses chemical flavoring. Both work for syrup, but pure has richer, more authentic notes.
Homemade Maple Syrup
Ingredients
Equipment
Method
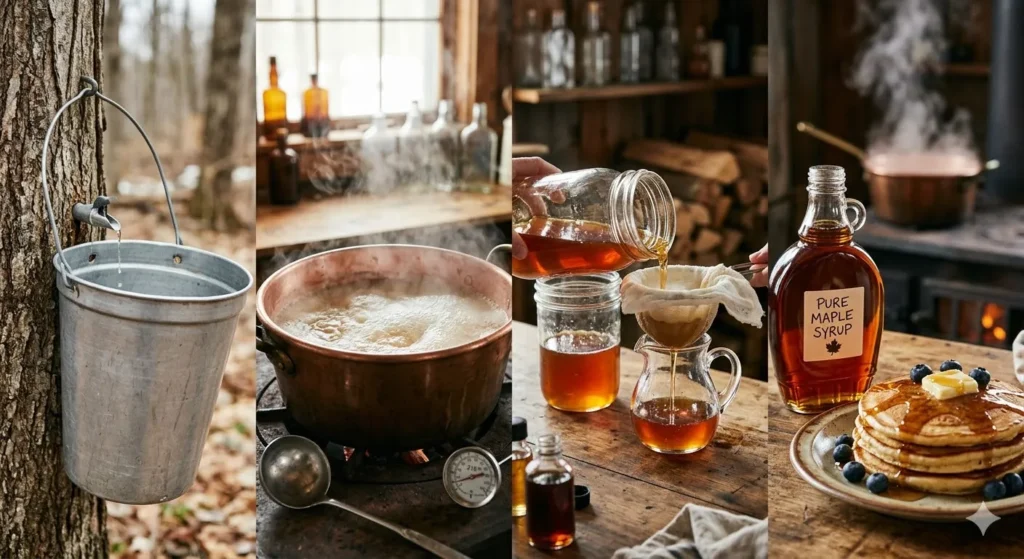
- Pour maple sap into a large stockpot and bring to a gentle boil over medium heat.
- Reduce heat to medium-low and simmer, stirring occasionally, until the liquid reduces by about half, forming a light syrup.
- Gradually stir in granulated sugar, ensuring it dissolves completely and mixture remains smooth.
- Attach a candy thermometer and continue simmering until the syrup reaches 219–220°F (104–105°C).
- Skim any foam from the surface with a spoon to keep the syrup clear and glossy.
- Remove from heat and stir in vanilla extract and salt, if using.
- Pour syrup through a fine mesh strainer or cheesecloth into sterilized jars while hot.
- Leave a small headspace (about 1/4 inch) in jars to allow for expansion.
- Let syrup cool completely at room temperature; it will thicken slightly as it cools.
- Store in the refrigerator for up to 6 months or process in a boiling water bath for shelf-stable storage.
Video
Notes
Conclusion Maple Syrup Recipe
This homemade maple syrup recipe is an effortless way to enjoy the sweet, comforting flavor of maple without breaking the bank. It’s simple, versatile, and adaptable for pancakes, waffles, baking, and more. Bookmark this recipe, experiment with flavors, and enjoy the satisfaction of drizzling your own syrup over every breakfast stack. With a few pantry staples, you can turn any morning into a special occasion.
Enjoy a moist, guilt free treat with this banana bread healthy recipe that balances natural sweetness and wholesome ingredients for a delicious snack or breakfast.