There’s something about warm bread and soft butter that feels like home. Add maple syrup to the mix, and suddenly that everyday moment turns into something special. The first time I made this maple butter recipe, it was for a weekend breakfast with buttermilk waffles and a pot of strong coffee. It disappeared before the second batch of waffles even hit the table.
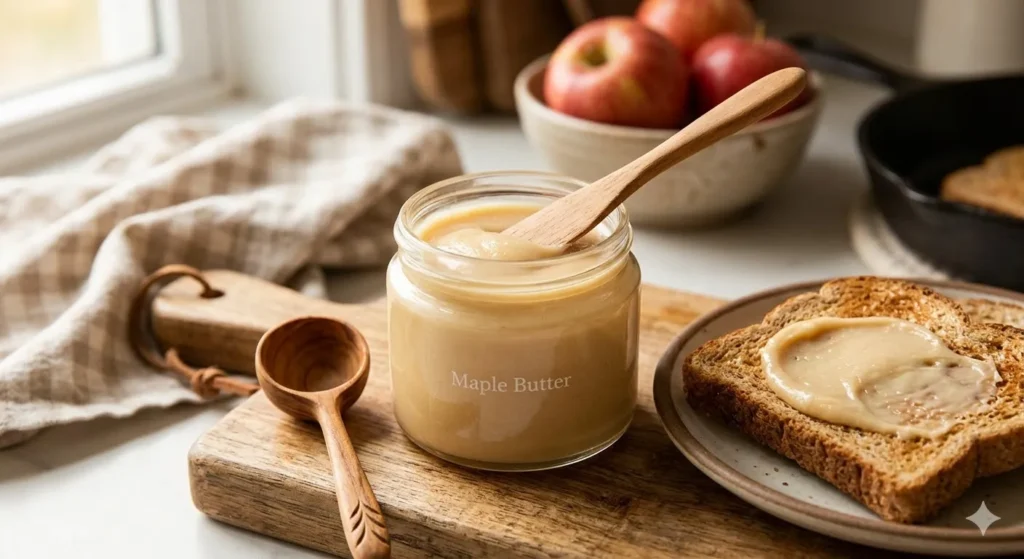
Maple butter is rich, sweet, lightly salty, and silky smooth when whipped properly. It spreads like a dream over toast, pumpkin biscuits, whole wheat pancakes, and even warm Dutch oven sourdough bread. With just a handful of ingredients and a few minutes of mixing, you can turn basic butter into something that tastes bakery level special.
Let’s walk through exactly how to make it, how to prevent common mistakes, and how to customize it so it suits your kitchen perfectly.
What Is Maple Butter Recipe and Why It’s Popular
Maple butter is a simple spread made by blending softened butter with pure maple syrup and a pinch of salt. It’s sometimes called whipped maple butter or maple compound butter. Unlike maple cream (which is made by cooking maple syrup), this version keeps things quick and accessible. It’s popular because it transforms everyday breakfasts and breads without requiring
extra cooking. The flavor is sweet but balanced, creamy yet light, and deeply aromatic thanks to real maple syrup. It’s especially loved during fall and holiday baking, but honestly, it works year round.People keep making it because it feels indulgent without being complicated. Three ingredients, five minutes, and suddenly your toast tastes like it came from a cozy café.
What Is a Maple Butter Recipe?
At its core, maple butter is simply butter that has been sweetened and flavored with real maple syrup. The butter provides richness and structure, while the syrup adds sweetness and that unmistakable maple aroma.
It’s typically served softened or whipped, making it easy to spread over toast, pumpkin bread, banana bread, sourdough pancakes, Southern cornbread, and dinner rolls. Some people use it as a frosting base, others swirl it into baked goods, and many just keep a jar in the fridge for everyday use. It’s a condiment but one that feels a little luxurious.
This banana bread healthy recipe swaps refined sugar and butter for wholesome ingredients, giving you moist, flavorful slices that are guilt-free and perfect for breakfast or snacks.
Why Make a Homemade Maple Butter Recipe Instead of Buying It?
Store bought maple butter can cost anywhere from $8–$15 for a small jar. Making it at home is dramatically more affordable.
Here’s a realistic breakdown using ½ cup pure maple syrup and 1 stick (8 tablespoons) unsalted butter:
| Item | Estimated Cost | Yield | Cost per Tbsp |
| Homemade Batch | ~$3.25 | ~16 tbsp | ~$0.20 |
| Store Bought (average) | $10 | ~12–16 tbsp | ~$0.60–$0.90 |
You’re paying about one third the price by making it yourself and you control the sweetness and salt level. That’s a win in my book.
Recipe Overview: Taste, Texture, and When It Shines
This maple butter is:
- Sweet but balanced
- Creamy and airy when whipped
- Light golden to amber in color (depending on syrup)
- Soft and spreadable at room temperature
It works beautifully for brunch spreads, holiday dinners, bake sales, or quick weekday breakfasts. It’s a 3 minute prep recipe that feels special enough for guests.
Quick Summary
| Detail | Info |
| Prep Time | 3–5 minutes |
| Cook Time | None |
| Total Time | 3–5 minutes |
| Servings | 6–8 |
| Difficulty | Easy |
| Cuisine | American |
| Calories | ~115–121 kcal per tablespoon |
Ingredients and Why Each One Matters for the Best Maple Butter
The quality of ingredients makes all the difference here.
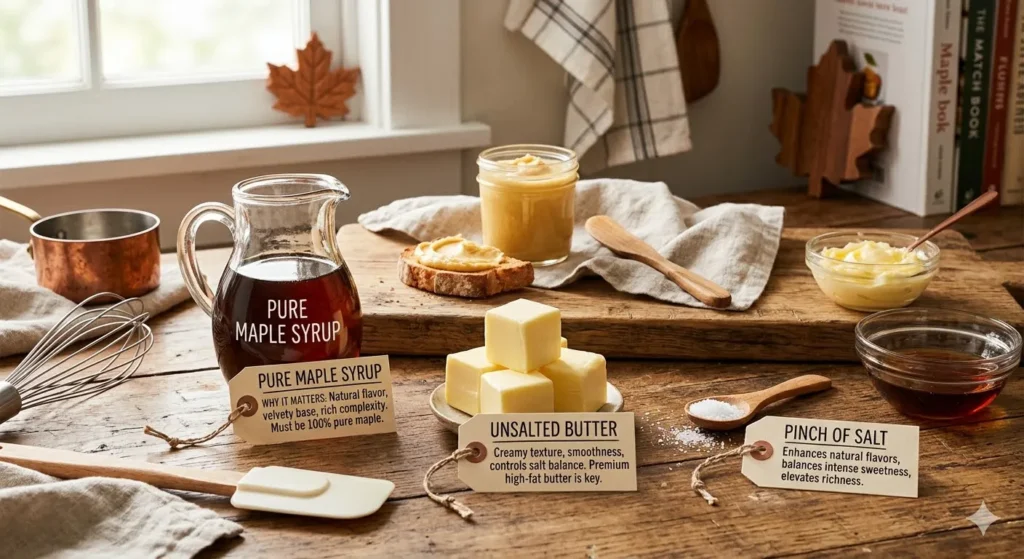
- 1 stick (8 tablespoons) unsalted butter, softened
Unsalted butter gives you control over salt levels. European style butter creates an even richer texture. - 3 tablespoons pure maple syrup
Use real maple syrup, not pancake syrup. The flavor depends entirely on this. - 1 teaspoon kosher salt (or less to taste)
Balances sweetness and enhances maple flavor.
The Best Maple Syrup: Understanding Grades and Flavor Impact
Since 2015, maple syrup has been classified into four Grade A categories. Here’s how they affect your maple butter:
| Grade | Flavor Profile | Color | Best for Maple Butter | Availability |
| Golden | Mild, delicate | Light yellow gold | Very subtle sweetness | Seasonal |
| Amber | Smooth, balanced | Amber color | Everyday use | Widely available |
| Dark | Robust, caramel like | Dark amber | Bold maple flavor | Grocery stores |
| Very Dark | Intense, molasses like | Very dark color | Deep fall flavor | Specialty stores |
For maple butter, I prefer Grade A Dark or Very Dark. They hold up beautifully against the richness of butter.
Where to Source Quality Maple Syrup
- Local farmers markets or CSA boxes
- Direct from farm online shops
- Grocery stores (look for “100% pure maple syrup”)
- Avoid labels that say “pancake syrup”
The Ratio Question: How Much Maple Syrup to Butter?
The ratio dramatically changes the texture.
| Ratio | Texture | Sweetness | Best Use |
| 1 tbsp per stick | Thick, holds shape | Mild | Dinner rolls |
| 3 tbsp per stick | Creamy, spreadable | Balanced | Pancakes & toast |
| ½ cup per stick | Very soft | Sweet | Frosting style use |
More syrup means softer texture and greater risk of separation.
Equipment Comparison: What Gives the Best Texture?
| Equipment | Texture Result | Time | Risk Level | Best For |
| Fork | Dense | 5–6 min | Low | Small batch |
| Hand Mixer | Light & airy | 1–2 min | Low | Most home cooks |
| Stand Mixer | Very fluffy | 1–2 min | Medium | Larger batches |
A hand mixer is the sweet spot. Over whipping in a stand mixer can cause graininess.
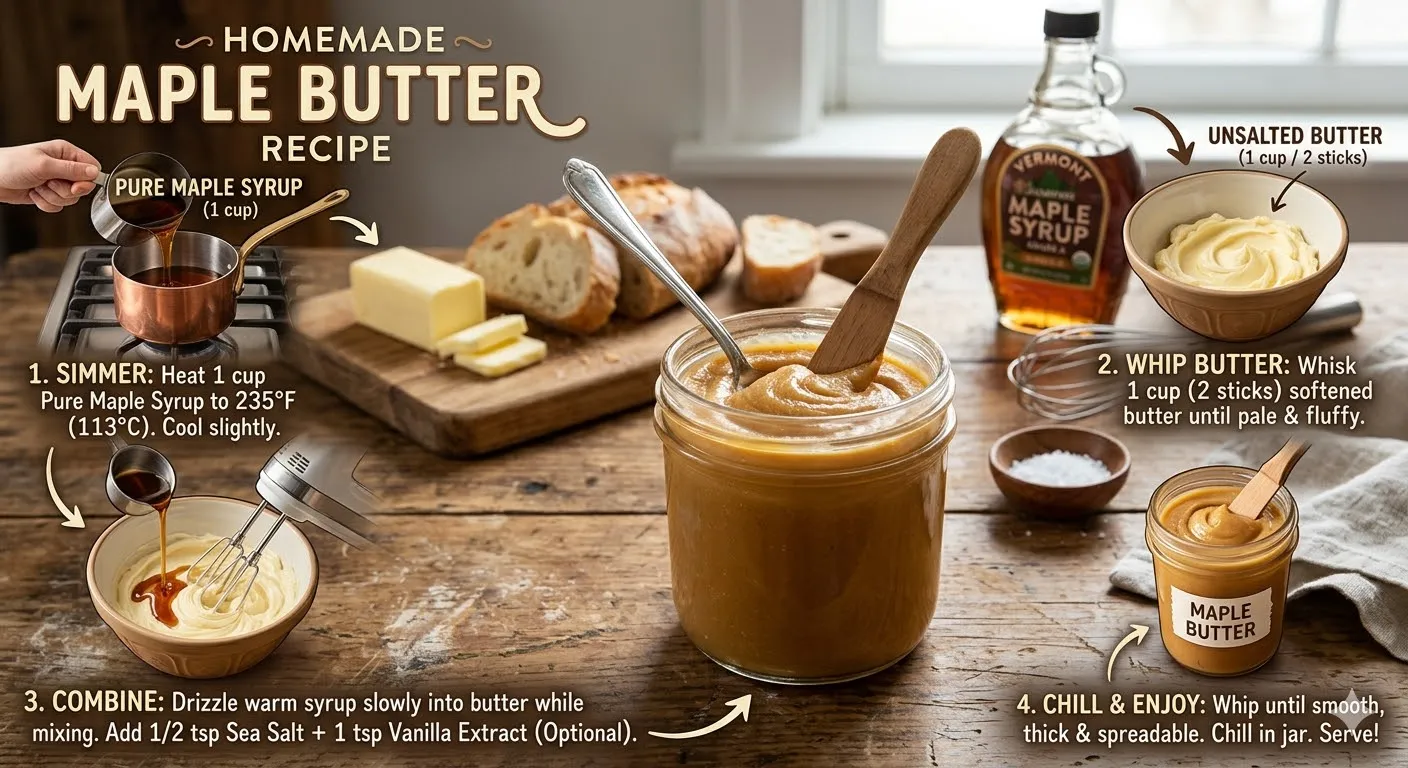
How to Make Maple Butter the Right Way

The key is starting with truly softened butter, not melted, not cold. Soft butter allows the syrup to emulsify instead of separating.
Instructions
- Place softened butter in a medium sized mixing bowl.
- Beat for 1–2 minutes until smooth and slightly fluffy.
- Slowly drizzle in maple syrup while mixing on low speed.
- Add salt and increase speed slightly for 30–60 seconds.
- Stop once it’s light, creamy, and evenly blended.
It should look glossy and pale amber.
Pro Tip for the Smoothest Maple Butter Recipe
If your syrup is cold from the fridge, let it sit at room temperature before mixing. Adding cold syrup to soft butter can cause separation. Matching temperatures helps create a stable emulsion.
Common Mistakes and Why They Ruin the Recipe
One of the biggest problems is separation. This happens when the butter and syrup don’t properly emulsify.
If your mixture looks broken:
- Butter may be too cold
- Syrup may be too warm
- Ratio may be too high
Fix it by gently warming the bowl for 5–10 seconds and re whipping on low speed.
Always start with fully softened butter.
Add syrup slowly while mixing.
Variations, Substitutions, and When They Work Best
This recipe adapts beautifully.
- Salted Maple Butter Use salted butter and reduce added salt.
- Whipped Maple Butter Beat 2–3 minutes for extra air.
- Cinnamon Maple Butter Add ¼ tsp cinnamon.
- Vegan Version Use plant based butter (coconut oil based is softest; cashew based has best flavor stability).
- Brown Butter Maple Brown butter first for nutty depth.
Ways to Use Maple Butter Recipe Beyond Pancakes
Savory Pairings
Try melting it over roasted carrots, brushing onto grilled salmon, stirring into BBQ baked beans, or finishing grilled corn.
Baking Applications
Swirl into banana bread batter, use as filling for croissants, spread between cake layers, or fold into pumpkin waffle batter.It’s far more versatile than most people realize.
Nutrition Context: What to Know About Maple Butter
Maple syrup has a lower glycemic index than refined sugar and contains small amounts of manganese and zinc. One tablespoon of maple butter recipe contains roughly 3–5g of sugar similar to a teaspoon of jam. Enjoy it as a flavorful spread rather than a heavy frosting, and portion size keeps it balanced.
This oven cooked bacon recipe makes perfectly crispy, evenly cooked strips with minimal mess, ideal for breakfast, sandwiches, or adding savory flavor to any dish.
Storage, Freezing, and Why It Sometimes Separates
Maple butter is an emulsion. Over time in the fridge, the water content in maple syrup can cause slight beading or separation. That’s normal.
Storage Guide
- Refrigerator: Up to 2 weeks for best texture
- Freezer: Up to 3 months
- Keep in airtight container
If separation appears, stir gently before serving.
My Experience Making This Recipe at Home
The first time I made a maple butter recipe, I poured the syrup all at once. It looked smooth at first, then split into a slightly oily mess. I learned quickly: slow drizzle, low speed, and patience. Now I always soften my butter fully and add syrup gradually. That small adjustment made all the difference.
This shit on a shingle recipe transforms simple ingredients like creamed chipped beef and toast into a classic, hearty comfort breakfast that’s quick and satisfying.
Benefits of Maple Butter
Maple butter is loved because it:
- Elevates simple foods instantly
- Requires only 3 ingredients
- Stores well
- Feels homemade and specia
It’s comfort food in a spreadable form.
Frequently Asked Questions
Can I use salted butter?
Yes. Just reduce or skip added salt. Taste as you go.
Why did my maple butter turn grainy?
Over whipping or cold butter can cause texture issues.
Can I freeze maple butter?
Absolutely. Store in a freezer safe container for up to 3 months.
Is maple butter dairy free?
Traditional versions are not. Use vegan butter for dairy free.
Why does syrup bead on top after a few days?
Natural separation from water content. Stir gently before serving.
Can I double the recipe?
Yes, but use a stand mixer for even whipping.
Maple Butter Recipe
Ingredients
Equipment
Method
- Cut the butter into small pieces and place in a medium mixing bowl to soften further if needed.
- In a small saucepan, gently warm the maple syrup over low heat until it’s just warm, not boiling.
- Pour the warm maple syrup over the softened butter in the mixing bowl.
- Add salt and vanilla extract if using.
- Using a hand mixer or whisk, beat the butter and syrup together until smooth, creamy, and fully combined.
- Transfer the maple butter to a clean jar or container with a lid.
- Refrigerate for at least 30 minutes to allow flavors to meld and texture to firm slightly.
- Serve at room temperature on pancakes, waffles, muffins, or toast.
Video
Notes
Conclusion Maple Butter Recipe
This homemade maple butter recipe is simple, affordable, and endlessly versatile. With just butter, real maple syrup, and salt, you can create a creamy spread that transforms breakfast, baking, and even savory dishes. Once you try it, you’ll probably keep a jar in your fridge year round. Save it, print it, and don’t be surprised if it becomes your new favorite little kitchen upgrade.